self-guided driving tour of oahu
Oahu offers a mix of stunning beaches‚ lush landscapes‚ and cultural landmarks‚ making it perfect for self-guided driving tours. Explore iconic spots like Waikiki‚ Diamond Head‚ and the North Shore at your own pace‚ discovering hidden gems and scenic routes. A self-guided tour provides flexibility and freedom to immerse yourself in Oahu’s natural beauty and rich history‚ creating unforgettable memories.
Overview of Oahu’s Geography and Attractions
Oahu‚ the third-largest island in Hawaii‚ is a paradise of diverse landscapes‚ from white sandy beaches to lush rainforests and volcanic craters. Its geography features iconic natural wonders like Diamond Head Crater‚ Hanauma Bay‚ and the Nuuanu Pali Lookout‚ offering breathtaking views. The island is home to world-renowned attractions such as Waikiki Beach‚ North Shore surfing spots‚ and scenic coastal routes. Oahu’s unique blend of tropical beauty‚ cultural significance‚ and outdoor activities makes it an ideal destination for exploration. A self-guided driving tour allows visitors to experience these highlights at their own pace‚ uncovering hidden gems and soaking in the island’s vibrant atmosphere.
Why Choose a Self-Guided Driving Tour?
A self-guided driving tour offers unparalleled flexibility‚ allowing you to explore Oahu at your own pace. Unlike traditional guided tours‚ you can create a personalized itinerary tailored to your interests‚ stopping wherever and whenever you desire. This freedom enables you to immerse yourself in the island’s stunning landscapes‚ cultural landmarks‚ and hidden gems without being rushed. Additionally‚ self-guided tours are often more cost-effective‚ as they eliminate the expense of a professional guide. With the help of modern tools like GPS audio guides and downloadable maps‚ navigating Oahu becomes seamless and enjoyable. This approach empowers you to craft a memorable adventure that reflects your unique preferences and travel style.
Best Time to Visit Oahu for a Driving Tour
Oahu’s tropical climate makes it a year-round destination‚ but the best time for a self-guided driving tour is during the dry season‚ from April to October. These months offer sunny weather‚ minimal rainfall‚ and clear road conditions‚ ideal for exploring the island’s scenic routes. The summer months (June to August) are peak tourist season‚ so expect larger crowds and higher prices. For a more relaxed experience‚ consider visiting in the shoulder seasons‚ April to June or September to November‚ when the weather is pleasant and crowds are smaller. Be sure to check surf forecasts if you plan to visit North Shore beaches‚ as large waves can impact accessibility. Planning your tour during these optimal times ensures a smoother and more enjoyable adventure.

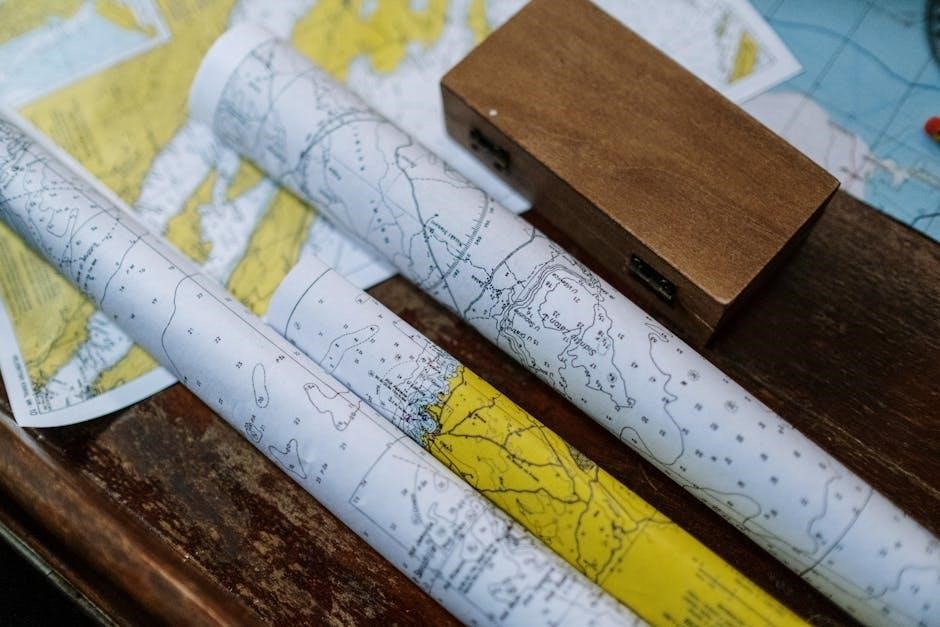
Planning Your Self-Guided Driving Tour
Effective planning ensures a seamless Oahu driving tour. Use GPS apps‚ maps‚ and itineraries to organize routes‚ attractions‚ and stops. Check road conditions and weather forecasts to avoid delays.
Renting a Car in Oahu: Tips and Recommendations
Renting a car is essential for a self-guided driving tour of Oahu‚ offering flexibility and convenience. Book your vehicle in advance to secure better rates‚ especially during peak seasons. Opt for a reliable rental company with good reviews‚ such as Enterprise‚ Hertz‚ or Avis‚ which have locations at Honolulu International Airport and across the island. Consider a compact or intermediate car for easier parking and fuel efficiency. Ensure your rental includes unlimited mileage to explore without restrictions. Check the insurance policy and additional fees to avoid surprises. Familiarize yourself with Hawaii’s driving laws‚ such as mandatory seatbelt use and strict DUI policies. Refuel before returning the car to avoid higher rates. A rental car is your key to unlocking Oahu’s hidden gems and scenic routes.
Creating a Realistic Itinerary for Your Tour
Planning a realistic itinerary is key to maximizing your self-guided driving tour of Oahu; Start by identifying must-visit attractions and mapping out logical routes to minimize backtracking. Allocate time for stops at popular spots like Waikiki Beach‚ Hanauma Bay‚ and the North Shore‚ considering driving times and parking. Allow flexibility for spontaneous exploration while ensuring you don’t overload your schedule. Prioritize early starts to beat crowds and make the most of daylight. Research opening hours‚ ticket requirements‚ and meal breaks to avoid delays. A well-organized itinerary ensures a stress-free and enjoyable experience‚ letting you soak in Oahu’s beauty without feeling rushed. Balance sightseeing with relaxation to create lasting memories.
Packing Essentials for a Day-Long Drive
For a seamless self-guided driving tour of Oahu‚ pack wisely to ensure comfort and convenience. Bring refillable water bottles to stay hydrated‚ and snacks like energy bars or fruits to keep your energy levels up. A cooler with refreshing drinks and sandwiches can save time and money. Don’t forget sunscreen‚ a hat‚ and sunglasses for outdoor exploration. Include a first-aid kit and a portable phone charger to keep your devices powered for navigation and photos. Pack a light jacket for cooler mountain areas and wear comfortable clothing and shoes for walking. Finally‚ bring a map or guide as a backup to GPS and organize your car with essentials within easy reach. This preparation ensures a stress-free and enjoyable journey around the island.
Must-Visit Attractions on the Island
Oahu’s must-visit attractions include Waikiki Beach‚ Hanauma Bay‚ Diamond Head‚ and the North Shore. Explore these iconic spots to discover stunning landscapes‚ vibrant culture‚ and breathtaking views that captivate visitors from around the world‚ making your self-guided driving tour unforgettable.
Waikiki Beach and its Surroundings
Waikiki Beach is Oahu’s most iconic destination‚ offering white sands and crystal-clear waters perfect for swimming and sunbathing. This vibrant area is surrounded by high-rise hotels‚ boutique shops‚ and restaurants‚ creating a dynamic atmosphere. Visitors can enjoy water sports‚ catamaran cruises‚ and stunning sunsets. Nearby‚ the Duke Kahanamoku Statue honors Hawaii’s legendary surfer‚ while the Royal Hawaiian Center provides insights into Hawaiian culture. The beach’s proximity to other attractions like Diamond Head makes it a great starting point for your self-guided tour. Don’t forget to explore the scenic coastal paths and vibrant nightlife‚ making Waikiki a must-visit for any traveler. Parking can be challenging‚ so consider arriving early or using nearby lots.
Hanauma Bay for Snorkeling and Scenic Views
Hanauma Bay is a protected marine sanctuary and one of Oahu’s most stunning spots for snorkeling and scenic views. Nestled within a volcanic crater‚ the bay offers calm‚ crystal-clear waters teeming with vibrant coral reefs and tropical fish. Snorkelers of all skill levels can explore the underwater world‚ while the bay’s white sands provide a relaxing spot for sunbathing. The scenic overlook above the bay offers breathtaking panoramic views‚ perfect for photography. To preserve the environment‚ visitors must watch an educational video and book tickets in advance. Arrive early‚ as parking is limited‚ and bring snorkeling gear to fully enjoy this natural wonder. Hanauma Bay is a must-visit for nature lovers and adventure seekers.

Diamond Head Crater: A Historical and Scenic Landmark
Diamond Head Crater‚ an iconic volcanic landmark‚ offers breathtaking views of Honolulu and the Pacific Ocean. This ancient formation‚ created over 150‚000 years ago‚ is a must-visit for its historical significance and natural beauty. Once a strategic military site‚ the crater now attracts hikers and photographers. The moderately challenging trail leads to the summit‚ where panoramic views await. Visitors can explore the crater’s interior and learn about its geological and cultural history. Parking is limited‚ so arrive early to secure a spot. The hike is short but steep‚ rewarding adventurers with stunning vistas. Diamond Head is a symbol of Oahu and a highlight for anyone exploring the island. Its unique landscape and rich history make it a unforgettable stop on your self-guided tour.
Nuuanu Pali Lookout: Breathtaking Coastal Views
The Nuuanu Pali Lookout offers one of Oahu’s most dramatic coastal vistas‚ with sheer cliffs plunging into the turquoise ocean below. Located along the Windward Coast‚ this natural wonder is a must-stop on your self-guided driving tour. The lookout provides stunning views of the coastline‚ valleys‚ and the ocean‚ making it a perfect spot for photos. Historically‚ the area was significant in Hawaiian battles‚ adding a layer of cultural depth to its natural beauty. Be prepared for strong winds and limited parking‚ and consider the short hike to nearby Pali Lookout for even more breathtaking views. This iconic spot captures the raw power and beauty of Oahu’s landscapes.
North Shore Beaches: Famous for Surfing and Sunsets
The North Shore of Oahu is renowned for its iconic beaches‚ thrilling surf culture‚ and dazzling sunsets. Home to legendary surf spots like Waimea Bay and Sunset Beach‚ this stretch of coastline attracts both professional surfers and beach lovers alike. During the winter months‚ massive waves draw international surf competitions‚ while summer offers calm‚ crystal-clear waters perfect for swimming and snorkeling. A self-guided driving tour along the North Shore allows you to explore these stunning beaches at your own pace‚ capturing breathtaking sunsets and soaking in the laid-back‚ local vibe. Don’t miss the famous Dole Plantation nearby‚ where you can enjoy fresh pineapple treats and explore the world’s largest maze. This region embodies the spirit of Oahu’s natural beauty and outdoor lifestyle.

Driving Routes and Scenic Paths
Oahu offers stunning driving routes that showcase its scenic beauty‚ from the Circle Island Route to the Windward Coast and Central Oahu. Each path reveals breathtaking landscapes‚ making every drive an unforgettable adventure.
The Popular Circle Island Route
The Circle Island Route is a must-do for any self-guided driving tour of Oahu‚ offering a comprehensive exploration of the island’s stunning landscapes and iconic attractions. Starting from Waikiki‚ the route takes you through scenic coastal roads‚ past Hanauma Bay‚ and along the Windward Coast‚ where lush greenery and turquoise waters captivate. Stop at Nuuanu Pali Lookout for breathtaking views and continue to the North Shore‚ famous for its surfing beaches and sunset spots. This drive is approximately 60 miles and can be completed in a day‚ allowing time to explore hidden gems and enjoy local cuisine. Plan your stops wisely to make the most of this unforgettable journey around Oahu.
Exploring the Windward Coast

The Windward Coast of Oahu is a haven for nature lovers and photographers‚ offering breathtaking views of lush greenery‚ cascading waterfalls‚ and serene beaches. Start your journey in the charming town of Kailua‚ known for its boutique shops and local eateries. As you drive along the coast‚ stop at the Nuuanu Pali Lookout for stunning panoramic views of the ocean and valleys. Continue to Kahana Bay and Laie Point‚ where you can enjoy tranquil beaches and scenic hiking trails. Don’t miss the iconic North Shore‚ famous for its surfing beaches and picturesque sunsets. This route allows you to experience Oahu’s natural beauty and cultural charm at your own pace‚ making it a highlight of your self-guided tour.
Driving Through Central Oahu
Central Oahu offers a unique blend of rural landscapes‚ historical sites‚ and local culture‚ making it a fascinating part of your self-guided driving tour. Start your journey in the central plains‚ where you’ll find vast agricultural fields and the iconic Dole Plantation‚ famous for its pineapple fields and the world’s largest maze. Stop by the Hawaii Plantation Village to learn about the island’s agricultural history and diverse ethnic influences. As you drive through Central Oahu‚ keep an eye out for roadside stands offering fresh local produce and snacks. This region provides a glimpse into Oahu’s lesser-known areas‚ allowing you to experience the island’s rural charm and rich cultural heritage. Be sure to check for any road closures and plan your route accordingly.
Cultural and Historical Stops
Oahu is rich in cultural and historical sites‚ blending Native Hawaiian heritage with influences from around the world; Explore ancient temples‚ museums‚ and historical landmarks to uncover the island’s storied past and diverse traditions. These stops offer a deeper connection to Oahu’s unique identity and history.
Pearl Harbor and USS Arizona Memorial
Pearl Harbor is one of Oahu’s most significant historical sites‚ offering a poignant glimpse into the events of December 7‚ 1941. The USS Arizona Memorial‚ located in the harbor‚ honors the lives lost during the attack. Visitors can take a boat tour to the memorial‚ which sits above the sunken battleship. The surrounding Pearl Harbor Visitor Center provides detailed exhibits and a historical context of the event. For a self-guided tour‚ plan your visit early to avoid crowds and allow time for reflection. Parking is available near the visitor center‚ and tickets can be reserved in advance. Bring water and sunscreen‚ as the sun can be intense.
Bishop Museum: Understanding Hawaiian History
Bishop Museum is a cornerstone of Hawaiian cultural and historical education‚ offering insights into the islands’ rich heritage. As the largest museum in Hawaii‚ it showcases extensive collections of artifacts‚ artworks‚ and interactive exhibits. Highlights include ancient Hawaiian tools‚ royal artifacts‚ and exhibits on natural history. The museum also explores the science of Hawaii’s unique ecosystems and volcanic landscapes. For a self-guided tour‚ allow at least two hours to explore the galleries. Located in Honolulu‚ it’s easily accessible by car‚ with ample parking available. Plan your visit to coincide with one of the daily cultural demonstrations for a deeper understanding of Hawaiian traditions and history.
Iolani Palace: A Glimpse into Royal Hawaii
Iolani Palace‚ located in Honolulu‚ is the only royal palace in the United States‚ offering a unique glimpse into Hawaii’s monarchic past. Built in 1882‚ it served as the official residence of the Hawaiian monarchy until the overthrow in 1893. The palace features a mix of Victorian and Hawaiian architectural styles‚ with opulent interiors and historic artifacts. Visitors can explore the grand throne room‚ the monarchs’ private quarters‚ and the impressive state rooms. Guided tours are available‚ providing detailed insights into the lives of Hawaii’s rulers and the kingdom’s history. Plan your visit as part of your self-guided driving tour‚ ensuring ample time to absorb the rich cultural and historical significance of this iconic landmark.
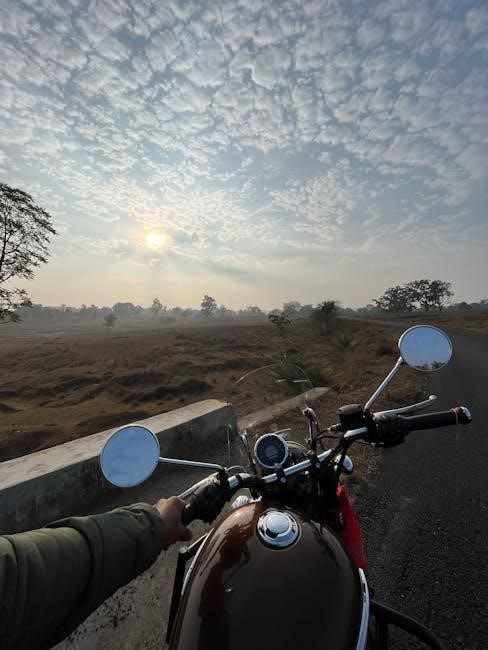
Practical Tips for Drivers
Use GPS apps like Google Maps or Waze for real-time navigation. Respect local driving laws‚ including speed limits and right-of-way rules. Stay alert and enjoy the scenic views responsibly.
Navigation and GPS Recommendations
For a smooth self-guided driving tour of Oahu‚ use reliable GPS apps like Google Maps or Waze for real-time directions. Consider downloading Shaka Guide‚ a popular app offering audio tours with cultural insights and turn-by-turn navigation. Offline maps are essential for areas with limited internet coverage. Ensure your rental car has a built-in GPS or bring a portable device. Check for traffic updates before departure and during your drive to avoid delays. Always keep your phone charged and use a car mount for safe navigation. Familiarize yourself with Oahu’s road signs and driving laws beforehand. With proper navigation tools‚ you’ll effortlessly explore Oahu’s stunning landscapes and attractions.
Driving Laws and Safety Tips in Hawaii
When driving in Oahu‚ adhere to Hawaii’s driving laws for a safe and enjoyable experience. Always wear a seatbelt‚ as it’s mandatory for all passengers. Speed limits are strictly enforced‚ especially in school zones and residential areas. Never drive under the influence of alcohol‚ as the legal blood alcohol content (BAC) limit is 0.08%. Using a mobile phone while driving is prohibited unless in hands-free mode. Be cautious of pedestrians and always yield at crosswalks. Familiarize yourself with road signs‚ as Hawaii has unique traffic laws. Drive defensively‚ especially on narrow coastal roads‚ and be prepared for sudden weather changes. Keep a first-aid kit and spare tire in your car for emergencies.
Where to Refuel and Grab Quick Bites
During your self-guided driving tour of Oahu‚ it’s essential to know where to refuel and enjoy quick‚ delicious meals. Gas stations like 76‚ Chevron‚ and Shell are conveniently located along major routes‚ especially near Waikiki and the North Shore. For quick bites‚ stop by local eateries or food trucks‚ such as shrimp trucks on the North Shore or bakeries in Honolulu. Use apps like Google Maps or Yelp to find the nearest options. Many gas stations also have mini-marts for snacks and drinks. For a more authentic experience‚ try local spots like Matsumoto Shave Ice or roadside diners serving Hawaiian favorites like laulau and poke bowls. Plan your stops in advance to ensure a seamless and enjoyable journey.

Additional Resources and Apps
Enhance your Oahu driving tour with apps like Shaka Guide‚ offering GPS audio tours and real-time directions. Downloadable maps and offline guides ensure seamless exploration‚ even without internet access.
Shaka Guide: A Popular GPS Audio Tour App
Shaka Guide is a highly-rated GPS audio tour app perfect for self-guided driving tours in Oahu. It offers real-time navigation‚ insightful commentary‚ and tips on key landmarks‚ beaches‚ and hidden spots. The app works offline‚ ensuring uninterrupted guidance even in areas with poor internet connectivity. With Shaka Guide‚ you can explore Oahu at your own pace‚ discovering scenic routes and cultural highlights seamlessly. Its user-friendly interface and engaging narration make it a favorite among visitors. Download Shaka Guide to transform your driving tour into an unforgettable adventure‚ packed with local knowledge and insider tips. It’s an essential tool for maximizing your Oahu experience.
Downloadable Maps and Offline Guides
Downloadable maps and offline guides are indispensable for a seamless self-guided driving tour of Oahu. Apps like Google Maps and specialized travel guides allow you to pre-load maps‚ ensuring navigation remains possible in areas with limited internet coverage. Offline guides often include detailed itineraries‚ points of interest‚ and insider tips‚ helping you discover hidden gems. Many apps‚ such as Shaka Guide‚ offer downloadable content tailored for Oahu’s scenic routes. These tools are especially useful for exploring remote areas like the North Shore or Windward Coast. By downloading maps and guides beforehand‚ you can enjoy a stress-free adventure‚ even without constant internet access. This preparation ensures you make the most of your Oahu driving tour experience.
Plan ahead‚ stay safe‚ and respect Oahu’s environment. Enjoy the scenic views‚ cultural sites‚ and memorable experiences. Make your self-guided driving tour unforgettable!
Maximizing Your Oahu Driving Tour Experience
Start your day early to beat crowds and make the most of your time. Pack snacks‚ water‚ and sunscreen to stay refreshed. Use apps like Shaka Guide for real-time insights and navigation. Be flexible—stop at hidden beaches‚ try local eats‚ and enjoy spontaneous moments. Respect Oahu’s environment by staying on designated paths and bringing reusable containers. End your day with a stunning sunset at spots like Waikiki or North Shore. Plan ahead‚ stay safe‚ and immerse yourself in Oahu’s beauty and culture for an unforgettable adventure.
Leaving a Positive Impact on the Environment
When exploring Oahu on a self-guided driving tour‚ it’s essential to leave a positive impact on the environment. Respect natural spaces by staying on designated paths and avoiding sensitive habitats. Bring reusable water bottles and containers to reduce waste. Avoid littering and take all trash with you. Support eco-friendly businesses and local vendors to promote sustainable tourism. Be mindful of Oahu’s unique ecosystems‚ such as coral reefs and wildlife habitats. By being a responsible traveler‚ you help preserve the island’s beauty for future generations. Your thoughtful actions contribute to Oahu’s environmental conservation and cultural preservation efforts.