Category: Manuals

mackie 1604 vlz manual

Mackie 1604 VLZ Manual: A Comprehensive Guide

This guide comprehensively details the Mackie 1604 VLZ mixer, covering features, operation, and troubleshooting. It references available manuals like the MACKIE_1604-VLZ-PRO.pdf. Explore the VLZ mix architecture and extended dynamic range preamplifiers.

The Mackie 1604 VLZ represents a cornerstone in compact mixing console design, offering professional-grade audio performance within a robust and portable format. Originally evolving from the CR-1604, which featured six mic/line and ten line-only channels, the VLZ series streamlined the design while retaining exceptional audio quality. This manual serves as a comprehensive resource for understanding and utilizing the full potential of your 1604 VLZ mixer.

Designed for diverse applications – from live sound reinforcement and recording to broadcast and post-production – the 1604 VLZ boasts Mackie’s renowned XDR (Extended Dynamic Range) preamplifiers, delivering pristine signal clarity and low noise. This guide will navigate you through its channel configurations, mixing capabilities, output options, and essential maintenance procedures. Referencing resources like the MACKIE_1604_VLZ-PRO.pdf, we’ll unlock the intricacies of this versatile console.

Understanding the VLZ Pro Series

The VLZ Pro Series, including the 1604 VLZ, marked a significant evolution in Mackie’s mixer technology, prioritizing compact size and reliability without compromising audio fidelity. These mixers were engineered for professional use, targeting applications like disc jockey setups, stereo PA systems, and recording studios. A key characteristic is the VLZ mix architecture, designed for efficient signal flow and minimal noise.

Mackie’s commitment to quality is evident in the use of proprietary XDR (Extended Dynamic Range) microphone preamplifiers, a defining feature of the VLZ Pro line. These preamps deliver exceptional headroom and low distortion, ensuring clean and powerful audio reproduction. The series also emphasizes ease of use, with intuitive controls and a straightforward layout. Documentation, such as the MACKIE_1604-VLZ-PRO.pdf, details the specific advantages and features of this professional-grade series.

Key Features of the 1604 VLZ

The Mackie 1604 VLZ boasts a robust feature set designed for versatile audio mixing. It offers sixteen channels, combining microphone and line inputs, providing flexibility for various sources. Central to its performance are the XDR Extended Dynamic Range microphone preamplifiers, delivering exceptional clarity and headroom. Aux sends enable effects routing and monitor mixes, while pan controls facilitate precise stereo imaging.

The mixer’s output section includes XLR and TRS main mix outputs, alongside monitor outputs for stage monitoring. A dedicated headphone output with level and impedance control allows for private monitoring. Notably, the “Rude Solo” light feature aids in solo monitoring. The compact VLZ mix architecture contributes to its portability and efficient operation, making it a reliable choice for both live sound and studio applications, as detailed in available manuals.

Channel Configuration & Inputs

This section details the 1604 VLZ’s channel setup, including mic/line inputs and their configuration. Explore how to optimize signal flow and input gain for best results.

Mic/Line Inputs: Detailed Overview

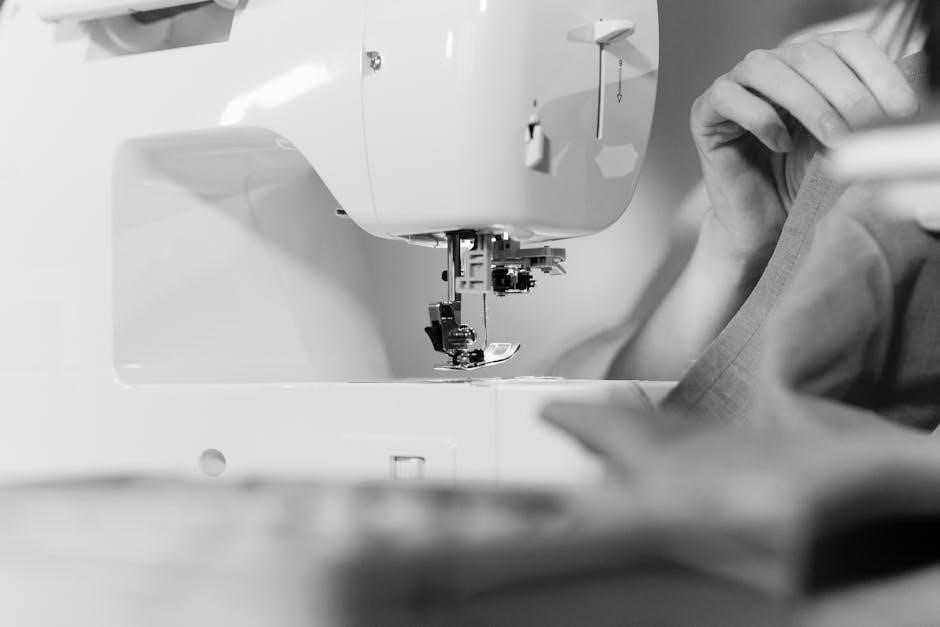
The Mackie 1604 VLZ offers versatile input options, featuring both microphone and line-level inputs on each channel. These inputs are designed to accommodate a wide range of audio sources, from vocals and instruments to playback devices. Understanding the difference between these input types is crucial for optimal performance; Microphone inputs are intended for low-level signals from microphones, requiring significant gain amplification from the built-in XDR preamplifiers.

Line-level inputs, conversely, are designed for higher-level signals from sources like keyboards, preamplified instruments, or audio interfaces. Using the correct input type ensures a clean and strong signal without introducing excessive noise or distortion. Each channel typically features a combo jack that accepts both XLR and 1/4-inch connectors, providing flexibility in connectivity. Proper cable selection and connection are essential for maintaining signal integrity. Refer to the manual for specific impedance matching recommendations.

Phantom Power Implementation

The Mackie 1604 VLZ incorporates 48V phantom power, essential for powering condenser microphones. This feature is individually switchable per channel, allowing selective activation only for microphones requiring it. It’s crucial to engage phantom power before connecting a condenser microphone to prevent potential damage from voltage spikes. Always ensure dynamic microphones are not connected when phantom power is activated, as it can potentially harm their diaphragms.

The manual details the location of the phantom power switches, typically found near the XLR input connectors on each channel. A visual indicator, often an LED, illuminates when phantom power is engaged. Remember to deactivate phantom power when using ribbon microphones, as they are particularly sensitive to phantom power voltage. Proper implementation of phantom power ensures optimal performance and longevity of your microphones.

Input Gain Control & Signal Optimization

The input gain controls on the Mackie 1604 VLZ are critical for achieving optimal signal levels. These controls adjust the sensitivity of each channel’s preamp, determining the strength of the incoming signal. Proper gain staging involves setting the gain high enough to maximize the signal-to-noise ratio, but low enough to avoid clipping or distortion. Observe the signal level meters carefully while adjusting the gain.

Aim for an average signal level peaking around -12dB to -6dB. Avoid letting the signal consistently hit 0dB, as this will cause unwanted distortion. Utilize the headroom provided by the XDR preamplifiers effectively. Experiment with different gain settings to find the sweet spot for each source, considering microphone type and output level. Remember, a stronger signal generally results in a cleaner, more professional sound.

Mixing & Routing Capabilities

The 1604 VLZ offers versatile mixing and routing, featuring channel EQ, aux sends, and pan controls. These tools shape and direct audio effectively.

Channel EQ Section: Frequency Bands & Control

Each channel on the Mackie 1604 VLZ boasts a three-band EQ section, providing precise tonal shaping. These controls encompass high, mid, and low-frequency bands, allowing for detailed adjustments to the audio signal. The high-frequency band typically offers shelving EQ, boosting or attenuating frequencies above a set point. Similarly, the low-frequency band often employs shelving EQ for bass control. The mid-frequency band is usually a peak/bell EQ, enabling focused adjustments around a specific frequency.

Gain control is crucial for optimizing signal levels before EQ application, ensuring a clean and dynamic sound; Proper EQ usage can enhance clarity, reduce muddiness, or creatively sculpt the sonic character of individual instruments or vocals. Experimentation is key to understanding how each frequency band impacts the overall mix. Remember that excessive boosting can introduce noise or distortion, so subtle adjustments are often most effective.

Aux Sends: Configuration & Usage

The Mackie 1604 VLZ features auxiliary sends, versatile tools for creating monitor mixes or routing signals to external effects processors. Each channel typically includes one or more aux sends, often labeled as ‘Aux 1’ and ‘Aux 2’. Aux sends allow you to divert a portion of the channel’s signal to a separate output, independent of the main mix.

Configuration involves adjusting the aux send level on each channel, determining how much signal is sent to the aux bus. This bus then feeds the aux outputs, which can be connected to headphones for musician monitoring or to effects units like reverb or delay. Pre-fader or post-fader aux send options dictate whether the aux signal is affected by the channel fader. Post-fader sends are ideal for effects, while pre-fader sends are preferred for monitor mixes.

Pan Control & Stereo Imaging

The pan control on the Mackie 1604 VLZ dictates the positioning of a mono signal within the stereo field. Rotating the pan knob left or right moves the signal’s perceived location between the left and right speakers. At the center position, the signal is equally distributed to both channels. Pan controls are crucial for creating a wider, more immersive soundstage.

Stereo imaging is enhanced by strategically panning different instruments and vocals. For example, panning rhythm guitars slightly left and right can create a broader sonic texture. Careful panning prevents signals from clashing and ensures clarity within the mix. The 1604 VLZ allows precise control over stereo placement, enabling engineers to sculpt a balanced and engaging listening experience. Proper use of panning contributes significantly to a professional-sounding mix.

Output Section & Connections

This section details the 1604 VLZ’s main mix, monitor, and headphone outputs. Explore XLR and TRS connections, fader control, and output section descriptions.

Main Mix Outputs: XLR & TRS

The Mackie 1604 VLZ provides professional-grade main mix outputs via both XLR and TRS connectors, offering versatility for connection to a wide range of audio systems. These balanced outputs are designed to deliver a clean, noise-free signal even over long cable runs. The XLR outputs are typically used for connecting to powered speakers or professional mixing consoles, while the TRS outputs are suitable for connecting to amplifiers or recording interfaces.

Understanding the output levels is crucial for optimal performance. Proper gain staging ensures a strong signal-to-noise ratio without clipping. The main mix fader controls the overall output level, allowing precise adjustment of the signal sent to the connected devices. Careful monitoring of the output meters is recommended to avoid distortion and maintain a healthy signal level. These outputs are a core component of the mixer’s signal flow, ensuring high-quality audio transmission.

Monitor Outputs: Functionality & Control

The Mackie 1604 VLZ features monitor outputs designed to provide a separate audio feed for stage monitors or nearfield speakers. These outputs allow performers to hear themselves and the mix independently from the main audience. Control over the monitor mix is typically achieved through the auxiliary sends, enabling customized mixes for each monitor. The monitor outputs are generally post-fader, meaning they follow the level adjustments made on the channel faders.

Proper configuration of the auxiliary sends is essential for creating effective monitor mixes. Careful attention should be paid to EQ and panning within the monitor mix to ensure clarity and balance. The level of the monitor outputs is controlled by dedicated knobs, allowing precise adjustment of the volume sent to the monitors. Monitoring ensures performers have a clear and comfortable listening experience during performances and rehearsals.

Headphone Output: Level & Impedance

The Mackie 1604 VLZ incorporates a headphone output for private monitoring during mixing, practice, or recording. This output allows users to listen to the main mix or auxiliary sends without disturbing others. A dedicated level control adjusts the headphone volume, providing a comfortable listening experience across various headphone impedances. The impedance of connected headphones should be considered for optimal performance; generally, the 1604 VLZ supports a wide range of common headphone impedances.

Proper headphone monitoring is crucial for critical listening and detailed mix adjustments. The headphone output offers a direct and focused sound, aiding in identifying subtle nuances in the audio. Ensure the headphone level is set appropriately to avoid ear fatigue or damage. Experimenting with different headphone impedances can reveal the best sonic clarity for your specific headphones and listening preferences.

Technical Specifications & Maintenance

This section details power requirements, fuse replacement procedures, and troubleshooting for the 1604 VLZ. Refer to the manual for schematic diagrams and essential maintenance guidelines.

Power Requirements & Fuse Replacement

The Mackie 1604 VLZ operates on a standard AC power supply, typically ranging from 100-240V at 50/60Hz. Always verify your local voltage matches the mixer’s input requirement, found on the unit’s rear panel. Incorrect voltage can cause damage and void the warranty. Fuse replacement is crucial for safety and functionality; use only the specified fuse type and rating – consult the manual for details.

Before replacing a fuse, disconnect the mixer from the power source. Locate the fuse holder, usually near the power inlet. Carefully remove the blown fuse and insert a new one of the identical type. If the fuse blows repeatedly, discontinue use and contact qualified service personnel. Attempting to bypass or modify the fuse holder is dangerous and strictly prohibited. Proper fuse maintenance ensures safe and reliable operation of your 1604 VLZ mixer.

Troubleshooting Common Issues

If experiencing no audio, first check all cable connections and power supply. Verify channel faders, pan controls, and mute switches are correctly positioned. Low output may indicate insufficient input gain or a muted channel. Hum or noise can stem from ground loops; try different power outlets or a ground lift adapter (with caution). Distorted sound suggests excessive input gain or a faulty cable.

For unresponsive controls, ensure the mixer is powered on and the control isn’t damaged. If a fuse repeatedly blows, a component failure likely exists – seek professional repair. Consult the manual for specific troubleshooting steps related to each feature. Remember to systematically isolate the problem; test each component individually. Avoid attempting complex repairs yourself; qualified technicians are recommended.

Schematic Diagram Availability & Resources

Finding a Mackie 1604 VLZ schematic diagram can be challenging, but resources exist. Online searches reveal diagrams for similar models like the 1202-Vlz Pro, offering valuable insight. Web forums dedicated to audio equipment repair often host user-shared schematics. 720trees.com, mentioned in documentation, may offer support or links to relevant resources. Be cautious when downloading files from unfamiliar sources; verify their authenticity.

Mackie’s official website may provide limited schematic information or direct users to authorized service centers. Professional audio repair technicians typically have access to comprehensive schematics. Understanding schematic diagrams requires electronics knowledge; consider seeking assistance if unfamiliar. Utilize these resources responsibly and respect copyright restrictions. Remember that modifying the mixer without proper knowledge can cause damage.

Modifications & Advanced Usage

Explore the Rude Solo Light functionality and VLZ mix architecture. Consider manual modifications detailed online, like those for the 1402, 1202, and 1604 VLZ series.

Rude Solo Light Functionality

The “Rude Solo” light, a distinctive feature often discussed in Mackie 1604 VLZ documentation and online forums, provides a visual indication of when a channel is soloed. This isn’t a standard solo function; it’s a modification or quirk noted by users. Essentially, the light illuminates when a channel’s signal is actively being monitored in solo mode, offering immediate feedback to the operator.

Understanding this functionality is crucial for advanced users who may have implemented custom modifications or are troubleshooting unexpected behavior. While not explicitly detailed in all official manuals, the Rude Solo light’s operation is frequently referenced in user guides and modification instructions found online, particularly concerning older VLZ Pro models. It’s a helpful visual cue for monitoring individual channel signals during mixing and recording sessions, enhancing workflow efficiency.

Users should consult community resources and modification guides for detailed instructions on enabling or troubleshooting the Rude Solo light, as its implementation can vary depending on the specific model and any prior modifications.

VLZ Mix Architecture Explained

The VLZ (Voltage-Controlled Low-Z) mix architecture is a core element of the Mackie 1604 VLZ series, renowned for its compact size and high performance. This design prioritizes signal purity by minimizing the number of active components in the signal path, reducing potential noise and distortion. Mackie achieves this through a streamlined circuit layout and careful component selection, resulting in a cleaner, more transparent sound.

Key to the VLZ architecture is the use of low-impedance circuitry, which enhances headroom and improves common-mode noise rejection. This translates to a more robust and reliable signal, even at high levels. The architecture is also designed for efficient power consumption, contributing to the mixer’s portability and suitability for various applications. Understanding this architecture is vital for appreciating the 1604 VLZ’s sonic characteristics and overall performance.

Further details on the VLZ architecture can be found in technical documentation and schematics available online.

Extended Dynamic Range (XDR) Preamplifiers

Mackie’s proprietary Extended Dynamic Range (XDR) preamplifiers are a defining feature of the 1604 VLZ, significantly enhancing its audio quality. These preamps are designed to deliver exceptionally low noise and distortion across a wide input gain range, providing a clean and powerful signal. XDR technology allows for a greater headroom, meaning the mixer can handle louder signals without clipping or compromising sonic integrity.

The XDR preamplifiers contribute to the mixer’s ability to capture subtle nuances in audio sources, making it ideal for recording and live sound reinforcement. They are specifically engineered to maximize signal-to-noise ratio, resulting in a more professional and polished sound. XDR™ is a trademark of Mackie Designs, Inc., highlighting its unique and patented technology. These preamps are a key reason for the 1604 VLZ’s reputation for sonic excellence.

Detailed specifications and performance characteristics of the XDR preamplifiers are available in the official Mackie documentation.

2015 chevy equinox user manual

The 2015 Chevrolet Equinox owner’s manual is a vital resource, offering comprehensive guidance on operation, safety, and maintenance for this popular vehicle.

Chevrolet provides both printed and digital versions, including access through Amazon and online manuals, ensuring owners have readily available information.

Overview of the Vehicle

The 2015 Chevy Equinox is a compact crossover SUV known for its comfortable ride, spacious interior, and practical features. This vehicle caters to families and individuals seeking a versatile and reliable transportation option.

Owners manuals detail its five-passenger seating capacity and ample cargo space, making it suitable for both daily commutes and longer journeys. Chevrolet focused on providing a blend of fuel efficiency and functionality in this model.

Understanding the manual unlocks the full potential of the Equinox, covering everything from basic operation to advanced features like the MyLink infotainment system.

Importance of the User Manual

The 2015 Chevy Equinox owner’s manual is crucial for maximizing vehicle enjoyment and ensuring safe operation. It provides detailed instructions on all features, from the infotainment system to safety technologies.

Understanding the manual allows owners to properly utilize the vehicle’s capabilities and avoid potential issues. Accessing the manual – whether in print or online via resources like Amazon – is essential for troubleshooting and performing basic maintenance.

Ignoring the manual can lead to improper use, overlooked safety features, and potentially costly repairs.

Vehicle Identification

Locating your 2015 Equinox’s Vehicle Identification Number (VIN) and understanding its model/trim level are essential for service, warranty work, and accurate part ordering.

Vehicle Identification Number (VIN) Location

The 2015 Chevy Equinox’s unique 17-digit Vehicle Identification Number (VIN) is crucial for identifying your specific vehicle. You can find this important code in several locations. Look on the driver’s side dashboard, visible through the windshield.

Additionally, the VIN is located on the driver’s side doorjamb sticker. It’s also imprinted on your vehicle’s registration and insurance documents. Having the VIN readily available streamlines service appointments, warranty claims, and helps ensure you receive the correct parts when needed for maintenance or repairs.

Model and Trim Levels

The 2015 Chevrolet Equinox offered a variety of models and trim levels to suit diverse preferences. Base models included the LS, providing essential features. Stepping up, the LT trim added enhanced comfort and convenience options.

For those seeking premium features, the LTZ trim offered leather upholstery, upgraded technology, and a more refined interior. Engine options typically included a 2.4L four-cylinder and a 3.6L V6, impacting performance and fuel economy. Understanding your specific trim level is vital for accessing relevant features and maintenance schedules.

Safety Features

The 2015 Equinox prioritizes occupant protection with an advanced airbag system, mandatory seat belt usage, and available stability control for enhanced safety.

Airbag System

Your 2015 Chevy Equinox is equipped with an advanced airbag system designed to provide occupant protection in the event of a collision. This system includes frontal airbags for both driver and passenger, as well as seat-mounted side-impact airbags.

Additionally, roof rail airbags are included to offer head protection during certain types of impacts. The manual details proper seating positions and cautions against placing objects near airbag deployment zones.

It’s crucial to understand that airbags are supplemental restraints and work best when used in conjunction with seat belts. Always refer to the owner’s manual for specific details and warnings regarding the airbag system.

Seat Belt Usage

Proper seat belt use is the most effective safety measure in your 2015 Chevy Equinox. The owner’s manual emphasizes that all occupants should wear properly adjusted seat belts at all times, regardless of seating position.

It details how to correctly fasten and adjust both lap and shoulder belts, ensuring a snug fit. The manual also provides specific guidance for pregnant women and children, stressing the importance of appropriate restraint systems.

Ignoring seat belt safety can significantly increase the risk of injury during a collision. Always consult the manual for complete instructions and safety recommendations.

Child Safety Seats

The 2015 Chevy Equinox owner’s manual provides detailed instructions regarding the proper installation and use of child safety seats. It stresses the importance of selecting a seat appropriate for the child’s weight and height, adhering to state and federal regulations.

The manual illustrates LATCH system usage and proper placement of seats in various Equinox positions. It cautions against using forward-facing seats with children who haven’t reached the recommended age or weight limits, prioritizing rear-facing installations whenever possible for enhanced safety.

Stability Control System

The 2015 Chevy Equinox’s Stability Control System (StabiliTrak) is thoroughly explained in the owner’s manual. It details how this system enhances vehicle control during challenging driving conditions, like slippery roads or sudden maneuvers.

The manual clarifies that StabiliTrak isn’t a substitute for cautious driving, but rather a supplemental safety feature. It describes the system’s indicators on the instrument panel, alerting drivers to its activation and potential limitations. Understanding its function is crucial for safe operation.

Understanding Your Instrument Panel

The 2015 Equinox manual details all warning lights, gauges, and the information display. It provides clear explanations for each indicator, ensuring drivers understand vehicle status.

Warning Lights and Indicators

The 2015 Chevy Equinox owner’s manual dedicates significant detail to interpreting the vehicle’s warning lights and indicators. It explains the difference between critical alerts requiring immediate attention and those indicating routine maintenance needs.

Specifically, the manual covers lights for engine issues, low fuel, tire pressure, airbag systems, and brake function. Understanding these signals is crucial for safe operation and preventing potential damage. The guide emphasizes promptly addressing illuminated warning lights to maintain vehicle reliability and driver safety.

Gauges

The 2015 Chevrolet Equinox’s instrument panel features several key gauges, thoroughly explained within the owner’s manual. These include the speedometer, tachometer, fuel level gauge, and engine temperature gauge. The manual details how to accurately read each gauge and understand the information presented.

It clarifies normal operating ranges and potential warning signs indicated by gauge readings. Properly monitoring these gauges allows drivers to proactively address potential issues and maintain optimal vehicle performance. The guide ensures owners can confidently interpret the vehicle’s vital signs.

Information Display

The 2015 Chevy Equinox’s information display, detailed in the owner’s manual, provides crucial vehicle data. This includes trip information like mileage and average speed, alongside external temperature readings. The manual explains how to navigate the display’s menus and customize settings to suit driver preferences.

It also covers the display of warning messages and system alerts, ensuring owners understand any potential issues. Properly utilizing this feature enhances the driving experience and promotes vehicle awareness. The guide empowers owners to access and interpret vital information efficiently.

Operating Your Vehicle

The 2015 Equinox manual details essential procedures, from starting and stopping the engine to understanding driving modes and proper fueling techniques for optimal performance.

Starting and Stopping the Engine

The 2015 Chevy Equinox owner’s manual provides detailed instructions for safely starting and stopping the engine. It emphasizes ensuring the vehicle is in Park or Neutral before attempting to start. The manual clarifies the proper use of the ignition key or push-button start system, if equipped.

Furthermore, it outlines procedures for emergency starting, should the battery be low. Regarding stopping the engine, the manual stresses parking on a level surface, applying the parking brake, and shifting into Park before turning off the ignition. Following these guidelines ensures both vehicle longevity and operator safety.

Driving Modes

The 2015 Chevrolet Equinox owner’s manual details the available driving modes, primarily focusing on standard driving conditions. While not featuring selectable modes like modern vehicles, the manual explains optimizing driving for various terrains and weather. It advises cautious operation in inclement weather, reducing speed and increasing following distance.

The manual also covers the functionality of the automatic transmission, including its shift patterns and overdrive capabilities. It emphasizes understanding how these features impact fuel efficiency and performance. Proper utilization, as described, contributes to a smoother and more controlled driving experience.

Fueling Information

The 2015 Chevrolet Equinox owner’s manual specifies using unleaded fuel with an octane rating of 87 or higher. It clearly states the fuel tank capacity, aiding in calculating range and planning refueling stops. The manual cautions against using fuel additives unless specifically approved by Chevrolet.

Detailed instructions are provided for safely refueling the vehicle, including warnings about static electricity and the importance of avoiding spills. It also explains the location of the fuel filler door release and the proper procedure for opening and closing it. Following these guidelines ensures safe and efficient refueling.

Interior Features

The 2015 Equinox manual details adjustments for seats, operation of the climate control, and the audio system. It also covers the MyLink infotainment system’s features and functions.

Seats and Adjustments

The 2015 Chevy Equinox owner’s manual provides detailed instructions on how to properly adjust both front and rear seats for optimal comfort and safety. It explains manual seat positioning, including fore/aft adjustments, seatback recline, and headrest height.

For models equipped with power seats, the manual illustrates the location and operation of the adjustment controls. It also covers lumbar support adjustments, if available, to enhance driver and passenger comfort during longer trips. Understanding these features ensures a personalized and secure driving experience.

Climate Control System

The 2015 Chevrolet Equinox owner’s manual details the operation of the vehicle’s climate control system, covering both manual and automatic settings. It explains how to adjust temperature, fan speed, and airflow direction for personalized comfort. The manual clarifies the use of the air conditioning system, including recirculation mode for quicker cooling.

It also provides guidance on using the defrost and defog functions for clear visibility. Understanding these controls allows drivers and passengers to maintain a comfortable cabin environment in various weather conditions, enhancing the overall driving experience.

Audio System

The 2015 Chevrolet Equinox owner’s manual provides a detailed explanation of the vehicle’s audio system features. It covers operation of the radio, CD player, and auxiliary input for connecting external devices. The manual illustrates how to adjust volume, tone, and balance for optimal sound quality.

It also details the use of steering wheel-mounted controls for convenient audio adjustments while driving. Owners can learn about preset station memory and scanning functions. Understanding these features enhances the in-vehicle entertainment experience for both the driver and passengers.

Infotainment System (MyLink)

The 2015 Chevrolet Equinox’s MyLink infotainment system is thoroughly explained in the owner’s manual. It details how to navigate the touchscreen interface, connect smartphones via Bluetooth, and utilize available apps. The manual guides users through voice recognition features for hands-free operation.

Owners will learn about pairing devices, streaming audio, and making phone calls safely. It also covers customization options and troubleshooting common issues. Understanding MyLink’s capabilities maximizes connectivity and enhances the driving experience, providing access to entertainment and information.

Exterior Features

The 2015 Equinox manual details operation of lights, wipers, mirrors, doors, and locks. It provides instructions for adjustments and proper usage of these exterior components.

Lights and Wipers

The 2015 Chevy Equinox owner’s manual provides detailed instructions regarding the vehicle’s exterior lighting system. It covers headlight operation, including high and low beams, as well as parking lights and turn signals.

Furthermore, the manual explains the functionality of the automatic headlights, if equipped, and how to adjust them for optimal visibility. Regarding wipers, the manual details the various speed settings and the use of the windshield washer fluid.

It also explains the rear wiper and defroster operation, ensuring clear visibility in all weather conditions. Proper use and maintenance of these features are crucial for safe driving.

Mirrors

The 2015 Chevrolet Equinox owner’s manual thoroughly explains the adjustment and operation of both the interior and exterior mirrors. It details how to manually or electrically adjust the side mirrors for optimal visibility, minimizing blind spots.

The manual also covers the use of the rearview mirror and any associated features, such as automatic dimming to reduce glare from headlights behind you. Understanding proper mirror adjustment is vital for safe lane changes and overall awareness.

The guide emphasizes the importance of checking and adjusting mirrors before each drive, ensuring a clear view of the surrounding traffic.

Doors and Locks

The 2015 Chevrolet Equinox owner’s manual provides detailed instructions on operating the vehicle’s doors, including interior and exterior handles, as well as the power door lock system. It explains how to use the key fob for remote locking and unlocking, and the manual key operation.

The manual also covers the child safety rear door locks, emphasizing their importance for preventing accidental opening from inside the vehicle. Furthermore, it details the operation of any available automatic locking features and troubleshooting tips for lock malfunctions.

Proper understanding of these features ensures security and convenience.

Maintenance

The 2015 Equinox manual details scheduled maintenance, fluid checks, and tire information, ensuring optimal vehicle performance and longevity through proper care.

Scheduled Maintenance

Your 2015 Chevy Equinox’s owner manual outlines a crucial schedule for maintaining peak performance and reliability. This includes regular inspections and services at specified mileage intervals.

Essential tasks encompass oil and filter changes, tire rotations, fluid level checks (coolant, brake, power steering, and transmission), and inspections of belts, hoses, and brakes.

Following this schedule, detailed within the manual, helps prevent unexpected repairs and extends the life of your vehicle, ensuring a safe and enjoyable driving experience.

Adhering to these guidelines also protects your warranty coverage.

Fluid Checks and Replacements

The 2015 Equinox owner’s manual emphasizes the importance of regularly checking and replenishing vital fluids. These include engine oil, coolant, brake fluid, power steering fluid, transmission fluid, and windshield washer fluid.

Proper fluid levels are critical for optimal performance and preventing component damage. The manual details specific procedures for checking each fluid, including location and recommended types.

Replacement intervals vary based on driving conditions; consult the manual for guidance. Using the correct fluids is essential to avoid costly repairs and maintain warranty validity.

Tire Information

The 2015 Chevy Equinox manual provides detailed tire information crucial for safety and performance. It specifies the correct tire size, load range, and speed rating for each trim level.

Maintaining proper tire pressure, found on the tire placard, is vital for handling, fuel efficiency, and even tire wear. The manual outlines how to check tire pressure and inflate tires correctly.

Information on tire rotation, inspection for damage, and understanding the tire tread wear indicators are also included, ensuring optimal tire life and safe driving conditions.

Troubleshooting

The 2015 Equinox manual details common issues and potential solutions, offering guidance for owners facing minor vehicle problems and emergency assistance contact details.

Common Issues and Solutions

The 2015 Chevy Equinox owner’s manual addresses frequently encountered problems. It provides troubleshooting steps for issues like starting difficulties, often linked to the battery or alternator. The manual also covers concerns with the infotainment system, suggesting resets or software updates.

Owners may find guidance on resolving minor electrical glitches, like malfunctioning lights. Furthermore, the manual details how to address basic maintenance needs, potentially preventing larger issues. For more complex problems, it emphasizes seeking professional assistance from a certified mechanic, ensuring safe and effective repairs.

Emergency Assistance

The 2015 Chevy Equinox owner’s manual details crucial emergency procedures. It outlines steps for roadside assistance, including contacting OnStar if equipped, for services like towing or jump-starts. The manual emphasizes the importance of hazard lights and proper signaling in breakdown situations.

It also provides guidance on handling accidents, stressing the need to ensure safety and exchange information. Furthermore, the manual lists emergency contact numbers and resources. Owners are advised to familiarize themselves with these procedures before encountering an emergency, promoting preparedness and a swift response.

Specifications

The 2015 Equinox manual details key vehicle specifications, including dimensions, weight, and engine details. It also covers transmission specifics for informed understanding.

Dimensions and Weight

The 2015 Chevy Equinox owner’s manual provides precise dimensional data crucial for parking and storage considerations. It outlines the vehicle’s length, width, and height, aiding in navigating tight spaces. Furthermore, the manual details the Equinox’s curb weight, a vital specification for understanding handling and load capacity.

This information is essential for calculating garage fit, trailer towing capabilities, and overall vehicle dynamics. Knowing these specifications ensures safe and efficient operation, contributing to a positive ownership experience. Detailed charts within the manual offer a clear presentation of these measurements.

Engine Specifications

The 2015 Chevy Equinox owner’s manual meticulously details the engine options available for that model year. It specifies displacement, horsepower, and torque figures for each engine configuration, providing a clear understanding of performance capabilities. Information regarding the engine’s compression ratio and valve train design is also included.

Owners can find details on recommended fuel grades and oil types, ensuring optimal engine health and longevity. This section is vital for maintenance and troubleshooting, allowing informed decisions regarding engine care. The manual presents this data in a concise and easily understandable format.

Transmission Specifications

The 2015 Chevrolet Equinox owner’s manual provides detailed specifications for the available transmissions. It outlines the type of transmission – typically a six-speed automatic – and its gear ratios, crucial for understanding vehicle performance. Owners will find information regarding the transmission fluid type and capacity, essential for proper maintenance.

The manual also clarifies the transmission’s operation, including shift patterns and any specific driving considerations. This section is vital for diagnosing potential issues and ensuring smooth operation. Detailed diagrams and explanations help owners understand the transmission’s internal workings and proper care.

Warranty Information

The 2015 Chevy Equinox owner’s manual details the new vehicle warranty coverage, including bumper-to-bumper and powertrain specifics, plus available service contracts.

New Vehicle Warranty

The 2015 Chevrolet Equinox came standard with a comprehensive new vehicle warranty, providing owners with peace of mind. This typically included a 3-year/36,000-mile bumper-to-bumper coverage, protecting against defects in materials or workmanship.

Additionally, a 5-year/100,000-mile powertrain warranty was included, covering the engine, transmission, and drive axles. Owners should consult their specific owner’s manual for exact terms and conditions, as coverage may vary.

Proper maintenance, as outlined in the manual, is crucial for maintaining warranty validity.

Service Contracts

Beyond the new vehicle warranty, Chevrolet offered extended service contracts for the 2015 Equinox, providing continued protection after the original coverage expired. These contracts, often purchased through dealerships, could extend bumper-to-bumper or powertrain coverage for an additional term and mileage.

The owner’s manual details the benefits of these service contracts, and owners should carefully review the terms, deductibles, and exclusions before purchasing.

Chevrolet’s service contracts offer options for various levels of protection, catering to different owner needs and budgets.

Index

The 2015 Equinox manual features an alphabetical listing of topics for quick reference, aiding owners in locating specific information efficiently within the guide.

Alphabetical Listing of Topics

The 2015 Chevy Equinox owner’s manual index provides a comprehensive alphabetical arrangement of subjects. Expect entries covering airbag systems, audio system operation, climate controls, and detailed descriptions of warning lights.

Further topics include child safety seat installation, door lock functions, engine starting procedures, fluid check guidelines, and fuel information. The index also details gauge explanations, interior feature usage, maintenance schedules, mirror adjustments, and the MyLink infotainment system.

Owners will find sections on scheduled maintenance, seat adjustments, stability control, tire information, troubleshooting common issues, and warranty details, all easily accessible through this organized listing.

th4210u2002 manual

Article Plan: TH4210U2002 Manual

This document outlines a comprehensive guide for the Honeywell TH4210U2002 thermostat, covering installation, operation, troubleshooting, and detailed technical specifications.

It details compatibility with conventional and heat pump systems, including wiring diagrams and advanced features like autochangeover and emergency heat.

Furthermore, it provides resources for support, warranty details, and frequently asked questions, ensuring a user-friendly experience with this programmable thermostat.

The Honeywell TH4210U2002 is a versatile programmable thermostat, supporting both 1H/1C conventional and 2H/1C heat pump systems with electric auxiliary heat capabilities.

This T4 Pro model offers flexible scheduling options – 7-day, 5-2, or 5-1-1 – and features like autochangeover for enhanced comfort and energy efficiency.

Designed for ease of use, it provides precise temperature control and integrates seamlessly into various home heating and cooling setups, as detailed in this manual.

Overview of the TH4210U2002 Model

The Honeywell TH4210U2002 thermostat represents a significant advancement in home climate control, offering a blend of functionality and user-friendliness. This T4 Pro series model is designed to accommodate a wide range of heating and cooling systems, specifically 1H/1C conventional setups and 2H/1C heat pump configurations with electric auxiliary heat.

Its core strength lies in its programmability, allowing homeowners to establish customized schedules – choosing from 7-day, 5-2 day, or 5-1-1 day options – to optimize comfort and minimize energy consumption. The thermostat’s intuitive interface and clear display contribute to a seamless user experience, making it accessible for both tech-savvy and novice users.

Furthermore, the TH4210U2002 boasts features like autochangeover, simplifying seasonal transitions between heating and cooling modes.

Key Features and Benefits

The Honeywell TH4210U2002 thermostat delivers numerous advantages for homeowners seeking enhanced climate control. Key features include programmable 7-day/5-2/5-1-1 schedules, optimizing comfort and energy savings. Its compatibility with both conventional (1H/1C) and heat pump (2H/1C) systems offers versatility.

The autochangeover function simplifies seasonal adjustments, while the emergency heat mode provides reliable backup during outages. A clear display and intuitive controls ensure ease of use. Benefits extend to reduced energy bills, consistent temperature maintenance, and increased home comfort.

Ultimately, the TH4210U2002 provides a smart and efficient solution for managing your home’s heating and cooling needs.

Compatibility with Heating and Cooling Systems

The Honeywell TH4210U2002 thermostat demonstrates broad compatibility, supporting both conventional and heat pump heating and cooling systems. Specifically, it functions effectively with up to 1 Heat/1 Cool conventional setups, and extends to 2 Heat/1 Cool heat pump configurations with electric auxiliary heat.

This thermostat accommodates various system types, ensuring adaptability for diverse home environments. Proper wiring is crucial, utilizing terminal designations like R, RC, C, W, O/B, Y, and G.

Its versatility makes it a suitable upgrade for many existing HVAC installations, offering enhanced control and efficiency.

Installation Guide

This section provides step-by-step instructions for safely installing the TH4210U2002 thermostat, including wiring diagrams, mounting procedures, and essential safety precautions for a secure setup.

Safety Precautions Before Installation

Prior to commencing installation, always disconnect power to your heating and cooling system at the breaker box to prevent electrical shock. Verify the system is completely de-energized using a non-contact voltage tester.

Carefully read and understand all wiring diagrams before making any connections, ensuring correct terminal assignments. If you are uncomfortable working with electrical wiring, consult a qualified HVAC technician.

Avoid installing the thermostat in direct sunlight or near sources of heat or drafts, as this can affect temperature readings. Keep small parts away from children during the installation process. Always follow local electrical codes and regulations.

Wiring Diagrams for Conventional Systems

For conventional 1H/1C systems, connect the R wire to the Rh terminal and the C wire to the Common (C) terminal. The W wire connects to the W terminal for heating, while the Y wire connects to the Y terminal for cooling. Ensure the G wire is connected to the G terminal for fan control.

If your system utilizes a single R wire, it can be connected to either Rh or Rc, but not both. Proper grounding is crucial; verify a secure connection to the system’s ground wire. Refer to the detailed wiring diagram included in the manual for specific configurations.

Wiring Diagrams for Heat Pump Systems

For 2H/1C heat pump systems, the wiring is more complex. Connect R to Rh and Rc, C to Common (C), Y to Y for cooling, and G to G for the fan. The O/B wire controls reversing valve operation; connect it to either O or B, depending on your system’s configuration – consult your HVAC professional. W connects to W1 for the first stage of heat, and L to W2 for auxiliary/second-stage heat.

Carefully review the diagram, noting the distinction between O and B wiring. Incorrect wiring can damage your system. Ensure all connections are secure and follow local electrical codes.

Mounting the Thermostat Base

Before mounting, ensure the power to your HVAC system is completely OFF at the breaker. Remove your old thermostat, carefully labeling the wires. Use the provided mounting screws to attach the thermostat base to the wall, ensuring it’s level for accurate temperature readings.

Feed the wires through the opening in the base and connect them to the appropriate terminals, referencing the wiring diagrams. Gently push any excess wire back into the wall. Snap the thermostat body onto the base, verifying a secure connection.

Operating Instructions

This section details how to navigate the TH4210U2002’s display interface, set the date and time, program schedules (7-day, 5-2, 5-1-1), and utilize override functions effectively.

Understanding the Display Interface

The Honeywell TH4210U2002 thermostat features a user-friendly display providing essential information at a glance. The screen prominently shows the current room temperature and the setpoint temperature. Icons indicate the current system mode – Heat, Cool, Auto, or Off.

Navigation is achieved through intuitive buttons allowing users to adjust settings and access programming options. A dedicated fan control button manages fan operation (Auto or On). The display also indicates the programmed schedule and any active temporary or permanent overrides.

Understanding these visual cues and button functions is crucial for efficient operation and customization of your home’s climate control.

Setting the Date and Time

Accurate date and time settings are fundamental for proper scheduling with the Honeywell TH4210U2002 thermostat. To begin, access the thermostat’s menu using the appropriate buttons – typically labeled ‘Menu’ or ‘Set’. Navigate to the ‘Date’ and ‘Time’ settings using the arrow keys.

Adjust the year, month, day, hour, and minute using the up and down arrows, confirming each selection. Ensure AM/PM is correctly set. Proper timekeeping ensures programmed schedules activate at the intended times, maximizing energy savings and comfort.

Refer to the full manual for specific button sequences.

Programming Schedules (7-Day, 5-2, 5-1-1)

The TH4210U2002 offers flexible scheduling options to match your lifestyle. Choose from 7-Day programming, creating unique schedules for each day of the week. Alternatively, utilize the 5-2 schedule, applying one set of settings for weekdays and another for weekends.

The 5-1-1 option allows a distinct schedule for Monday, and a shared schedule for Tuesday-Friday, with a separate setting for Saturday and Sunday. Within each schedule, define multiple periods with specific temperature settings.

Careful programming optimizes comfort and energy efficiency.

Temporary and Permanent Overrides

The TH4210U2002 allows for both temporary and permanent adjustments to your programmed schedule. A temporary override adjusts the temperature for a specified duration, reverting to the regular schedule afterward. This is ideal for short-term comfort needs without disrupting long-term settings.

For lasting changes, utilize the permanent override function. This modifies the schedule indefinitely until manually changed. This feature is useful for vacations or seasonal adjustments.

Both override options are easily accessible through the thermostat’s interface, providing convenient control.

Technical Specifications

This section details the TH4210U2002’s electrical specifications, temperature range, accuracy, and crucial terminal designations (R, RC, C, W, O/B, Y, G, L) for proper installation.

Electrical Specifications

The Honeywell TH4210U2002 thermostat operates on a standard 24VAC power source, ensuring compatibility with most residential heating and cooling systems. It requires a common (C) wire for consistent power, crucial for reliable operation and display functionality.

The thermostat’s input voltage range is 20-30 VAC, and its power consumption is relatively low, typically around 3W. It’s designed to handle a variety of load types, supporting both inductive and resistive loads commonly found in HVAC equipment.

Proper wiring and voltage levels are essential for optimal performance and to prevent damage to the thermostat or connected systems. Always consult a qualified technician for electrical work.

Temperature Range and Accuracy

The Honeywell TH4210U2002 thermostat boasts a wide temperature range, effectively managing environments from 40°F to 90°F (4.4°C to 32.2°C) for accurate heating and cooling control. Its temperature sensing capabilities provide reliable readings for consistent comfort.

The thermostat’s accuracy is typically ±1°F (±0.6°C), ensuring precise temperature regulation throughout your home. This level of precision minimizes temperature fluctuations and optimizes energy efficiency.

Factors like thermostat placement and airflow can influence accuracy; avoid direct sunlight or drafts for best results.

Terminal Designations (R, RC, C, W, O/B, Y, G, L)

Understanding the terminal designations is crucial for correct wiring of the TH4210U2002 thermostat. ‘R’ and ‘RC’ are the 24VAC power terminals, with ‘RC’ often used for heat pump systems. ‘C’ is the common wire, essential for consistent power. ‘W’ activates the heating system, while ‘Y’ controls cooling.

‘G’ energizes the fan, and ‘O/B’ reverses the valve for heat pump changeover – ‘O’ for cooling, ‘B’ for heating. Lastly, ‘L’ is used for the emergency heat function in heat pump setups.

Proper connection ensures optimal system operation.

Troubleshooting Common Issues

This section addresses frequent problems with the TH4210U2002, including power failures, inaccurate readings, unresponsive systems, and deciphering error codes for swift resolution.

Thermostat Not Powering On

If the TH4210U2002 thermostat fails to power on, begin by verifying the power supply. Ensure the circuit breaker controlling the thermostat is active and hasn’t tripped. Next, carefully inspect the wiring connections, specifically the ‘R’ and ‘C’ terminals, confirming they are securely fastened.

A loose connection is a common culprit. Confirm the ‘C’ wire (common wire) is properly connected, as it’s essential for consistent power. If a ‘C’ wire isn’t present, consider installing one for reliable operation. Check the batteries, if applicable, and replace them with fresh ones. Finally, examine the thermostat base for any physical damage that might interrupt the power flow.

Incorrect Temperature Readings

If the TH4210U2002 displays inaccurate temperature readings, first ensure the thermostat isn’t directly exposed to sunlight or drafts, as these can significantly affect its sensors. Verify the thermostat is mounted on an interior wall, away from heat sources like lamps or appliances.

Check for proper airflow around the unit. If the issue persists, recalibrate the thermostat’s temperature settings through the menu. Compare the displayed temperature with a known accurate thermometer. If a substantial discrepancy remains, consider a sensor malfunction requiring professional service.

System Not Responding to Settings

When the TH4210U2002 fails to respond to programmed settings, initially confirm the system’s power supply and wiring connections. Ensure the circuit breaker hasn’t tripped and all wires are securely fastened to the correct terminals (R, RC, W, Y, G, etc.).

Verify the thermostat’s mode is set correctly (Heat, Cool, Auto). Check for error codes displayed on the screen, referencing the troubleshooting section for specific meanings. If problems continue, a faulty system component or wiring issue may necessitate professional HVAC assistance.

Error Codes and Their Meanings

The Honeywell TH4210U2002 thermostat utilizes error codes to diagnose system malfunctions. While specific codes vary, common indicators include “E1” suggesting a communication failure, “E2” potentially indicating a sensor issue, and “E3” signaling a low battery.

Consult the full user manual for a comprehensive list and detailed explanations of each code. Addressing these errors often involves checking wiring, replacing batteries, or contacting a qualified HVAC technician for more complex repairs. Ignoring error codes can lead to system inefficiency or damage.

Advanced Features

The TH4210U2002 boasts autochangeover, emergency heat, and flexible fan control options, enhancing comfort and energy efficiency through customized heating and cooling management.

Autochangeover Functionality

The autochangeover feature of the TH4210U2002 intelligently switches between heating and cooling modes, optimizing comfort without manual adjustments. This eliminates the need for users to manually select the desired mode as the seasons transition.

When enabled, the thermostat monitors indoor temperatures and automatically activates either heating or cooling to maintain the setpoint. This is particularly beneficial for climates with fluctuating temperatures.

The system determines the changeover point based on pre-programmed settings, ensuring efficient operation and consistent indoor climate control. Users can typically adjust the changeover temperature to suit their preferences. This feature contributes to energy savings and enhanced convenience.

Emergency Heat Mode

The Emergency Heat mode on the TH4210U2002 provides a crucial backup heating source when the primary heat pump system experiences issues or during extremely cold weather. Activated manually or automatically depending on system configuration, it bypasses the heat pump and relies solely on electric resistance heating.

This ensures continued warmth even if the heat pump fails. However, it’s important to note that emergency heat is less efficient than standard heat pump operation, resulting in higher energy consumption.

Users should utilize this mode only when necessary and revert to normal operation once the primary system is restored, minimizing energy costs.

Fan Control Options (Continuous, Auto)

The TH4210U2002 thermostat offers two distinct fan control settings: “Auto” and “On” (Continuous). In “Auto” mode, the fan operates only during heating or cooling cycles, providing efficient airflow when needed and conserving energy. Selecting “On” ensures the fan runs continuously, regardless of system operation.

Continuous fan operation can improve air circulation and temperature distribution throughout the home, but it also increases energy usage.

Users can choose the setting that best suits their comfort preferences and energy-saving goals.

Resources and Support

Access Honeywell Home’s support website for manuals, FAQs, and troubleshooting. Downloadable user guides and direct assistance are readily available for the TH4210U2002.

Honeywell Home Support Website

The Honeywell Home support website is a central hub for all your TH4210U2002 thermostat needs. You’ll find a comprehensive library of resources, including downloadable user manuals in various formats, detailed installation guides, and helpful troubleshooting tips to resolve common issues.

The website also features an extensive FAQ section addressing frequently asked questions about programming, operation, and compatibility. Furthermore, you can access video tutorials demonstrating key features and procedures. Direct contact options, such as a live chat feature and a customer support phone number, are available for personalized assistance.

Visit Honeywell Home to maximize your thermostat experience!

User Manual Download Links

Accessing the official Honeywell TH4210U2002 user manual is straightforward. A direct link to the PDF version is available on the Honeywell Home website, ensuring you have the most up-to-date information at your fingertips.

Alternative download locations include authorized Honeywell distributors and reputable online documentation archives. These resources provide convenient access to the complete manual, covering installation, operation, troubleshooting, and technical specifications.

Ensure you download from trusted sources to avoid outdated or inaccurate information. Having a digital copy readily available simplifies setup and maintenance.

Frequently Asked Questions (FAQ)

Is the TH4210U2002 compatible with my existing heating system? This thermostat supports both conventional (1H/1C) and heat pump (2H/1C) systems. Can I program different schedules for weekdays and weekends? Yes, it offers 7-day, 5-2, and 5-1-1 programming options.

What do the error codes mean? Refer to the troubleshooting section for a comprehensive list of error codes and their corresponding solutions. How do I reset the thermostat to factory settings? Consult the manual for detailed reset instructions.

Where can I find technical specifications? All specifications are listed in the manual.

Warranty Information

Honeywell Home provides a limited warranty for the TH4210U2002 thermostat, covering defects in materials and workmanship. Coverage details, claim processes, and limitations are outlined.

Coverage Details

The Honeywell TH4210U2002 thermostat is covered by a limited warranty against manufacturing defects for a specified period from the date of purchase. This warranty typically covers component failures affecting the thermostat’s core functionality, such as inaccurate temperature readings or display issues.

However, it generally does not cover damage resulting from improper installation, misuse, abuse, acts of God, or unauthorized modifications. The warranty is valid only for the original purchaser and requires proof of purchase. Specifically, the warranty ensures the product is free from defects under normal use.

Claim Process

To initiate a warranty claim for your Honeywell TH4210U2002 thermostat, you must first contact Honeywell Home Support. This can be done through their official website or by calling their dedicated customer service line. You will need to provide proof of purchase, including the date and place of purchase, along with a detailed description of the defect.

Honeywell may request that you return the defective thermostat for inspection. If the claim is approved, Honeywell will, at their discretion, repair or replace the unit. Shipping costs for the return may be the responsibility of the customer.

Limitations and Exclusions

The Honeywell TH4210U2002 warranty does not cover damage resulting from improper installation, misuse, abuse, or neglect. It excludes issues caused by external factors like power surges, acts of God, or unauthorized modifications. Normal wear and tear are also not covered under the warranty terms.

Furthermore, the warranty is void if the thermostat is opened or repaired by anyone other than an authorized Honeywell service representative. Incidental or consequential damages are specifically excluded, limiting the warranty to the repair or replacement of the defective unit itself.

can am manual

Can-Am Manual: A Comprehensive Guide

Can-Am manuals, encompassing operators and shop versions, are readily available via ManualsLib and dedicated Can-Am forums; These resources provide crucial information for DIY enthusiasts, covering models like the Outlander 2021 and Outlander X mr series.

Can-Am, a brand of BRP, has established itself as a prominent manufacturer of high-performance ATVs (All-Terrain Vehicles) and Side-by-Sides. These machines are engineered for both recreational riding and demanding work applications. Understanding your Can-Am vehicle requires access to comprehensive documentation, making the operators manual an essential resource.

Can-Am’s diverse model range, including the popular Outlander series and specialized X mr models, necessitates specific manuals tailored to each vehicle; These manuals detail everything from basic operation and safety precautions to intricate maintenance procedures. Accessing these guides, whether in physical or digital format through platforms like ManualsLib, is paramount for responsible ownership.

The availability of free downloadable shop manuals further empowers DIY enthusiasts to perform repairs and modifications. Proper utilization of these resources ensures optimal performance, longevity, and safety when operating your Can-Am ATV or Side-by-Side.

Understanding Can-Am Model Series

Can-Am organizes its ATV and Side-by-Side offerings into distinct model series, each catering to specific rider needs and preferences. The Outlander series, for example, represents a versatile range of ATVs suitable for both trail riding and utility tasks. Within the Outlander family, variations like the 2021 Series and the mud-focused X mr Series demand specific operators manuals.

Accessing the correct manual is crucial, as procedures and component locations can vary significantly between series and even model years. ManualsLib provides a platform to locate PDF downloads for various Can-Am models, ensuring owners have the appropriate documentation.

Furthermore, understanding the nuances of each series – whether it’s the transmission type or specific features – is detailed within the corresponding shop manual. These resources are invaluable for DIY maintenance and repair, allowing owners to confidently address mechanical issues and optimize their Can-Am experience.

Locating Your Can-Am Manual

Finding the correct Can-Am manual is the first step towards proper maintenance and operation. ManualsLib stands out as a primary online resource, offering a searchable database of operators manuals and, in some cases, shop manuals in PDF format. Simply navigating to their website and entering your specific Can-Am model and year – such as “Can-am OUTLANDER 2021 Series” – will yield relevant results.

Beyond ManualsLib, dedicated Can-Am ATV and UTV forums often host links to downloadable manuals and resources shared by fellow enthusiasts. These forums can be invaluable for locating manuals for older or less common models.

Remember to verify the manual’s compatibility with your exact Can-Am model and year to ensure accurate information. A dedicated shop manual download site, frequently discussed within these forums, provides another avenue for obtaining detailed repair instructions.

Digital Manuals: ManualsLib and Online Resources

ManualsLib emerges as a central hub for accessing Can-Am digital manuals, providing a convenient platform to view and download operators manuals in PDF format. This accessibility extends to various models, including the Can-am OUTLANDER 2021 Series, Can-am outlander 650 2021, and the Outlander X mr Series. The site’s search functionality streamlines the process of locating the specific manual needed for your offroad vehicle.

However, ManualsLib isn’t the sole provider. Numerous online resources, particularly Can-Am ATV and UTV forums, curate links to downloadable manuals and supplementary information. These forums foster a community where users share valuable resources, including access to shop manuals and parts diagrams.

Utilizing these combined resources ensures a comprehensive approach to finding the digital documentation required for maintaining and repairing your Can-Am machine.

Free Downloadable Shop Manuals

For Can-Am enthusiasts embracing the DIY approach, obtaining a free shop manual is invaluable. Several online platforms cater to this need, offering downloadable manuals for various Can-Am models. Dedicated Can-Am ATV and UTV forums frequently host links to these resources, compiled and shared by community members.

A particularly highlighted resource is a Shop Manual Download Site, offering access to a range of manuals. These manuals provide detailed instructions for repairs, maintenance, and troubleshooting, empowering owners to perform complex tasks independently. Accessing these resources can significantly reduce maintenance costs and enhance understanding of your machine.

However, users should exercise caution and verify the source’s reliability when downloading files from online forums. Ensuring the manual is compatible with your specific Can-Am model is also crucial for accurate information and successful repairs.

Can-Am Outlander 2021 Series Manual Overview

The Can-Am Outlander 2021 Series Operators Manual, readily available on platforms like ManualsLib, serves as a comprehensive guide for owners. This manual covers essential aspects of operation, maintenance, and safety precautions specific to the 2021 Outlander models, including the 650 and 850 variants, as well as the DPS versions.

It details procedures for pre-ride inspections, starting and stopping, understanding dashboard indicators, and basic operational controls. Furthermore, the manual provides insights into the vehicle’s systems, aiding in routine maintenance tasks. ManualsLib offers a downloadable PDF version, ensuring easy access to information.

Owners can utilize this manual to familiarize themselves with their Outlander, maximizing its performance and longevity. Proper understanding of the manual’s contents is crucial for safe and responsible operation of this powerful ATV.

Can-Am Outlander X mr Series Manual Overview

The Can-Am Outlander X mr Series Operators Manual, accessible through resources like ManualsLib, is a vital document for owners of these specialized ATVs. This manual provides detailed instructions on operating and maintaining the Outlander X mr, designed for navigating challenging muddy terrains. It covers all essential aspects, from pre-ride checks to understanding the unique features of the X mr series.

Key areas addressed include starting and stopping procedures, interpreting dashboard indicators, and performing routine maintenance. The manual emphasizes safety precautions specific to the X mr’s capabilities. A downloadable PDF version on ManualsLib ensures convenient access to this critical information.

Understanding the Outlander X mr manual is paramount for maximizing performance and ensuring safe operation in demanding conditions. It empowers owners to confidently tackle muddy trails and enjoy the full potential of their Can-Am machine.

Safety Precautions and Warnings

Can-Am manuals prioritize rider safety, dedicating significant sections to crucial precautions and warnings. These guidelines, found within both Operator’s and Shop manuals, emphasize the inherent risks associated with ATV operation. Riders are strongly advised to thoroughly read and understand these warnings before operating any Can-Am vehicle.

Key safety points include wearing appropriate protective gear – helmet, eye protection, gloves, and sturdy footwear – at all times. The manuals caution against operating under the influence of drugs or alcohol and highlight the importance of responsible riding practices. Specific warnings address terrain limitations, load capacity, and passenger safety.

Can-Am manuals also detail potential hazards related to vehicle maintenance and repair. Following recommended procedures and using appropriate tools are essential to prevent injury. Ignoring safety warnings can lead to severe accidents and potential harm. Always prioritize safety when operating or maintaining your Can-Am.

Pre-Ride Inspection Checklist

Can-Am manuals consistently emphasize the importance of a thorough pre-ride inspection. This checklist, detailed in both Operator’s and Shop manuals, is crucial for identifying potential mechanical issues and ensuring safe operation. Before each ride, riders should systematically inspect several key components.

The checklist begins with tire pressure and tread depth, followed by a check of the fluid levels – oil, coolant, and brake fluid. Brake functionality, including lever travel and responsiveness, must be verified. Steering should be checked for smooth operation and any excessive play. Inspect lights, signals, and the instrument panel for proper function.

Further inspection includes examining the throttle, chain (or belt), and suspension components for damage or wear. Securely fastened nuts and bolts are vital, as are any signs of leaks. A comprehensive pre-ride inspection, as outlined in the Can-Am manual, significantly reduces the risk of accidents and ensures a safe riding experience.

Basic Operation and Controls

Can-Am manuals dedicate significant sections to explaining basic operation and controls, vital for both novice and experienced riders. Understanding these controls is paramount for safe and enjoyable operation of your Outlander or side-by-side. The manual details the function of the throttle, steering, and braking systems, emphasizing proper technique.

Detailed diagrams illustrate the location of all controls – ignition switch, gear selector (for both manual and automatic transmissions), parking brake, and differential lock. The manual explains how to engage and disengage 2WD and 4WD modes, crucial for navigating varied terrain. It also covers the operation of any auxiliary systems, like winch controls.

Furthermore, the Can-Am manual provides clear instructions on utilizing the dashboard indicators, explaining what each light signifies. Familiarizing yourself with these controls, as outlined in the manual, ensures confident and controlled operation of your machine.

Starting and Stopping Procedures

Can-Am manuals meticulously detail starting and stopping procedures, emphasizing safety at every step. The manual outlines a pre-start checklist, including verifying fluid levels and ensuring the parking brake is engaged. It explains the correct ignition sequence and any specific starting requirements for different models, like the Outlander series.

Detailed instructions cover both cold and warm starting procedures, addressing potential issues like flooding. The manual stresses the importance of allowing the engine to warm up before applying significant load. Conversely, stopping procedures are equally detailed, emphasizing the use of both the brake pedal and engine braking.

The manual also highlights the proper procedure for shutting down the machine, including engaging the parking brake and turning off the ignition. Following these procedures, as outlined in your Can-Am manual, minimizes wear and tear and ensures long-term reliability.

Understanding the Dashboard Indicators

Can-Am manuals dedicate significant attention to deciphering the dashboard indicators, crucial for monitoring vehicle health and performance. These indicators, varying slightly between models like the Outlander and Outlander X mr series, provide vital information regarding engine status, transmission function, and potential system faults.

The manual provides a comprehensive legend, explaining each symbol’s meaning – from low fuel warnings and coolant temperature alerts to diagnostic trouble codes (DTCs) related to the CAN Bus communication system. Understanding these indicators allows operators to proactively address issues before they escalate into major repairs.

Furthermore, the manual details the difference between warning lights (requiring immediate attention) and informational lights. Proper interpretation, guided by your Can-Am manual, ensures safe operation and prevents costly damage. Ignoring these signals can lead to severe mechanical failures.

Transmission and Drive System

Can-Am manuals offer detailed sections dedicated to the transmission and drive system, vital for understanding the operation and maintenance of your ATV or side-by-side. These sections cover both manual and automatic transmission variants, outlining their specific functionalities and recommended service intervals.

The manual explains the intricacies of the drive system, including the clutch, differential, and axles. Diagrams and illustrations clarify component locations and interactions. For models with selectable drive modes (2WD, 4WD, and Diff Lock), the manual provides clear instructions on engaging and disengaging these features.

Troubleshooting guides address common issues like slipping clutches or differential problems. Regular inspection, as detailed in the Can-Am manual, is crucial for preventing failures. Understanding the system, aided by the manual, empowers owners to perform basic maintenance and identify potential concerns early on.

Manual Transmission Operation

Can-Am manuals dedicated to models featuring a manual transmission provide comprehensive guidance on its operation. The manual details the gear shift pattern, emphasizing smooth and precise shifting techniques for optimal performance and longevity. It explains the function of the clutch, including proper engagement and disengagement procedures to avoid jerking or stalling.

Specific instructions cover shifting both up and down, highlighting the importance of matching engine speed to road conditions. The manual also addresses techniques for navigating challenging terrain, such as utilizing engine braking on descents. Troubleshooting sections pinpoint common issues like difficult shifting or clutch slippage, offering diagnostic steps and potential solutions.

Regular clutch adjustment and cable lubrication, as outlined in the Can-Am manual, are essential for maintaining smooth operation. Understanding the manual’s guidance ensures efficient and reliable performance from your manual transmission.

Automatic Transmission Operation (if applicable)

Can-Am models equipped with an automatic transmission, as detailed in their respective manuals, offer a simplified driving experience. The manual explains the various drive modes – typically including Park, Reverse, Neutral, and Drive – and their appropriate usage. It clarifies the operation of the forward and reverse gears, emphasizing safe engagement procedures.

Information is provided on the transmission’s intelligent shifting capabilities, adapting to terrain and rider input. The manual outlines how the transmission manages gear selection for optimal power delivery and efficiency. Troubleshooting sections address potential issues like delayed engagement or erratic shifting, offering diagnostic steps and recommended solutions.

Regular transmission fluid checks and changes, as specified in the Can-Am manual, are crucial for maintaining performance. Understanding the automatic transmission’s operation, as described in the manual, ensures a smooth and reliable ride.

Braking System Maintenance

Can-Am manuals dedicate significant attention to braking system maintenance, emphasizing its critical role in safety. The manual details procedures for inspecting brake pads for wear, outlining acceptable thickness limits and replacement guidelines. It covers brake fluid level checks and topping-up procedures, specifying the correct fluid type to avoid damage.

Detailed instructions are provided for bleeding the brake lines to remove air bubbles, ensuring optimal braking performance. The manual explains how to inspect brake rotors for damage, scoring, or warping, and when replacement is necessary. It also covers the inspection of brake lines and hoses for leaks or cracks.

Regular maintenance, as outlined in the Can-Am manual, is vital for maintaining stopping power. Following these guidelines ensures the braking system operates reliably, contributing to a safe riding experience.

Steering System Inspection

Can-Am manuals prioritize steering system integrity, providing comprehensive inspection procedures. These manuals detail checking tie rod ends for play, outlining acceptable tolerances and replacement instructions. They emphasize inspecting the steering linkage for damage, including bent or cracked components, and proper lubrication points.

The manual guides users through inspecting the steering rack or gearbox for leaks and smooth operation. It covers checking the power steering fluid level (if equipped) and identifying potential issues like pump noise or fluid contamination. Proper torque specifications for steering components are clearly stated to ensure secure assembly.

Regular inspection, as detailed in the Can-Am manual, is crucial for maintaining responsive and predictable steering. Adhering to these guidelines ensures optimal handling and contributes significantly to rider safety and control during operation.

Suspension System Overview

Can-Am manuals provide a detailed overview of the ATV or side-by-side’s suspension system, crucial for understanding its operation and maintenance. These guides typically begin by identifying the key components: shocks, springs, A-arms, and sway bars (if equipped). Diagrams illustrate the arrangement and function of each part.

The manuals explain the different suspension types used in Can-Am models – independent rear suspension (IRS) being common – and their benefits regarding ride comfort and handling. They outline the importance of maintaining proper spring preload and shock damping for optimal performance.

Furthermore, the Can-Am manual details inspection procedures for worn bushings, ball joints, and shock leaks. It emphasizes the significance of regular maintenance to prevent premature wear and ensure a safe and controlled riding experience. Proper torque specifications are provided for all suspension fasteners.

Cooling System Maintenance

Can-Am manuals dedicate significant attention to cooling system maintenance, vital for preventing engine overheating and ensuring longevity. The guides detail the location of all cooling system components, including the radiator, coolant reservoir, water pump, and thermostat. Diagrams clearly illustrate the coolant flow path.

Regularly checking coolant levels is emphasized, along with the correct type of coolant specified for your Can-Am model. The manual outlines procedures for flushing and refilling the cooling system, including proper bleeding techniques to remove air pockets. Inspection of hoses and clamps for leaks or damage is also crucial.

Furthermore, the Can-Am manual provides instructions for cleaning the radiator fins to maintain optimal airflow. It highlights the importance of using the correct tools and torque specifications when servicing the cooling system, preventing damage and ensuring a secure seal.

Engine Maintenance and Oil Changes

Can-Am manuals provide comprehensive guidance on engine maintenance, with oil changes being a primary focus. Detailed instructions cover the recommended oil type, capacity, and change intervals specific to each model, like the Outlander series. Diagrams illustrate the location of the oil filter, drain plug, and fill point.

The manual emphasizes the importance of warming up the engine before draining the oil for optimal flow. Torque specifications for the drain plug and filter are clearly stated to prevent leaks or damage. Proper disposal of used oil is also highlighted, adhering to environmental regulations.

Beyond oil changes, Can-Am manuals detail valve clearance checks and adjustments, spark plug replacement procedures, and air filter maintenance. They also cover inspecting the engine for leaks and unusual noises, promoting proactive maintenance and preventing costly repairs.

Electrical System Basics

Can-Am manuals dedicate significant sections to the electrical system, crucial for understanding operation and troubleshooting. They detail the function of key components like the battery, stator, regulator/rectifier, and wiring harness. Diagrams illustrate the wiring schematics, aiding in identifying connections and tracing circuits.

A core element covered is the CAN Bus communication system, explaining its role in data exchange between various electronic control units (ECUs). The manuals specify CAN Bus high and low voltage standards, essential for diagnostics and repair. Understanding error frame analysis in CAN/CAN-FD networks is also addressed, helping pinpoint communication faults.

Furthermore, the manuals provide guidance on fuse locations and replacement, headlight and taillight maintenance, and troubleshooting common electrical issues. Safety precautions regarding electrical work are prominently featured, emphasizing the importance of disconnecting the battery before performing any repairs.

CAN Bus Communication System

Can-Am manuals extensively cover the Controller Area Network (CAN) Bus, a vital component of modern ATV and Side-by-Side functionality. This system allows communication between the vehicle’s various ECUs – engine control, transmission, braking, and more – without a central computer. The manuals explain the principles of CAN Bus operation, detailing how data is transmitted and received.

Crucially, the manuals outline the CAN high and low voltage standards, specifying the voltage levels for reliable communication. They also address the importance of proper termination resistance to prevent signal reflections. Understanding error frame analysis is key to diagnosing CAN Bus issues, and the manuals provide guidance on interpreting error codes.

Furthermore, the documentation details how to identify and troubleshoot CAN Bus related problems, including wiring faults and ECU malfunctions. The CAN/CAN-FD protocols are explained, highlighting the differences and implications for diagnostics.

CAN Bus High and Low Voltage Standards

Can-Am service manuals meticulously detail the CAN Bus’s voltage specifications, essential for accurate diagnostics and repairs. The CAN High (CANH) line typically maintains a standard voltage of 3.5V during a dominant state, while the CAN Low (CANL) line operates at 1.5V. These levels ensure reliable data transmission across the network.

During a recessive state, both CANH and CANL converge towards a common voltage. Importantly, in a low-voltage condition, CANH and CANL both exhibit a voltage of approximately 2.5V. Maintaining these standards is critical; deviations can indicate wiring issues, ECU failures, or improper termination.

Can-Am manuals emphasize the importance of using a multimeter to verify these voltage levels during troubleshooting. Proper understanding of these standards, as outlined in the documentation, allows technicians to effectively pinpoint and resolve communication problems within the vehicle’s electronic systems.

Error Frame Analysis in CAN/CAN-FD

Can-Am diagnostic procedures, detailed within the service manuals, heavily rely on understanding CAN/CAN-FD error frames. These frames signal communication disruptions on the CAN Bus, indicating potential issues with ECUs, wiring, or sensors. A key indicator is the transmission of continuous dominant bits – specifically, approximately 12us of a dominant signal – where a recessive bit is expected.

Can-Am technicians utilize oscilloscopes to visually confirm error frame occurrences, analyzing the waveform for these prolonged dominant signals. The manuals provide examples of these waveforms, aiding in accurate identification. Error frames trigger a ‘Bus-Off’ state, halting communication from the offending node.

Analyzing the source of the error frame is crucial. Can-Am manuals guide users through isolating the faulty component, often involving disconnecting nodes one by one to pinpoint the source of the disruption. Correct interpretation of error frames, as described in the documentation, is vital for efficient troubleshooting.

Troubleshooting Common Issues

Can-Am manuals dedicate significant sections to troubleshooting, offering systematic approaches to resolving frequent problems. These guides emphasize utilizing the CAN Bus diagnostic system to identify error codes, providing a starting point for investigation. Common issues addressed include starting difficulties, erratic engine performance, and electrical malfunctions.

The manuals detail procedures for checking connections, testing sensors, and verifying ECU functionality. DIY enthusiasts benefit from detailed wiring diagrams and component location illustrations. Specific attention is given to issues related to the transmission, braking, and steering systems.

Furthermore, the Can-Am service documentation highlights the importance of interpreting error frames within the CAN communication network. By understanding these signals, technicians can isolate faulty components and restore proper operation. Regular maintenance, as outlined in the manual, proactively prevents many common issues.

Parts Manuals and Diagrams

Can-Am manuals are invaluable when sourcing replacement parts, featuring detailed exploded-view diagrams. These diagrams illustrate the precise arrangement of components, simplifying identification and ordering. Parts manuals typically categorize components by system – engine, transmission, suspension, and electrical – for efficient navigation.

Each part is assigned a unique identification number, crucial for accurate ordering from Can-Am dealerships or online retailers. The manuals often include supersession information, indicating updated part numbers for improved designs or availability. Access to these diagrams significantly aids DIY repairs and maintenance.

Beyond visual representations, Can-Am parts lists specify quantities required for a complete assembly. This prevents overlooking essential components during rebuilds. Utilizing these resources ensures compatibility and proper fit, maximizing repair quality and minimizing downtime. Online resources often supplement the printed manuals with interactive parts finders.

Resources for Can-Am DIYers

Can-Am enthusiasts undertaking self-maintenance benefit from a wealth of online resources. Dedicated ATV and UTV forums, like Can-Am ATV UTV Forums, provide platforms for sharing knowledge, troubleshooting issues, and accessing user-generated repair guides. ManualsLib offers a centralized repository for operators and shop manuals, streamlining access to essential documentation.

Websites like MotorcycleManuals.Info specialize in providing downloadable service and repair manuals in PDF format. These resources often include wiring diagrams and fault code lists, aiding in complex diagnostics. YouTube channels dedicated to Can-Am maintenance offer visual step-by-step instructions for common repairs.

Furthermore, online parts retailers frequently provide interactive parts finders, simplifying the process of identifying and ordering components. Utilizing these combined resources empowers DIYers to confidently tackle maintenance and repairs, saving on professional service costs.

gmc terrain manual

Welcome! This GMC Terrain manual guides you through vehicle functions, ensuring optimal use and understanding of its capabilities; keep it readily available.

This comprehensive guide provides detailed instructions and information about your GMC Terrain, aiding in safe and efficient operation, and maintenance procedures.

GMC trademarks are protected; this manual is for quick reference, especially for Canadian Vehicle Owners, offering insights into vehicle features and symbols.

Understanding the Purpose of this Manual

This owner’s manual serves as a vital resource, meticulously designed to familiarize you with every facet of your GMC Terrain. It’s more than just a guide; it’s your key to unlocking the full potential of your vehicle, ensuring a safe, enjoyable, and informed driving experience.

Within these pages, you’ll discover detailed explanations of all features, controls, and systems, alongside crucial safety precautions and maintenance schedules. The manual provides instructions for optimal vehicle operation, covering everything from basic driving techniques to advanced technological functionalities.

Specifically for Canadian Vehicle Owners, it details relevant regulations and service information. Keeping this manual accessible allows for quick reference and a deeper understanding of your GMC.

Important Safety Precautions

Safety is paramount when operating your GMC Terrain. This manual details critical precautions to protect you and your passengers. Always familiarize yourself with the airbag system information and the stability control system’s functions before driving.

Pay close attention to all warning lights and their meanings, as they indicate potential issues requiring immediate attention. Never operate the vehicle without understanding the emergency assistance features available. Adhering to scheduled maintenance intervals is crucial for maintaining optimal safety performance.

Canadian Vehicle Owners should also be aware of specific regional safety regulations. Prioritize safe driving practices and consult this manual for comprehensive guidance;

Vehicle Overview

Explore your GMC Terrain! This section details exterior and interior features, dashboard symbols, and controls for a complete understanding of your vehicle.

Exterior Features and Controls

Discover the Terrain’s exterior! This section details key features like headlights, taillights, and exterior mirrors, explaining their operation and adjustments. Learn about the door locks, including remote keyless entry and the manual key operation for secure access. Understand the function of the windshield wipers and washers, crucial for visibility in various weather conditions.

Explore the location and operation of the hood release, allowing access to the engine compartment for fluid checks and maintenance. Familiarize yourself with the fuel filler door and its operation for convenient refueling. This overview ensures you confidently interact with and maintain your GMC Terrain’s exterior components.

Interior Features and Controls

Step inside your Terrain! This section details the driver and passenger seats, including adjustments for optimal comfort. Learn about the steering wheel controls, managing audio, cruise control, and phone functions effortlessly. Explore the climate control system, ensuring a comfortable cabin temperature. Understand the operation of the power windows and door locks, providing convenience and security.

Familiarize yourself with the gear selector, parking brake, and other essential interior controls. Discover the location and function of storage compartments, maximizing space and organization. This guide ensures you master the Terrain’s interior, enhancing your driving experience.

Dashboard Symbols and Indicators

Decoding your Terrain’s dashboard is crucial! This section explains each symbol, from warning lights indicating potential issues – like low oil pressure or engine temperature – to indicator lights showing system operation. Understand the meaning of the airbag, seatbelt, and stability control indicators, prioritizing safety. Learn to differentiate between critical warnings requiring immediate attention and informational lights.

Familiarize yourself with symbols for features like traction control, cruise control, and high beam operation. Knowing these indicators ensures you respond appropriately to vehicle conditions, maintaining control and preventing potential problems. Refer to this guide for a comprehensive understanding.

Operating Your GMC Terrain

Mastering your Terrain! This section details starting, stopping, driving modes, traction control, and essential fluid checks for optimal performance and safety.

Starting and Stopping the Engine

Starting your GMC Terrain typically involves pressing the brake pedal firmly and then pressing the start/stop button until the engine ignites. Ensure the gear selector is in Park before attempting to start. Familiarize yourself with the instrument panel indicators that confirm successful engine operation.

To stop the engine, simply press the start/stop button again while the vehicle is in Park or Neutral. Avoid abruptly shutting off the engine while driving, as this could compromise vehicle control. Always allow the engine to idle briefly before turning it off to ensure proper cooling and lubrication. Refer to the manual for specific details regarding remote start functionality, if equipped.

Driving Modes and Traction Control

Your GMC Terrain may offer various driving modes – such as Normal, Snow, or Sport – selectable to optimize performance for different conditions. These modes adjust throttle response, transmission shifting, and stability control settings. The traction control system helps maintain grip by reducing wheel spin during acceleration.

Understanding these systems is crucial for safe driving. Refer to your owner’s manual for detailed explanations of each driving mode and how to activate them. The manual also details the traction control system’s operation and any available deactivation options, along with associated safety considerations.

Fueling and Fluid Checks

Proper fueling and regular fluid checks are vital for maintaining your GMC Terrain’s performance and longevity. The owner’s manual details the correct fuel type for your vehicle – typically unleaded gasoline – and provides guidance on safe fueling practices. Regularly inspect fluid levels, including engine oil, coolant, brake fluid, and windshield washer fluid.

The manual illustrates the location of each fluid reservoir and explains how to accurately check the levels. Maintaining correct fluid levels prevents damage and ensures optimal operation. Refer to the scheduled maintenance section for recommended intervals for fluid top-ups and changes.

Maintenance and Care

GMC recommends scheduled maintenance for optimal performance. This section details intervals for tire care, fluid top-ups, and essential service procedures for your Terrain.

Scheduled Maintenance Intervals

Maintaining your GMC Terrain requires adherence to a specific maintenance schedule, ensuring longevity and peak performance. Regular inspections and servicing are crucial for safety and reliability.

Key intervals include oil and filter changes, tire rotations, fluid level checks (coolant, brake, power steering, and transmission), and inspections of belts, hoses, and brakes.

Refer to the detailed schedule within this manual for mileage or time-based recommendations. Following these guidelines helps prevent costly repairs and maintains your vehicle’s warranty coverage. GMC emphasizes proactive care for a dependable driving experience.

Don’t neglect scheduled maintenance; it’s an investment in your Terrain’s future.

Tire Maintenance and Replacement

Proper tire care is vital for safety, fuel efficiency, and handling of your GMC Terrain. Regularly check tire pressure – including the spare – and inflate to the recommended PSI found on the tire placard.

Inspect tires for wear, damage (cuts, bulges), and uneven tread. Rotate tires according to the schedule in this manual to promote even wear and extend their lifespan.

When replacement is necessary, use tires of the same size and type as originally equipped. GMC recommends professional installation and balancing. Ignoring tire maintenance can compromise vehicle stability and braking performance.

Always prioritize safe tires for optimal driving.

Fluid Levels and Top-Ups

Maintaining correct fluid levels is crucial for your GMC Terrain’s performance and longevity. Regularly check engine oil, coolant, brake fluid, power steering fluid, and windshield washer fluid. Refer to the manual for specific locations and recommended fluid types.

Low fluid levels can cause serious damage. Top up fluids as needed, ensuring you use the correct specification. GMC recommends professional inspection if frequent top-ups are required, as this may indicate a leak.

Always dispose of used fluids responsibly, following local regulations. Proper fluid maintenance ensures smooth operation and prevents costly repairs.

In-Vehicle Technology

Explore your GMC Terrain’s advanced tech! This section details the infotainment system, Bluetooth connectivity, and navigation features for a connected driving experience.

Infotainment System Overview

Your GMC Terrain’s infotainment system is the central hub for connectivity and entertainment. It features a user-friendly touchscreen interface, providing access to audio controls, smartphone integration via Bluetooth, and vehicle settings. Explore features like Apple CarPlay and Android Auto for seamless smartphone mirroring.

The system also supports voice commands, allowing hands-free operation while driving. Navigation functionality, if equipped, offers real-time traffic updates and turn-by-turn directions. Familiarize yourself with the various menus and customizable options to personalize your driving experience; Detailed instructions on system operation and troubleshooting are available within this manual;

Bluetooth Connectivity and Pairing

Bluetooth allows wireless connection of compatible smartphones and audio devices to your GMC Terrain’s infotainment system. To initiate pairing, access the Bluetooth menu on the touchscreen and select “Add Device.” Ensure your smartphone’s Bluetooth is enabled and discoverable.

Follow the on-screen prompts to complete the pairing process, which may involve entering a PIN code. Once paired, you can stream audio, make hands-free calls, and access contacts. The system can store multiple paired devices. Refer to the infotainment system overview for detailed instructions and troubleshooting tips regarding Bluetooth connectivity.

Navigation System Operation

Your GMC Terrain’s navigation system provides turn-by-turn directions and points of interest. Input your destination via voice command or the touchscreen interface. The system offers 2D and 3D map views, and real-time traffic updates (subscription may be required). Explore menu options for route preferences, such as avoiding tolls or highways.

Regularly update the map data via USB or over-the-air to ensure accuracy. The system also displays estimated time of arrival and distance remaining. Refer to the infotainment system overview for detailed instructions on utilizing all navigation features and troubleshooting potential issues.

Safety Features

GMC Terrain prioritizes safety with features like airbags, stability control, and emergency assistance. This manual details each system’s operation and limitations.

Airbag System Information

Your GMC Terrain is equipped with an advanced airbag system designed to provide occupant protection during certain collisions. This system includes frontal, side-impact, and curtain airbags, strategically positioned throughout the vehicle’s interior.

Understanding how the airbag system functions is crucial for your safety. Airbags deploy rapidly and with significant force, so proper seatbelt usage is always required. This manual details the airbag system’s components, deployment criteria, and important safety precautions.

Never place objects or install accessories that could interfere with airbag deployment. Improper modifications can compromise the system’s effectiveness. Regularly review this section to ensure you’re fully informed about your vehicle’s safety features.

Stability Control System

Your GMC Terrain features a sophisticated Stability Control System (SCS) designed to enhance vehicle control during challenging driving conditions. This system helps prevent skidding and loss of control by selectively applying brakes to individual wheels.

The SCS works in conjunction with traction control, utilizing sensors to monitor wheel speed, steering angle, and vehicle motion. When the system detects a potential loss of control, it intervenes automatically, helping you maintain your intended path.

While the SCS is a valuable safety feature, it’s not a substitute for careful driving. Always adjust your speed and driving style to suit road and weather conditions.

Emergency Assistance Features

Your GMC Terrain is equipped with features designed to provide assistance in emergency situations. These include OnStar, offering automatic crash response, roadside assistance, and remote diagnostics. OnStar can connect you to an advisor for help, even when a phone isn’t available.

The vehicle may also include features like emergency braking assist, which can apply maximum braking force during a panic stop. Familiarize yourself with the location of the emergency assistance button and understand how to activate these systems.

Regularly check OnStar subscription status for continued service.

Troubleshooting

This section details common issues, offering solutions and explaining warning lights; consult it for quick fixes and understanding vehicle signals for optimal performance.

Common Issues and Solutions

Experiencing difficulties? This section addresses frequently encountered problems with your GMC Terrain. Common concerns include issues with the infotainment system, such as Bluetooth pairing failures or navigation inaccuracies. Battery drain, often linked to leaving accessories active, is another prevalent issue; ensure proper shutdown procedures.

Furthermore, some owners report occasional starting problems, potentially due to a weak battery or faulty starter. Tire pressure monitoring system (TPMS) malfunctions and unexpected warning light illumination are also noted. For each issue, we provide step-by-step troubleshooting guidance, ranging from simple resets to recommended service checks. Always prioritize safety and consult a qualified technician for complex repairs.

Warning Lights and Their Meanings

Dashboard lights: understanding the alerts! Your GMC Terrain utilizes a comprehensive system of warning lights to communicate vehicle status. A solid illumination indicates a current issue requiring attention, while a flashing light often signifies a more urgent problem. The check engine light signals potential engine or emissions system faults, demanding prompt diagnosis.

The low tire pressure light indicates insufficient tire inflation, impacting handling and fuel efficiency. Other critical lights include those for oil pressure, battery voltage, and brake system malfunctions. Refer to the vehicle symbol chart for detailed explanations and recommended actions; ignoring these warnings could lead to further damage or safety risks.

Canadian Vehicle Owner Specifics

Canadian owners: This section details regulations, compliance information, and specialized service details relevant to your GMC Terrain within Canada’s guidelines.

Regulations and Compliance

Canadian regulations governing vehicle operation and safety are paramount for GMC Terrain owners. This section outlines specific requirements pertaining to emissions standards, safety inspections, and provincial or territorial laws impacting vehicle usage.

Compliance with these regulations ensures responsible vehicle ownership and contributes to environmental protection. Understanding these rules is crucial for legal operation within Canada, avoiding potential fines or restrictions. GMC adheres to these standards, and this manual provides guidance for maintaining compliance throughout your vehicle’s lifespan.

Refer to Transport Canada’s website for the most current and detailed information regarding vehicle regulations applicable to your GMC Terrain.

Service Information for Canadian Owners

Canadian GMC Terrain owners benefit from a network of authorized service centers equipped to handle all maintenance and repair needs. Utilizing these centers ensures genuine GMC parts and qualified technicians are employed, maintaining vehicle integrity.

This section details locating authorized service providers, understanding warranty coverage specific to Canada, and accessing roadside assistance programs. Regular servicing, as outlined in the maintenance schedule, is vital for optimal performance and longevity. GMC prioritizes customer satisfaction and provides resources for convenient and reliable service.

Contact GMC Canada directly for specific service inquiries or assistance.

Warranty Information

GMC Terrain warranties provide coverage for defects in materials or workmanship; details are within this manual, outlining claim procedures and coverage durations.

GMC Terrain Warranty Details

Your GMC Terrain’s warranty offers peace of mind, covering defects in materials and workmanship under normal use. The bumper-to-bumper warranty typically lasts for 3 years/36,000 miles, whichever comes first, protecting against a wide range of issues. Powertrain coverage extends to 5 years/60,000 miles, safeguarding the engine, transmission, and drive systems.

Additionally, corrosion protection is often included for a specified period. This manual details specific exclusions and limitations. To understand your coverage fully, carefully review the warranty booklet provided with your vehicle. Proper maintenance, as outlined in this guide, is crucial for maintaining warranty validity.

How to File a Warranty Claim

To initiate a warranty claim for your GMC Terrain, first, schedule a service appointment with an authorized GMC dealership. Clearly describe the issue to the service advisor and present your vehicle’s warranty booklet and proof of ownership. The dealership will diagnose the problem and determine if it’s covered under warranty.

If approved, the dealership will handle the repair process. Keep detailed records of all communication and repairs. For questions or concerns, contact GMC Customer Assistance. This manual provides contact information. Remember, maintaining proper service records is vital for a smooth claim process.

Vehicle Symbol Chart

Decode vehicle symbols! This chart clarifies warning and indicator lights, providing essential understanding of your GMC Terrain’s dashboard messages for safe operation.

Decoding Common Vehicle Symbols

Understanding your GMC Terrain’s symbols is crucial for safe driving. This section details frequently encountered dashboard icons, explaining their meanings and required actions.

A lit check engine light signals a potential mechanical issue needing prompt diagnosis. The ABS indicator highlights an anti-lock braking system concern, impacting stopping power. Low tire pressure is indicated by a specific symbol, ensuring optimal handling and fuel efficiency.

Familiarize yourself with symbols for airbag systems, traction control, and other vital features. Refer to this chart alongside the manual for comprehensive interpretation, promoting confident and informed vehicle operation. Ignoring warning lights can lead to more significant problems.

Understanding Warning and Indicator Lights

Your GMC Terrain utilizes a system of warning and indicator lights to communicate vehicle status. These lights alert you to potential issues requiring attention, ensuring safe operation and preventing damage.

Red lights typically signify serious problems demanding immediate action, like low oil pressure or brake system failure. Yellow or amber lights indicate a need for inspection or service soon. Green or blue lights generally show a system is actively engaged or functioning normally.

Consult the dashboard symbol chart within this manual for detailed explanations of each light. Promptly addressing warning lights prevents costly repairs and maintains vehicle reliability.

Using the Manual Effectively

Maximize your understanding! Locate specific information quickly using the index and cross-references within this GMC Terrain manual for optimal vehicle mastery.

Locating Specific Information

Efficiently find what you need! This GMC Terrain owner’s manual is designed for easy navigation. Utilize the comprehensive index at the rear of the book to pinpoint specific topics quickly. Cross-references throughout the manual direct you to related information, ensuring a thorough understanding of vehicle systems.

Pay attention to page references indicated by “see page” – these offer additional details or instructions. Familiarize yourself with the organization of chapters to streamline your search. Remember, keeping this manual in your vehicle provides instant access to vital information, enhancing your driving experience and vehicle maintenance knowledge.

Understanding Cross-References

Maximize your understanding! Throughout this GMC Terrain owner’s manual, you’ll encounter cross-references. These direct you to related sections offering more detailed explanations or supplementary instructions. Look for phrases like “see page…” or “refer to…” to quickly locate connected information.

These references are crucial for grasping the interconnectedness of vehicle systems. They ensure a comprehensive understanding, preventing incomplete knowledge. Utilizing these links allows for a deeper dive into specific features and maintenance procedures, ultimately enhancing your ownership experience and vehicle proficiency. Always follow these references for complete clarity.

jandy e pump manual

Welcome to the Jandy ePump manual! This guide provides essential information for installing, operating, and maintaining your variable-speed pool and spa pump efficiently and safely.

1.1 Overview of the Jandy ePump

The Jandy ePump is a variable-speed pool and spa pump designed for efficient water circulation. It offers adjustable speed settings, ranging from 600 RPM to 3450 RPM, allowing customized operation. With its compact design and dual-voltage capability, it suits various pool systems. The pump is compatible with Jandy Pro Series models and integrates seamlessly with other pool equipment, ensuring reliable performance. Its energy-efficient design reduces operational costs, making it a cost-effective solution for pool owners. The ePump is built for durability and ease of use, providing a versatile option for maintaining clean and safe pool water year-round.

1.2 Importance of Reading the Manual

Reading the Jandy ePump manual is crucial for proper installation, operation, and maintenance. It provides essential safety guidelines, installation steps, and troubleshooting tips. The manual ensures users understand how to configure speed settings and integrate the pump with other systems. By following the guidelines, users can optimize energy efficiency, reduce costs, and extend the pump’s lifespan. Ignoring the manual may lead to improper setup, safety hazards, or equipment damage. Always refer to the manual for specific instructions tailored to your ePump model, ensuring safe and efficient operation of your pool or spa system. Proper adherence guarantees peak performance and longevity of the pump.

Key Features of the Jandy ePump

The Jandy ePump offers variable-speed technology, energy efficiency, and compatibility with pool and spa systems. Its compact design ensures flexible installation and optimal performance in various settings.

2.1 Variable Speed Technology

The Jandy ePump features advanced variable-speed technology, allowing it to operate at various RPM settings (600 to 3450 RPM). This flexibility enables optimal performance for different tasks, from gentle filtration to intense cleaning cycles. By adjusting speeds, the pump minimizes energy consumption while maintaining efficiency. The controller allows programming up to eight custom speed settings, making it adaptable to specific pool and spa needs. This technology not only enhances energy savings but also reduces noise levels during operation. With its robust design and intelligent speed control, the ePump delivers reliable performance tailored to modern pool and spa systems.

2.2 Energy Efficiency and Cost Savings

The Jandy ePump is designed to deliver exceptional energy efficiency, significantly reducing operational costs; By utilizing variable-speed technology, the pump consumes less energy compared to traditional single-speed models. With adjustable RPM settings, it operates at the lowest necessary speed for each task, minimizing power usage. This results in substantial cost savings over time. Additionally, the ePump’s energy-efficient motor and intelligent control system optimize performance while lowering electricity consumption. Homeowners can enjoy a quieter operation and reduced utility bills, making the Jandy ePump a cost-effective and environmentally friendly choice for pool and spa systems.

2.3 Compatibility with Pool and Spa Systems

The Jandy ePump is designed to seamlessly integrate with a wide range of pool and spa systems, ensuring compatibility and optimal performance. It works effortlessly with various pool equipment, including filters, heaters, and sanitization systems. The pump is specifically compatible with Zodiac and Jandy Pro Series models, as well as other leading pool and spa setups. Its universal design allows it to adapt to different configurations, making it a versatile choice for both new installations and upgrades. This compatibility ensures that the ePump can be easily incorporated into existing systems without requiring additional adapters or modifications, providing a hassle-free experience for users.

Compatibility and System Requirements

The Jandy ePump is compatible with various pool and spa systems, including Zodiac models, and requires a 240V or 120V electrical connection for proper operation.

3.1 Compatible Pool and Spa Models

The Jandy ePump is designed to work seamlessly with various pool and spa systems, including Zodiac models like the A0577900 and Pro Series. It is also compatible with the FloPro series, offering flexibility for different pool setups. The pump supports multiple configurations, making it suitable for both residential and commercial applications. Ensure your pool or spa model is listed in the compatibility chart provided in this manual to guarantee optimal performance and proper integration with your existing equipment.

3.2 Required Electrical Connections

Proper electrical connections are crucial for the safe and efficient operation of the Jandy ePump. Ensure the pump is connected to a constant power source, with the correct voltage and amperage rating as specified in the manual. The electrical circuit must be protected by a suitable ground fault circuit interrupter (GFCI) to prevent shocks. Follow the wiring diagram provided in the manual for accurate connections. Always ground the pump and bonding system according to local electrical codes. If unsure, consult a licensed electrician to ensure compliance with safety standards and avoid potential hazards. Correct electrical setup is vital for optimal performance and longevity of the pump.

3.3 Integration with Other Pool Equipment

The Jandy ePump seamlessly integrates with various pool and spa systems, enhancing overall functionality. It can be connected to filters, heaters, and sanitization systems, ensuring synchronized operation. Compatibility with automation systems like Jandy’s AquaLink allows for remote control and scheduling. The pump’s variable speed technology works in harmony with other equipment, optimizing energy use and performance. Proper integration ensures efficient water circulation, heating, and cleaning. Always refer to the manual for specific compatibility guidelines and installation tips to create a cohesive and efficient pool system setup.

Installation Guidelines

Ensure proper installation by following the manual’s step-by-step guide. Verify electrical connections, mounting, and system compatibility before starting. Correct setup ensures optimal performance and longevity of the ePump.

4;1 Pre-Installation Checks

Before installing your Jandy ePump, ensure all components are included and undamaged. Verify electrical requirements match your setup, and the pump is compatible with your pool or spa system. Check local regulations for compliance and ensure the installation area is clear and accessible. Proper grounding and bonding are essential for safety. Review the manual thoroughly to understand each step. Familiarize yourself with the controller and its mounting options. Ensure the pump’s horsepower and voltage ratings match your system’s needs. Double-check all connections and settings before powering on. A thorough pre-installation check ensures a smooth and successful setup process for your ePump.

4.2 Step-by-Step Installation Process

Begin by unpacking and inspecting all components. Connect the Jandy ePump to your pool or spa system, ensuring proper plumbing alignment. Mount the pump on a level, stable surface, following the manufacturer’s guidelines. Install the controller in an easily accessible location, ideally near the pump. Wire the connections according to the manual, ensuring correct polarity and voltage. Secure all electrical connections tightly and test the system for leaks. Power on the pump and verify operation at different speeds. Set up the timeclock and programmed speeds as desired. Double-check all connections and settings before regular use. Follow the manual for any additional configuration steps.

4.3 Mounting the Controller

Mount the controller on a flat, dry surface near the pump for easy access. Ensure the location is protected from direct sunlight and moisture. Use the provided mounting hardware to secure the controller firmly to the wall or designated area. Align the controller properly to avoid tilting or uneven positioning. Check for any damage or obstructions before installation. Connect the controller to the pump following the wiring diagram in the manual. Ensure all connections are secure and tightened properly; Test the controller’s responsiveness after installation to confirm proper functionality. Refer to the manual for specific mounting requirements and safety guidelines.

Operating the Jandy ePump

Learn to operate the Jandy ePump with ease. Start and stop manually, adjust speed settings, program custom speeds, and set up the timeclock for automated operation.

5.1 Manual Start and Stop Function

The Jandy ePump features a straightforward manual start and stop function, allowing quick control. Press the manual start button on the controller to begin operation. The pump will activate, and an LED or display will confirm it’s running. To stop, press the stop button, and the pump will shut down. This function is ideal for immediate adjustments or maintenance. Always ensure the pump is properly grounded and follow safety guidelines to avoid electrical hazards. For detailed instructions, refer to the manual or consult a professional if unsure. Proper use ensures longevity and safe operation of the ePump.

5.2 Adjusting Pump Speed Settings

Adjusting the Jandy ePump’s speed is simple and efficient. Use the controller’s interface to navigate to the speed settings menu. Select the desired RPM (revolutions per minute) within the range of 600 to 3450 RPM. The pump will automatically adjust to the new speed. For precise control, use the up and down arrows to fine-tune the setting. Once selected, the pump will operate at the chosen speed. This feature allows for energy-efficient operation by optimizing water circulation for specific tasks, such as filtration or cleaning. Always refer to the manual for guidelines on optimal speed settings for your pool system.

5.3 Programming Speed Settings

Programming speed settings on the Jandy ePump allows for customized operation. Access the menu via the controller, select the number of speed settings (up to 8), and assign specific RPM values. Use the +/- buttons to adjust each speed. Save your settings to ensure consistent operation. The pump will automatically switch between programmed speeds, optimizing energy use. For advanced control, integrate the timeclock feature to schedule speed changes based on your pool’s needs. This feature enhances efficiency by tailoring water circulation to specific tasks, such as filtration or cleaning, without manual adjustments. Refer to the manual for detailed programming instructions.

5.4 Timeclock Setup and Operation

The Jandy ePump’s timeclock feature allows you to schedule specific speed settings throughout the day. Access the timeclock menu via the controller, select the desired time slots, and assign corresponding speeds. This feature ensures efficient operation by automating speed adjustments based on your pool’s needs. For example, you can program lower speeds during off-peak hours and higher speeds during filtration cycles. The timeclock integrates seamlessly with programmed speed settings, optimizing energy use and reducing operational costs. Refer to the manual for step-by-step instructions on setting up and managing the timeclock for precise and energy-efficient operation.

Maintenance and Care

Regularly clean the pump and its components to ensure optimal performance. Lubricate wear parts and inspect for damage. Proper winterization is essential to prevent damage during colder months.

6.1 Regular Cleaning and Inspection

Regular cleaning and inspection are crucial for maintaining the Jandy ePump’s efficiency and longevity. Start by turning off the power and ensuring the pump is cool. Remove any debris from the strainer basket and housing. Check the impeller for blockages and clean it gently. Inspect all seals for signs of wear or damage. Lubricate moving parts as recommended. Finally, ensure all electrical connections are secure and free from corrosion. Regular maintenance prevents premature wear and ensures safe, reliable operation of your pool and spa system.

6.2 Lubrication and Wear Parts Replacement

Regular lubrication of moving parts is essential for the Jandy ePump’s smooth operation. Use a silicone-based lubricant on O-rings, gaskets, and any other parts specified in the manual. Inspect wear parts, such as the impeller and shaft seal, for signs of wear or damage. Replace these components as needed to prevent leaks or reduced performance. Always use genuine Jandy replacement parts to ensure compatibility and maintain efficiency. Avoid over-lubricating, as this can attract debris and impair functionality. Refer to the manual for specific part numbers and torque specifications. Proper lubrication and timely replacements will extend the pump’s lifespan and ensure optimal operation.

6.3 Winterization and Storage

Winterization is crucial for protecting your Jandy ePump from freezing temperatures and ensuring longevity. Drain all water from the pump, pipes, and connected equipment to prevent ice damage. Disconnect the electrical supply and clean the pump thoroughly to remove dirt or debris. Store the pump in a dry, protected area, such as a shed or garage, to avoid exposure to harsh weather. Cover the pump to shield it from dust and moisture. Avoid leaving the pump outdoors in freezing conditions. Follow the manufacturer’s guidelines for specific winterization steps, as improper storage can lead to costly repairs. Regular maintenance ensures optimal performance when restarting in spring.

Troubleshooting Common Issues

Identify and resolve issues promptly to ensure optimal performance; Common problems include pump not starting, unusual noise, or error messages. Check power connections, ensure proper installation, and consult the manual for solutions. If issues persist, contact a professional for assistance. Regular maintenance can prevent many common malfunctions and extend the pump’s lifespan. Always refer to the troubleshooting section in the manual for detailed guidance on diagnosing and fixing specific problems. Proper care ensures your Jandy ePump operates efficiently and reliably, minimizing downtime and ensuring your pool remains clean and safe. Addressing issues early prevents more severe damage and costly repairs. Avoid ignoring warning signs like excessive vibration or noise, as they may indicate underlying problems. By following the troubleshooting steps, you can restore your pump’s functionality quickly and maintain peak performance. If unsure, seek help from a certified technician to avoid further complications. Troubleshooting is essential for maintaining your investment and ensuring long-term satisfaction with your Jandy ePump. Remember, timely intervention is key to preventing major breakdowns and extending the pump’s service life; Always prioritize safety when troubleshooting electrical components to avoid potential hazards. Keep the manual handy for quick reference and follow all recommended procedures carefully.

7.1 Diagnosing Pump Malfunctions

Diagnosing pump malfunctions starts with identifying symptoms like unusual noise, vibration, or failure to start. Check power connections and ensure they are secure and properly grounded. Review error codes on the controller, if available, as they can indicate specific issues. Inspect the pump and motor for visible damage or blockages. Verify that the pump is correctly sized for your pool system and that all valves are open. Consult the manual for troubleshooting charts or guides tailored to your Jandy ePump model. If issues persist, contact a certified technician to avoid further damage. Regular maintenance can often prevent malfunctions, so always follow the recommended care routine.

7.2 Resolving Electrical Connection Problems

Electrical issues often stem from loose connections or improper wiring. Start by verifying that the power supply matches the pump’s voltage and horsepower requirements. Check all connections to the controller and motor for tightness and corrosion. Ensure the circuit breaker or fuse is not tripped or blown. If using a timeclock, confirm it is properly programmed and functioning. Refer to the manual for specific wiring diagrams and voltage specifications. If issues persist, consult a licensed electrician to inspect and repair any faulty wiring or components. Always disconnect power before performing any electrical troubleshooting to ensure safety and prevent further damage. Regular inspections can help prevent such problems.

7.3 Addressing Noise or Vibration Issues

Noise or vibration issues with the Jandy ePump can often be resolved by ensuring proper installation and maintenance. First, check that the pump is installed on a level, stable surface and securely fastened to prevent movement. Verify that all connections, including pipes and electrical components, are tight and free from leaks. Inspect the impeller and diffuser for debris, as blockages can cause imbalance and noise. If vibrations persist, ensure the motor is properly aligned with the pump housing. Regularly lubricate moving parts and replace worn-out wear rings or seals. For persistent issues, consult the manual or contact a professional for assistance to restore smooth operation. Always follow safety guidelines when performing inspections or repairs.

Safety Precautions and Warnings

Always follow safety guidelines to avoid electrical hazards, improper handling, and potential accidents. Ensure proper installation, operation, and maintenance as outlined in the manual to guarantee safe use.

8.1 General Safety Guidelines

Always disconnect power before performing maintenance or repairs. Keep children and unauthorized individuals away from the pump. Ensure proper electrical connections and grounding to prevent shocks. Avoid exposing the pump to extreme temperatures or corrosive substances. Regularly inspect for wear or damage, and replace worn parts promptly. Follow all local safety codes and regulations. Never operate the pump if it is damaged or malfunctioning. Ensure the area around the pump is well-ventilated and free from obstructions. Use only genuine Jandy replacement parts to maintain safety and performance. Read and adhere to all safety instructions provided in this manual to ensure safe operation and longevity of the ePump.

8.2 Electrical Safety Considerations

Ensure all electrical connections are secure and meet local codes. Use a dedicated, GFCI-protected circuit to power the ePump. Never expose electrical components to water or moisture. Avoid overloading circuits, as this can cause system failure or fire hazards. Always turn off power at the circuit breaker before servicing. Use properly rated fuses or circuit breakers to protect against overcurrent. Ensure the pump is properly grounded to prevent electrical shock. Keep all electrical components clean and free from debris. Do not modify or tamper with the pump’s electrical system. Follow all electrical safety guidelines outlined in this manual to ensure safe and reliable operation of your Jandy ePump.

8.3 Proper Use and Handling

Always operate the Jandy ePump as intended for pool and spa applications. Avoid using it in hazardous locations or for non-approved purposes. Keep children and pets away from the pump and controller. Handle the pump with care to prevent damage during installation or maintenance. Avoid exposing the unit to extreme temperatures or chemicals. Regularly inspect for wear and tear, replacing worn parts promptly. Follow recommended maintenance schedules to ensure optimal performance. Never attempt repairs without proper tools and knowledge. Store the pump in a dry, protected area during off-season. Adhere to all guidelines in this manual to ensure safe and efficient operation of your Jandy ePump.

The Jandy ePump is a valuable addition to any pool or spa system, offering energy efficiency, variable speed control, and reliable performance. This manual provides comprehensive guidance for optimal use and maintenance.

9.1 Summary of Key Points

The Jandy ePump manual provides a comprehensive guide for installing, operating, and maintaining the variable-speed pump. It highlights the importance of proper installation, regular maintenance, and safety precautions to ensure optimal performance. Key features such as variable speed technology, energy efficiency, and compatibility with pool and spa systems are emphasized. The manual also covers troubleshooting common issues and offers step-by-step instructions for programming speed settings and timeclock operation. By following the guidelines outlined, users can maximize the pump’s efficiency, reduce energy costs, and extend its lifespan. This manual is an essential resource for both new and experienced users of the Jandy ePump.

9.2 Importance of Proper Maintenance

Proper maintenance is crucial for ensuring the longevity and efficiency of the Jandy ePump. Regular cleaning, inspection, and lubrication prevent wear and tear, while addressing issues promptly avoids costly repairs. Winterization is essential to protect the pump from damage during colder months. Following the manual’s guidelines ensures optimal performance, energy efficiency, and safety. Neglecting maintenance can lead to reduced pump life and increased energy consumption. By prioritizing maintenance, users can enjoy reliable operation, lower utility bills, and extended equipment lifespan. Consistent upkeep is vital for maximizing the benefits of the Jandy ePump and maintaining a safe, efficient pool or spa system.

ge advantium 120 microwave manual

The GE Advantium 120 Microwave is a revolutionary over-the-range microwave oven offering advanced SpeedCook technology. It combines microwave, convection, and halogen light cooking for faster, versatile meals.

1.1 Overview of the GE Advantium 120 Microwave

The GE Advantium 120 Microwave is a high-performance over-the-range oven combining microwave, convection, and SpeedCook technologies. Designed for versatility, it offers precise cooking with halogen light and ceramic heaters. Ideal for modern kitchens, it integrates seamlessly with other GE Appliances. The oven operates at 120V, providing 975 watts of microwave power. Its advanced features enable faster cooking while preserving moisture. Suitable for broiling, toasting, and warming, it’s a multitasking appliance. The user manual is essential for maximizing its capabilities and ensuring safe operation.

1.2 Key Features of the GE Advantium 120

The GE Advantium 120 Microwave boasts SpeedCook technology, combining halogen light and ceramic heaters for rapid cooking. It offers multiple modes: microwave, convection, and toasting. With 975 watts of microwave power, it ensures efficient cooking. The oven features precision cooking and a glass tray for even heating; Its over-the-range design saves counter space, and it operates at 120V. Compatible with other GE Appliances, it’s a versatile addition to modern kitchens. The Advantium 120 is designed for multitasking, making it a superior choice for home cooks seeking advanced functionality.

Installation Instructions for the GE Advantium 120

Ensure proper installation by securing the unit to the wall and aligning with existing ductwork. Connect vents and electrical components as per the manual’s guidelines.

2.1 Pre-Installation Requirements

Before installing the GE Advantium 120, ensure the installation site meets specific criteria. The area must be well-ventilated, and the unit should be placed at a safe height to avoid accidental contact. Verify the electrical supply matches the oven’s 120V requirement. Clear the space around the installation area to prevent obstructions. Check for compatibility with existing ductwork if necessary. Ensure all tools and materials are available, including a power supply and proper mounting hardware. Review the manual for detailed specifications to ensure compliance with safety standards;

2.2 Step-by-Step Installation Guide

Begin by unpacking the GE Advantium 120 and inspecting for damage. Ensure the installation area is clear and meets the specified dimensions. Mount the oven to a sturdy wall or above a compatible cooktop, following the provided template. Install the damper kit and venting system as outlined in the manual. Secure the oven with screws, ensuring it is level and plumb. Connect the electrical wiring to the designated terminals, adhering to local codes. Finally, test the oven by running a short cooking cycle to verify proper function.

2.3 Safety Precautions During Installation

Always disconnect power before starting installation to prevent electric shock. Use protective gloves and eyewear. Avoid placing metal objects near the oven during installation. Ensure the damper door is fully open during microwave mode to prevent damage. Do not store flammable materials near the oven. Keep children away from the installation area. Follow all local electrical codes and manufacturer guidelines. Properly secure the oven to prevent tipping. Test the oven at a low setting after installation to ensure safe operation. Refer to the manual for specific safety instructions tailored to your model.

Design and Features of the GE Advantium 120

The GE Advantium 120 features a sleek, wall-oven combo design with SpeedCook technology, combining microwave, convection, and halogen light cooking for faster, precise results.

3.1 Available Sizes and Configurations

The GE Advantium 120 is available in 27-inch and 30-inch widths, offering flexibility for various kitchen layouts. It can be configured as a wall-oven combo or over-the-range microwave. The oven operates at 120V or 240V, depending on the installation requirements. Its compact design integrates seamlessly with other GE Appliances, making it a versatile option for modern kitchens. The unit measures 5.5 inches in height, 19.75 inches in width, and 19.75 inches in depth, ensuring a sleek and space-efficient fit.

3.2 Advanced Cooking Technologies

The GE Advantium 120 features Precision Cooking, convection baking, broiling, toasting, warming, proofing, and microwaving capabilities. It uses high-intensity halogen lights, ceramic heaters, and convection heating elements for uniform cooking. SpeedCook technology accelerates cooking by up to 50% compared to traditional methods. The oven combines microwave energy with halogen and convection heat for faster, crisper results. Multiple heating sources work simultaneously to seal moisture and ensure even browning, making it ideal for various cooking tasks. This technology ensures efficient and versatile meal preparation, catering to diverse culinary needs.

3.4 Special Features of the Advantium 120

The Advantium 120 boasts a metal tray for direct broiling or toasting and high-intensity halogen lights for rapid cooking. It offers 975 watts of microwave power and advanced SpeedCook technology for faster meal preparation. The oven features a thermal fuse for safety and is designed for integration with other GE appliances. Its versatile design allows for installation above cooktops or in combination with wall ovens, making it a flexible addition to any kitchen. These features enhance cooking efficiency and provide a modern, convenient cooking experience.

Operating Modes of the GE Advantium 120

The GE Advantium 120 operates in Microwave, Convection, and SpeedCook modes; Each mode offers unique cooking capabilities, ensuring flexibility and efficiency for various culinary tasks.

4.1 Microwave Mode

The Microwave Mode on the GE Advantium 120 provides efficient reheating, defrosting, and cooking using 975 watts of power. It requires the glass microwave tray for safe operation. Metal cookware, except for provided pans, should be avoided to prevent sparks. This mode is ideal for quick tasks like warming leftovers or melting chocolate. The oven’s design ensures even heating, while the glass tray helps contain splatters. Always follow guidelines to avoid damage or hazards. This mode is a versatile option for everyday cooking needs, offering convenience and speed.

4.2 Convection Mode

The Convection Mode on the GE Advantium 120 utilizes a heating element to cook food evenly, similar to a traditional oven. This mode is ideal for baking, roasting, or toasting, delivering consistent results without microwaves. It’s perfect for tasks like baking cookies, roasting vegetables, or toasting bread. The convection feature ensures crispy exteriors and tender interiors, making it a versatile option for home cooking. Always preheat the oven and use appropriate cookware for best results. This mode enhances the oven’s functionality, offering a conventional cooking experience with modern efficiency.

4.3 SpeedCook Technology

SpeedCook Technology in the GE Advantium 120 combines high-intensity halogen lights, a ceramic heater, and microwave energy for up to four times faster cooking. It seals moisture and flavor, achieving crispy surfaces while cooking interiors evenly. Ideal for dishes like roasted meats or baked vegetables, SpeedCook reduces cooking time significantly without sacrificing quality. It’s a game-changer for busy households, offering precision and speed while maintaining delicious results. This innovative feature makes the Advantium 120 a versatile and efficient addition to any kitchen, catering to a variety of culinary needs with unmatched performance.

Cooking Guidelines for the GE Advantium 120

Explore expert guidelines for microwaving, convection baking, and SpeedCook modes. Discover tips for adapting recipes, using cookware, and achieving optimal results with your Advantium 120 microwave.

5.1 Microwave Cooking Tips

For optimal microwave cooking, always place food on the glass tray and ensure it is securely positioned. Avoid using metal cookware, except for pans provided with the oven. Cover foods with a microwave-safe lid or plastic wrap to retain moisture and promote even heating. Adjust cooking times and power levels based on food type and quantity. Use the provided guidelines for defrosting, reheating, and cooking specific dishes. Properly vent the microwave after cooking to prevent steam buildup. Follow these tips to achieve perfectly cooked meals every time with your GE Advantium 120 microwave.

5.2 Convection Baking Guidelines

For convection baking, preheat the oven to the desired temperature before placing food inside. Use bakeware that fits within the 9×13-inch recommended size. Ensure adequate space around dishes for proper air circulation. Place food directly on the metal tray for even cooking. Covering with foil can enhance browning and moisture retention. Follow the manual’s specific temperature and time guidelines for optimal results. Always refer to the GE Advantium 120 manual for detailed convection baking instructions to achieve perfectly cooked dishes every time.

5.3 Using SpeedCook Technology

SpeedCook technology enhances cooking efficiency by combining halogen light, ceramic heaters, and a convection element. It cooks up to four times faster than traditional methods, ensuring even browning and crisping. Always use the provided metal tray for SpeedCook mode to maximize performance. Avoid using metal accessories like twist-ties or poultry pins. Select the SpeedCook option on the control panel and follow the manual’s guidelines for specific food settings. Ensure food is properly placed and covered for optimal results. Refer to the GE Advantium 120 manual for detailed SpeedCook recipes and time recommendations.

Safety Precautions and Maintenance

Regularly clean the oven cavity and filters to maintain performance. Inspect the thermal fuse and door sensing switch for proper function. Ensure proper ventilation during use.

6.1 Safety Tips for Using the Advantium 120

Always use the glass microwave tray when cooking in Microwave mode to prevent damage. Avoid using metal cookware, including twist-ties or poultry pins, as they can cause sparks. Keep children away from the oven while it is in operation. Do not store items on top of the appliance. Ensure proper ventilation to avoid moisture buildup. Never leave cooking unattended, especially when using SpeedCook technology. Follow the manual’s guidelines for cleaning and maintenance to ensure safe operation.

6.2 Cleaning and Maintenance Tips

Regularly clean the Advantium 120 to maintain performance. Wipe spills immediately with a damp cloth to prevent food buildup. Use mild soap and avoid harsh chemicals or abrasive cleaners. Clean the interior cavity, door seals, and exterior surfaces frequently. The glass microwave tray should be washed after each use. Empty and clean the drip tray and grease filters regularly. Check the damper door for blockages and ensure it operates smoothly. Refer to the user manual for detailed cleaning instructions to keep your appliance in optimal condition.

6.3 Troubleshooting Common Issues

The GE Advantium 120 may occasionally display error codes such as “F1” or “F2,” indicating issues with the control panel or sensors. If the damper door is clogged, it can disrupt SpeedCook mode—clean it regularly. Power fluctuations or a tripped circuit breaker might cause sudden shutdowns; ensure the unit is properly installed and check the circuit. If problems persist, consult the user manual or contact GE customer support for assistance. Regular maintenance can help prevent many common issues and ensure optimal performance.

Warranty and Support Information

The GE Advantium 120 Microwave is covered by a one-year limited warranty on parts and labor. Extended service plans are available for added protection. Visit GEAppliances.com for details and customer support assistance.

7.1 Warranty Coverage Details

The GE Advantium 120 Microwave includes a one-year limited warranty covering defective parts and labor. This warranty applies to original purchasers and is non-transferable. It does not cover damage from misuse, neglect, or unauthorized repairs. Extended warranties are available for purchase, offering additional years of coverage. For details, refer to the user manual or visit GEAppliances.com; Always register your appliance to ensure warranty validity and access exclusive support services.

7.2 Customer Support and Resources

GE offers comprehensive customer support for the Advantium 120 Microwave. Users can access downloadable user manuals, troubleshooting guides, and FAQs on the official GEAppliances.com website. Additionally, a dedicated customer service team is available to assist with inquiries. For further assistance, online cooking guides and tutorials provide tips for maximizing the appliance’s features. Registered users also gain access to exclusive resources and updates. GE’s customer support ensures a seamless experience, helping you make the most of your Advantium 120 Microwave.

Accessories and Parts for the GE Advantium 120

The GE Advantium 120 supports various accessories, including a glass microwave tray and compatible cookware. Genuine replacement parts are available through GE’s official service and support channels.

8.1 Compatible Accessories

The GE Advantium 120 is compatible with a range of accessories designed to enhance its functionality. These include a durable glass microwave tray, which is essential for microwaving, and specialized cookware optimized for SpeedCook technology. Additional accessories like metal racks and baking pans are also available, ensuring versatile cooking options. For optimal performance, it’s recommended to use GE-approved parts and accessories, which can be purchased through authorized dealers or GE’s official website. Always refer to the user manual for compatibility guidelines to ensure safe and efficient operation.

8.2 Replacement Parts and Where to Find Them

Replacement parts for the GE Advantium 120 are readily available through GE’s official website, authorized dealers, or appliance repair shops. Common parts include the glass microwave tray, racks, and door seals; Ensure authenticity by purchasing from trusted sources to maintain performance and safety. Refer to the user manual or parts diagram for specific part numbers. GE Appliances also offers online support to help locate certified service providers or genuine replacement components, ensuring compatibility and reliability for your Advantium 120 microwave.

User Manuals and Additional Resources

The GE Advantium 120 user manual is available for download as a PDF online. Additional resources include cooking guides, troubleshooting tips, and FAQs on the GE Appliances website.

9.1 Downloading the User Manual

To access the GE Advantium 120 microwave manual, visit the official GE Appliances website. Navigate to the “Support” section and search for your specific model. The manual is available for free download in PDF format, providing detailed instructions for installation, operation, and troubleshooting. It also includes cooking guides and safety precautions. Ensure to download the correct version for your appliance to get accurate information. This resource is essential for optimizing your appliance’s performance and addressing any operational queries you may have.

9.2 Online Cooking Guides and Tutorials

GE offers extensive online resources to help you master the Advantium 120. Visit the GE Appliances website for downloadable cooking guides and video tutorials. These resources provide step-by-step instructions for using SpeedCook technology, convection baking, and microwave modes. You’ll also find recipe ideas and tips to optimize your cooking experience. Additional tutorials on YouTube and GE’s support page cover troubleshooting and maintenance. These guides ensure you maximize the appliance’s features and explore its full culinary potential. They’re perfect for both beginners and experienced users seeking to enhance their cooking skills with the Advantium 120.

The GE Advantium 120 Microwave seamlessly combines advanced cooking technologies with versatile features, offering a powerful tool for modern kitchens. Explore its capabilities to elevate your cooking experience.

10.1 Final Thoughts on the GE Advantium 120

The GE Advantium 120 Microwave stands out as a top-tier appliance, offering unparalleled efficiency and versatility. With SpeedCook technology, convection baking, and halogen lighting, it delivers quick and high-quality cooking results. Its advanced features make it ideal for modern kitchens, catering to various culinary needs. Designed to be both functional and sleek, this over-the-range microwave is a valuable addition for home cooks and professionals alike, enhancing the overall cooking experience.

10.2 Encouragement to Explore the Appliance

Embrace the full potential of your GE Advantium 120 Microwave by exploring its advanced features and capabilities. Experiment with SpeedCook, convection, and halogen cooking to discover new ways to create delicious meals. Dive into the user manual and online guides to unlock tips and recipes tailored for this appliance. Don’t hesitate to try new techniques—this oven is designed to inspire creativity and simplify your cooking routine, making it an invaluable tool in your kitchen.

nobles speed scrub parts manual

The Nobles Speed Scrub parts manual provides essential operation and maintenance instructions for optimal performance; It includes an illustrated parts list to help users identify and order components efficiently.

1.1 Overview of the Nobles Speed Scrub

The Nobles Speed Scrub is a high-performance automatic scrubber designed for efficient cleaning in various industrial and commercial settings. Built for durability and reliability, it features advanced cleaning technology to ensure consistent results. The machine is equipped with user-friendly controls and robust construction, making it suitable for heavy-duty applications. Its compact design allows for easy maneuverability in tight spaces, while its powerful cleaning capabilities handle large areas effectively. The Speed Scrub is ideal for maintaining cleanliness in warehouses, schools, hospitals, and other facilities requiring regular floor maintenance. This model is part of the Nobles line of cleaning equipment, known for innovative solutions to cleaning challenges. The Speed Scrub is supported by a comprehensive parts manual, ensuring users can easily access necessary components for maintenance and repairs. This manual is essential for extending the lifespan and performance of the machine.

1.2 Purpose of the Parts Manual

The purpose of the Nobles Speed Scrub parts manual is to provide users with a comprehensive guide for identifying, ordering, and replacing parts for their machine. This manual serves as an essential resource for maintenance, repairs, and upgrades. It includes detailed diagrams, part numbers, and descriptions to ensure accurate identification of components. By following the manual, users can efficiently locate and order the correct parts, minimizing downtime and ensuring proper machine functionality. The manual also includes instructions for understanding model and serial numbers, which are critical for ordering the right components. Its clear organization and detailed information make it an indispensable tool for anyone responsible for maintaining or repairing the Nobles Speed Scrub. This ensures the machine continues to perform optimally, extending its lifespan and maintaining its efficiency in cleaning operations.

1.3 Key Features of the Speed Scrub Model

The Nobles Speed Scrub model is designed for high-efficiency cleaning, featuring a robust construction and user-friendly interface. It includes an automatic scrubbing system with adjustable brush speed and pressure, ensuring thorough cleaning on various surfaces; The machine is equipped with a large solution tank and recovery system, minimizing downtime during operation. Its ergonomic design enhances operator comfort, while the quiet operation makes it suitable for noise-sensitive environments. The Speed Scrub also incorporates advanced safety features, such as emergency stop buttons and protective guards, to ensure safe operation. Additionally, it offers eco-friendly cleaning options, including low-water usage settings, making it an environmentally conscious choice. The model is backed by a comprehensive parts manual, ensuring easy access to maintenance and repair information; These features collectively make the Speed Scrub a reliable and versatile cleaning solution for commercial and industrial settings.

Safety Precautions

Always wear protective gear, including gloves and safety glasses, when operating or maintaining the Speed Scrub. Follow all safety warnings and guidelines to prevent accidents and ensure safe operation.

2.1 General Safety Tips

Always read the manual thoroughly before operating the Speed Scrub. Wear appropriate personal protective equipment, such as gloves and safety glasses, to minimize risks. Ensure the work area is clear of obstacles and properly ventilated. Regular maintenance is crucial; check and replace worn or damaged parts promptly. Use only genuine Nobles parts to ensure safety and performance. Never bypass safety features or attempt repairs without proper training. Keep children and pets away while operating the machine. Familiarize yourself with emergency stop procedures and test them periodically. Avoid overreaching or stretching while using the scrubber, as this can lead to loss of control. Store the machine in a dry, secure location when not in use. Follow all safety guidelines provided in the manual to ensure safe and efficient operation of the Nobles Speed Scrub.

2.2 Specific Warnings for the Speed Scrub

Do not operate the Speed Scrub near open flames or sparks, as this could ignite flammable materials. Avoid exposing the machine to excessive water or moisture, which may damage electrical components. Never use abrasive cleaners or strong chemicals, as they can harm the surfaces or degrade internal parts. Keep the machine away from direct sunlight for extended periods to prevent overheating. Do not leave the Speed Scrub unattended while in operation, as unintended movement could cause accidents. Ensure all loose clothing or long hair is tied back to avoid entanglement with moving parts. Never modify or tamper with the machine’s safety features, as this could void the warranty and pose serious risks. Always disconnect the battery before performing maintenance or repairs; Avoid operating the Speed Scrub on uneven or slippery surfaces to maintain stability and control. Follow all specific warnings outlined in the manual to ensure safe and reliable operation.

2.3 Personal Protective Equipment Requirements

Always wear appropriate personal protective equipment (PPE) when operating or maintaining the Speed Scrub to minimize risks of injury. Safety glasses or goggles are essential to protect eyes from debris or cleaning agents. Durable gloves should be worn to prevent cuts, abrasions, or chemical exposure. Steel-toe boots or sturdy footwear are recommended to safeguard feet from heavy objects or machine components. Long sleeves and pants can protect skin from accidental chemical splashes or friction. A dust mask or respirator may be necessary when working in dusty environments or with harsh cleaning solutions. Ensure all PPE meets safety standards and is in good condition. Never operate the machine without proper protective gear, as this could lead to serious harm. Adhere to these guidelines to maintain a safe working environment while using or servicing the Speed Scrub.

Parts Identification

Understand the model and serial numbers to navigate the parts list effectively. Identify components by their descriptions and diagrams to ensure accurate ordering and maintenance of the Speed Scrub.

3.1 Understanding Model and Serial Numbers

Understanding the model and serial numbers is crucial for accurate parts identification. The model number identifies the specific Speed Scrub variant, while the serial number provides unique machine identification. Both can be found on the data label located on the machine. For example, models like the Speed Scrub 17-20 inch automatic scrubber have serial numbers in ranges such as 10000000-20000000 or 80000000-90000000. These numbers ensure compatibility when ordering parts. Always cross-reference the model and serial numbers with the parts list to avoid errors. This step is essential for maintaining the machine effectively and ensuring safety. Proper identification prevents mismatches and delays in repairs or maintenance. Referencing these numbers accurately guarantees the correct parts are ordered and installed. This process is vital for maintaining optimal performance and longevity of the Speed Scrub. Always double-check the numbers before placing an order to avoid unnecessary issues. Accurate identification is key to efficient maintenance and operation.

3.2 Navigating the Parts List

Navigating the parts list in the Nobles Speed Scrub manual is straightforward when approached systematically. The list is organized by sections, corresponding to different machine components, and includes diagrams for visual reference. Each part is assigned a unique number, which must be used when ordering. To locate a specific part, first identify its section in the diagram, then cross-reference it with the numerical listing; The parts list also indicates quantities required and compatibility with the machine’s model and serial number. Always avoid ordering by page numbers, as this can lead to errors. Instead, rely on the part numbers and descriptions provided. This method ensures accuracy and efficiency when sourcing replacement parts. By familiarizing yourself with the structure of the parts list, you can quickly identify and order the components needed for maintenance or repairs. Proper navigation prevents delays and ensures the correct parts are delivered. This step is critical for maintaining the machine’s performance and longevity. Accurate navigation minimizes errors and streamlines the ordering process, ensuring timely repairs and uninterrupted operation. Effective use of the parts list is essential for all users, from technicians to facility managers. It serves as a comprehensive guide to keeping the Speed Scrub in optimal condition. Always double-check part numbers before placing an order to avoid discrepancies. This ensures that the correct components are supplied, reducing the risk of further issues. The parts list is a vital tool for anyone working with the Nobles Speed Scrub, providing clear and detailed information to support maintenance and repairs. By understanding how to navigate it effectively, users can maintain the machine’s efficiency and extend its operational life. Proper use of the parts list is a cornerstone of effective maintenance practices.

3.3 Commonly Replaced Parts

The Nobles Speed Scrub parts manual highlights several components that are commonly replaced during maintenance or repairs. These include wear-and-tear items such as brushes, squeegee blades, and filters, which are prone to degradation over time. Brushes, for instance, may need replacement when bristles show excessive wear, affecting cleaning efficiency. Similarly, squeegee blades should be replaced when they no longer effectively collect water, ensuring proper floor drying. Filters, especially in dusty environments, can clog and reduce machine performance, necessitating regular cleaning or replacement. Additionally, batteries and electrical components may require attention, particularly if the machine experiences power issues. Understanding which parts are most frequently replaced allows users to maintain an inventory of essential components, minimizing downtime. Regular inspection of these parts is crucial for maintaining the Speed Scrub’s performance and extending its operational life. Familiarity with commonly replaced parts ensures proactive maintenance, preventing unexpected breakdowns and ensuring consistent cleaning results. This knowledge empowers users to address issues promptly, keeping the machine in optimal condition. By staying informed about high-wear components, users can schedule replacements during routine maintenance, avoiding costly repairs and operational delays. This proactive approach underscores the importance of the parts manual in guiding effective maintenance practices for the Nobles Speed Scrub. Regular checks and timely replacements of these parts are vital for maintaining the machine’s efficiency and reliability. This ensures that the Speed Scrub continues to deliver exceptional cleaning performance, meeting the demands of busy environments. Overall, understanding commonly replaced parts is a key aspect of responsible machine ownership and operation. It allows users to plan and budget for necessary replacements, ensuring seamless functionality. By prioritizing these components, users can uphold the machine’s productivity and extend its lifespan, making it a valuable asset for years to come. Regular maintenance, focused on these high-wear parts, is essential for preserving the Speed Scrub’s performance and ensuring it remains a reliable cleaning solution. This practice not only saves time but also reduces operational costs associated with unexpected breakdowns. In conclusion, staying informed about commonly replaced parts is a critical component of effective Speed Scrub maintenance, enabling users to maintain peak performance and operational efficiency.

Maintenance Schedule

The Nobles Speed Scrub requires routine maintenance to ensure optimal performance. This includes daily inspections, weekly cleaning of filters, and monthly checks on batteries and brushes for longevity.

4.1 Routine Maintenance Tasks

Regular maintenance is crucial to ensure the Nobles Speed Scrub operates efficiently. Daily tasks include checking the solution tank level, inspecting brushes for wear, and ensuring all bolts are tightened. Weekly, clean or replace filters, inspect squeegee blades, and check for any blockages in the recovery tank. Monthly, inspect and charge the battery, clean the electrical connections, and lubricate moving parts. Additionally, every 500 hours, replace brushes and inspect the motor for unusual wear. Always refer to the parts manual for specific part numbers and instructions. Proper maintenance prolongs equipment life, prevents breakdowns, and ensures consistent cleaning performance. Neglecting these tasks may lead to reduced efficiency or costly repairs. Follow the schedule diligently to maintain optimal functionality and extend the lifespan of your Nobles Speed Scrub.

4.2 Battery Maintenance Guidelines

Proper battery maintenance ensures the Nobles Speed Scrub operates reliably. Charge the battery fully after each use and avoid overcharging, as it can reduce battery life. Check the charge level daily before operation. Clean terminals regularly with a wire brush to prevent corrosion. Inspect the battery cables for damage or wear and replace them if necessary. Store the battery in a cool, dry place during extended periods of inactivity. Avoid extreme temperatures, as they can affect performance. Replace the battery every 3 years or when capacity drops significantly; Always use the correct charger specified in the parts manual to prevent damage. Proper care extends battery lifespan and ensures consistent machine performance. Neglecting these steps may lead to premature failure or reduced runtime. Refer to the manual for specific charging instructions and part numbers for replacement batteries.

4.3 Filter Cleaning and Replacement

Regular filter cleaning and replacement are crucial for maintaining the efficiency of the Nobles Speed Scrub. Start by turning off the machine and allowing it to cool. Locate and remove the filter according to the parts manual instructions. Clean the filter with water or a mild detergent, ensuring no debris remains. Replace the filter if it is damaged or excessively worn. Check the filter daily before use and clean it as needed. Replace filters every 3 to 6 months, depending on usage. Use only genuine Nobles replacement filters to ensure optimal performance. Improper or dirty filters can reduce suction power and affect cleaning quality. Refer to the parts list for the correct filter model number. Always follow the manufacturer’s guidelines for disposal of used filters. Proper maintenance of the filter system ensures the machine operates efficiently and effectively.

Troubleshooting

Identify common issues like reduced suction or uneven cleaning. Check power supply, water flow, and brush operation. Refer to the troubleshooting guide for specific solutions and diagnostic steps to resolve mechanical or electronic problems efficiently.

5.1 Common Issues and Solutions

Common issues with the Nobles Speed Scrub include reduced cleaning efficiency, uneven water distribution, and mechanical malfunctions. For reduced efficiency, inspect and clean the brushes or replace worn bristles. Uneven water flow may indicate clogged nozzles or low tank levels. Regularly check and maintain the water tank to ensure proper function. Mechanical issues, such as the machine not moving, often relate to battery health or drive system problems. Refer to the troubleshooting guide for step-by-step solutions. Always ensure the machine is on a level surface and all connections are secure. If issues persist, consult the parts manual for repair or replacement options. Proper maintenance and timely repairs will extend the lifespan of your Nobles Speed Scrub and maintain its performance.

5.2 Diagnostic Steps for Mechanical Problems

Diagnosing mechanical issues with the Nobles Speed Scrub involves systematic checks. Start by ensuring the machine is properly powered on and the battery is fully charged. Inspect the brush and squeegee for wear or blockages, as these can disrupt operation. Check the drive system for obstructions or misalignment. If the machine fails to move, examine the drive belt for signs of wear or damage. For issues with water distribution, verify that the solution tank is filled and that nozzles are unobstructed. Refer to the parts manual for specific diagnostic procedures tailored to your model. Always ensure the machine is on a level surface and all safety precautions are followed during diagnostics. If a problem persists, consult the troubleshooting guide or contact authorized support for further assistance.

5.3 Electronic System Troubleshooting

Troubleshooting electronic systems on the Nobles Speed Scrub begins with checking the control panel for error codes or unusual displays. Ensure the machine is properly powered on and all electrical connections are secure. If the system fails to respond, inspect the circuit breaker or fuses. Verify that sensors, such as those monitoring water flow or brush pressure, are clean and free from obstructions. Review the error log in the manual to decode specific issues. For intermittent problems, check wiring harnesses for damage or loose connections. If the issue persists, reset the system by turning it off and on again. Always refer to the manual for model-specific troubleshooting steps. If unable to resolve the issue, contact authorized service personnel for assistance. Regular maintenance, such as updating software or replacing faulty sensors, can prevent electronic malfunctions.

Ordering Parts

To order parts, identify the machine model and serial number, then use the parts list to find the part number and quantity. Do not order by page numbers.

6.1 How to Identify Correct Parts

Identifying the correct parts for your Nobles Speed Scrub requires precise attention to detail. Start by locating the model and serial number on the machine, typically found on a data label. Use this information to reference the parts list in the manual. Each part is assigned a unique number, which must be matched exactly to ensure compatibility. Avoid ordering by page numbers or descriptions alone, as this can lead to errors. Cross-check the part number with the diagram provided in the manual to confirm its location and function. Additionally, verify the quantity needed to avoid overstocking or delays. By following these steps, you can efficiently and accurately identify the correct parts for your Nobles Speed Scrub, ensuring smooth operation and minimizing downtime.

6.2 Using the Parts List Effectively

To use the parts list effectively, start by identifying your machine’s model and serial number, typically found on the data label. This ensures you’re referencing the correct parts for your specific Nobles Speed Scrub. Next, locate the part you need in the parts list, which is organized by category or component. Each part is assigned a unique number, which you must use when placing an order to avoid errors. Refer to the accompanying diagrams to visually identify the part and confirm its location on your machine. Pay attention to the quantity specified, as ordering the correct amount prevents delays or overstocking. Avoid relying solely on page numbers, as parts may span multiple pages. By systematically cross-referencing the part number and diagram, you can efficiently find and order the correct components, ensuring your Nobles Speed Scrub operates smoothly.

6.3 Placing an Order for Replacement Parts

To place an order for replacement parts, ensure you have the correct part numbers from the parts list. Contact your authorized Nobles distributor or supplier, providing the model and serial number of your Speed Scrub. Specify the part numbers and quantities required to avoid errors. For online orders, visit the official Nobles website or authorized dealer portals, where you can search by part number or browse through diagrams. Double-check your order for accuracy before submission. Include your contact information and any special instructions to ensure timely processing. Allow 24-48 hours for order confirmation and an estimated delivery time based on availability. Keep a record of your order details for reference. Prompt delivery ensures minimal downtime for your Nobles Speed Scrub, maintaining productivity and efficiency in your operations.

cuckoo rice cooker manual english pdf

Welcome to the Cuckoo Rice Cooker manual, your guide to mastering this versatile kitchen appliance․ This document provides essential safety tips, operating instructions, and feature details to ensure optimal performance․ Download the English PDF manual from the official Cuckoo website for detailed guidance․

Key Features of the Cuckoo Rice Cooker

The Cuckoo Rice Cooker is designed to provide a seamless and efficient cooking experience․ It features advanced functions such as pressure cooking, multi-functional capabilities, and smart technology․ The cooker is equipped with a user-friendly interface, including a digital display and preset buttons for various cooking options․

  • Pressure Cooking Functionality: Allows for faster cooking and retains nutrients in food․
  • Multi-Functional Capabilities: Enables cooking rice, porridge, soup, and other dishes with ease․
  • Smart Technology: Includes features like automatic temperature control and delayed cooking timers․
  • Durable Design: Built with high-quality materials for long-lasting performance․
  • Easy Cleaning: The inner pot and exterior are designed for convenient maintenance․
  • Customizable Settings: Adjust cooking parameters to suit your preferences․

These features make the Cuckoo Rice Cooker a versatile and reliable addition to any kitchen․ Refer to the manual for detailed instructions on utilizing these features effectively․

Safety Precautions

Safety is paramount when operating the Cuckoo Rice Cooker․ To ensure safe and effective use, follow these essential precautions:

  • Handling the Cooker: Always use oven mitts or tongs when handling the inner pot, as it may be extremely hot after cooking․
  • Placement: Position the cooker on a stable, heat-resistant surface, away from flammable materials and out of children’s reach․
  • Electrical Safety: Avoid using damaged cords or plugs․ Never submerge the cooker in water or expose it to excessive moisture․
  • Overheating Prevention: Ensure the vent is not blocked during operation to prevent pressure buildup and potential damage․
  • Maintenance: Regularly clean the cooker to avoid food residue buildup, which can affect performance and safety․

Failure to adhere to these precautions may result in injury or damage․ Always refer to the manual for detailed safety guidelines before and during use․

Operating Instructions

To operate the Cuckoo Rice Cooker, plug in the device and use the control panel to select the desired mode․ Add rice and water according to guidelines, then press Start․ Refer to the manual for detailed steps․

Before First Use

Before using your Cuckoo Rice Cooker for the first time, ensure all components are clean and properly assembled․ Wash the inner pot with mild soap and rinse thoroughly․ Dry all parts with a soft cloth to prevent water spots․ Remove any protective packaging from accessories like the steam tray or rice paddle․ For optimal results, rinse the rice under cold water before cooking to remove excess starch․ Familiarize yourself with the control panel and buttons to understand their functions․ Always refer to the manual for specific instructions tailored to your model․ Ensure the cooker is placed on a stable, heat-resistant surface, away from children․ Plug in the device and perform a test run without rice to verify proper operation․ These steps ensure a safe and effective first use, preparing you to achieve perfectly cooked rice every time․

Basic Cooking Guide

To start cooking with your Cuckoo Rice Cooker, follow these simple steps for perfect results․ First, measure the rice using the provided cup to ensure accurate proportions․ Rinse the rice thoroughly under cold water to remove excess starch, then drain well․ Place the rinsed rice into the inner pot and add water according to the marked water level corresponding to the rice quantity․ For white rice, the general ratio is 1 cup of rice to 1․2 cups of water․ Close the lid securely and select the “White Rice” mode using the control panel․ Press the “Start” button to begin cooking․ The cooker will automatically adjust cooking time and temperature for optimal results․ Once cooking is complete, allow the rice to rest for 5 minutes with the lid closed to ensure fluffiness․ Open the lid, fluff the rice with the provided paddle, and serve․ For variations like brown rice or porridge, refer to the manual for specific water ratios and settings․ This basic guide ensures perfectly cooked rice every time, whether you’re preparing a simple meal or a special dish․

Advanced Functions

The Cuckoo Rice Cooker offers advanced functions to enhance your cooking experience․ One key feature is the pressure cooking mode, which allows for faster cooking times while retaining nutrients․ This mode is ideal for tougher grains or legumes․ Additionally, the multi-functional capabilities enable you to prepare a variety of dishes beyond rice, such as porridge, soup, and even yogurt․ The smart technology integrated into the cooker ensures precise temperature and pressure control, delivering consistent results․ For added convenience, the delay timer allows you to set cooking to start at a later time, perfect for meal planning․ The cooker also features fuzzy logic, which automatically adjusts cooking parameters based on the type and quantity of rice, ensuring perfect texture every time․ Furthermore, some models include customizable settings, enabling you to tailor cooking to your preferences․ These advanced functions make the Cuckoo Rice Cooker a versatile and efficient addition to any kitchen, capable of handling a wide range of culinary tasks with ease․

Special Features

The Cuckoo Rice Cooker boasts special features like pressure cooking, multi-functional capabilities, and smart technology․ These enhancements allow for versatile cooking, precise temperature control, and effortless meal preparation, making it a standout appliance for modern kitchens․

Pressure Cooking

Pressure cooking with the Cuckoo Rice Cooker offers a faster and more efficient way to prepare meals․ This feature allows for even heat distribution, ensuring grains and flavors are perfectly balanced․ Models like the CRP-DHSR0609F and CRP-P0609S support pressure cooking, enabling users to achieve professional-grade results․ The pressure function is ideal for cooking tougher grains or achieving a fluffy texture quickly․ Refer to the manual for specific instructions on activating and using this feature safely․ Always follow guidelines to avoid accidents and ensure optimal performance․ Pressure cooking enhances the versatility of your Cuckoo Rice Cooker, making it a valuable tool for diverse culinary needs․

Multi-Functional Capabilities

The Cuckoo Rice Cooker is designed to go beyond traditional rice cooking, offering a wide range of multi-functional capabilities․ Models like the CRP-DHSR0609F and CR-0632F support functions such as steaming, sautéing, slow cooking, and even baking․ These features allow users to prepare diverse dishes, from hearty stews to crispy roasted vegetables, all in one appliance․ The cooker also includes a timer and keep-warm function, ensuring meals are ready at the perfect time․ For added convenience, some models come with a steamer basket and recipe book, enabling users to explore creative cooking options․ The multi-functional design makes the Cuckoo Rice Cooker a versatile addition to any kitchen, catering to various dietary needs and preferences․ Refer to the manual for specific instructions on using these advanced functions safely and effectively․ With its multi-functional capabilities, the Cuckoo Rice Cooker simplifies meal preparation while delivering delicious results every time․

Smart Technology

The Cuckoo Rice Cooker integrates advanced smart technology to enhance your cooking experience․ With features like digital touch controls and preset programs, you can effortlessly navigate through various cooking options․ Some models, such as the CRP-DHSR0609F, come equipped with smart sensors that automatically adjust cooking temperatures and times for perfect results․ Additionally, certain versions offer Wi-Fi connectivity, allowing you to control and monitor your cooker via a smartphone app․ This smart technology ensures precise cooking, reduces manual effort, and provides real-time feedback․ The cooker also features an intuitive LCD display, making it easy to select settings and monitor progress․ For detailed instructions on using these smart features, refer to the English PDF manual available on the Cuckoo website․ By combining traditional cooking methods with modern innovation, the Cuckoo Rice Cooker delivers both convenience and excellence in every dish․

Maintenance and Care

Regularly clean the inner pot and exterior to prevent residue buildup․ Avoid using abrasive cleaners to maintain the cooker’s finish․ Check and clean the steam vent for optimal performance․ Store the cooker in a dry place and avoid exposure to harsh chemicals․

Cleaning the Inner Pot

Cleaning the inner pot of your Cuckoo Rice Cooker is essential for maintaining hygiene and performance․ Before first use, wash the inner pot with mild soap and warm water․ Rinse thoroughly and dry with a soft cloth․ After each use, remove any leftover rice and stains to prevent residue buildup․ Use a non-abrasive sponge or soft brush to avoid scratching the non-stick coating․ For tougher stains, soak the pot in warm soapy water for 30 minutes before scrubbing․ Avoid using harsh chemicals, bleach, or metal scourers, as they may damage the surface․ Regular deep cleaning can be done by mixing equal parts water and white vinegar, then heating it in the cooker for 10-15 minutes․ This helps remove any stubborn residues․ Always ensure the inner pot is completely dry before storing to prevent bacterial growth․ Refer to the manual for specific cleaning instructions tailored to your model․

Exterior Cleaning

Regular cleaning of the Cuckoo Rice Cooker’s exterior ensures a sleek appearance and prevents dust buildup․ Use a soft, damp cloth with mild soap to wipe down the outer surface, paying attention to buttons, handles, and any visible crevices․ Avoid using harsh chemicals, abrasive cleaners, or rough scrubbers, as they may damage the finish․ For stubborn stains or splatters, mix equal parts water and white vinegar on a soft cloth and gently scrub the area․ Never immerse the cooker in water or expose electrical components to moisture․ After cleaning, dry the exterior thoroughly with a clean, dry cloth to prevent water spots․ For stainless steel models, a stainless steel cleaner can be used to maintain a polished look․ Avoid using paper towels, as they may leave lint or scratches․ Regular cleaning not only enhances the cooker’s appearance but also ensures hygienic operation․ Always refer to the manual for model-specific cleaning recommendations to maintain your Cuckoo Rice Cooker in optimal condition․

Proper Storage

Proper storage of your Cuckoo Rice Cooker is essential to maintain its performance and longevity․ Before storing, ensure the cooker is completely clean and dry, as moisture can lead to mold or mildew․ Use a soft cloth to wipe down the exterior and inner pot, removing any residue․ Store the cooker in its original packaging if available, as it provides the best protection․ If the original box is unavailable, place the cooker in a dry, cool area away from direct sunlight and humidity․ Avoid storing it in attics, basements, or areas prone to temperature fluctuations․ Keep the cooker away from children and pets to prevent accidental damage․ Do not store food or utensils inside the cooker, as this can attract pests or cause unpleasant odors․ For extended storage, consider covering the cooker with a breathable cloth to protect it from dust․ Periodically check the cooker for any signs of damage or wear․ Always follow the manufacturer’s guidelines for storage to ensure your Cuckoo Rice Cooker remains in excellent condition when not in use․

Troubleshooting Common Issues

Common issues with the Cuckoo Rice Cooker include error codes, power malfunctions, or improper cooking results․ Check the power cord, ensure the inner pot is properly aligned, and clean the cooker regularly․ Refer to the error code list in the manual for specific solutions․

Common Operating Issues

Common operating issues with the Cuckoo Rice Cooker often stem from improper use or maintenance․ One frequent issue is the appearance of error codes, which indicate specific problems such as overheating or sensor malfunctions․ Another issue is the rice cooker not turning on, which could be due to a loose power cord or a tripped circuit breaker․ Additionally, some users report uneven cooking results, which may be caused by incorrect water ratios or failure to rinse rice beforehand․

To address these issues, ensure the inner pot is properly aligned and clean․ Regularly check and clean the steam vent and gasket to maintain proper pressure and sealing․ If error codes persist, consult the manual for specific solutions or reset the cooker․ For uneven cooking, adjust the water ratio and rinse rice thoroughly before cooking․ Proper maintenance and adherence to guidelines can prevent most operating issues․

Understanding Error Codes

The Cuckoo Rice Cooker is equipped with an error code system to help diagnose and resolve issues․ These codes, such as E1, E2, or E3, appear on the display to indicate specific problems․ E1 often relates to temperature sensor malfunctions, while E2 may signal a heating element issue․ E3 could indicate a pressure sensor problem, commonly caused by blockages in the steam vent or faulty seals․

To address these errors, start by unplugging the cooker and allowing it to cool․ For E1 or E2, check if the inner pot is properly aligned and clean․ For E3, inspect and clean the steam vent and gasket․ If the issue persists, reset the cooker by pressing and holding the “Cancel” button for 5 seconds․ Refer to the manual for specific error code meanings and troubleshooting steps․ Regular maintenance, such as cleaning the sensors and ensuring proper ventilation, can prevent many of these issues․ Always consult the official Cuckoo Rice Cooker manual for detailed guidance on error resolution․

Resetting the Cooker

Resetting your Cuckoo Rice Cooker can resolve various operational issues and restore default settings․ To reset, unplug the cooker from the power source and wait for 30 seconds․ Press and hold the “Cancel” button while plugging it back in․ Release the button after 5 seconds and wait for the cooker to reboot․ This process resets all settings to factory defaults, including time and cooking preferences․

Resetting is useful for addressing unexpected errors or malfunctions․ After resetting, reconfigure your settings as needed․ Note that this process does not delete stored recipes or user preferences in models with memory functions․ If issues persist after resetting, consult the manual or contact customer support․ Regular resets can also help maintain optimal performance․ Always ensure the cooker is unplugged before attempting a reset to avoid any electrical issues․

Regular maintenance and proper care will extend the lifespan of your cooker and maintain its performance․ If you encounter any issues, refer to the troubleshooting section or contact customer support for assistance․ With its multi-functional capabilities and user-friendly design, the Cuckoo Rice Cooker is an indispensable addition to any kitchen․ Happy cooking!

Additional Resources

For more detailed information, download the official Cuckoo Rice Cooker Manual in English or Korean PDF from the Cuckoo Electronics website․ Additional support and troubleshooting guides are also available online to assist with any questions or concerns․

Downloading the Manual and Customer Support

To ensure you have all the necessary information for your Cuckoo Rice Cooker, you can easily download the English PDF manual from the official Cuckoo Electronics website․ This comprehensive guide covers safety precautions, operating instructions, and troubleshooting tips․ Additionally, manuals for various Cuckoo rice cooker models, such as the CR-0632F and CRP-P0609S, are available for free download․ If you encounter any issues or have questions, Cuckoo provides dedicated customer support․ You can contact their support team via email, phone, or through the live chat feature on their website․ For further convenience, many manuals are also available on platforms like ManualsLib, ensuring easy access to the information you need․ The customer support team is ready to assist with any queries, whether it’s about understanding error codes, resetting the cooker, or maintaining your appliance․ Visit the official Cuckoo website or refer to the resources provided in this manual to download your copy or reach out for support․ Their team is committed to helping you make the most of your Cuckoo Rice Cooker experience․

singer handheld sewing machine manual

Welcome to the Singer Handheld Sewing Machine Manual, your essential guide to mastering this portable sewing solution․ This manual provides comprehensive instructions for setup, operation, and maintenance, ensuring optimal performance for both beginners and experienced users․

1․1 Overview of the Singer Handheld Sewing Machine

The Singer Handheld Sewing Machine is a portable, versatile sewing solution designed for convenience and ease of use․ Perfect for both beginners and experienced sewists, it offers a compact design that allows for sewing on-the-go․ With its lightweight construction and user-friendly interface, this machine is ideal for small to medium-sized projects, such as repairing clothes, sewing curtains, or crafting home decor․ It features adjustable stitch length and tension, enabling precise control over various fabrics․ The machine typically operates on batteries or a power adapter, making it suitable for both indoor and outdoor use․ Accessories like extra needles, threads, and carrying cases are often included to enhance functionality․ This overview highlights the machine’s key benefits, making it a practical tool for DIY enthusiasts and professionals alike․

1․2 Importance of the Manual for Proper Operation

The Singer Handheld Sewing Machine Manual is an indispensable resource for ensuring proper operation and maximizing the machine’s potential․ It provides detailed instructions for setting up, maintaining, and troubleshooting, helping users avoid common mistakes․ The manual outlines essential steps like threading, adjusting stitch length, and tension, which are critical for achieving professional results․ Additionally, it covers safety guidelines and maintenance tips to prolong the machine’s lifespan; Whether you’re a beginner or an experienced user, the manual serves as a roadmap to understanding the machine’s features and capabilities fully․ By following the guidelines, users can ensure efficient and safe operation, making it a vital companion for all sewing projects․

Understanding the Singer Handheld Sewing Machine

The Singer Handheld Sewing Machine is a portable, user-friendly device designed for sewing on-the-go․ Its compact design and lightweight construction make it ideal for small repairs and creative projects․ Built for versatility, it handles various fabrics with ease, offering a convenient solution for both beginners and experienced sewers․ The machine’s ergonomic design ensures comfort during use, while its straightforward controls simplify the sewing process․ Whether for quick fixes or crafting, this handheld sewing machine is a practical tool for any sewing enthusiast․

2․1 Key Features of the Singer Handheld Sewing Machine

The Singer Handheld Sewing Machine is equipped with a range of features that enhance its functionality and user experience․ Designed for portability, it is lightweight and compact, making it easy to carry and use anywhere․ The machine is battery-powered, eliminating the need for cords and providing greater convenience․ It includes an automatic threading mechanism, simplifying the setup process for users․ The machine also offers adjustable stitch length and tension controls, allowing for customization based on the type of fabric being sewn․ Additionally, it comes with a built-in LED light to illuminate the sewing area, improving visibility․ The ergonomic design ensures comfortable handling during extended use․ These features make the Singer Handheld Sewing Machine a versatile and practical tool for various sewing tasks, from quick repairs to small-scale projects․

2․2 Components and Parts of the Machine

The Singer Handheld Sewing Machine comprises several essential components designed for efficient operation․ The sewing head houses the needle and bobbin mechanism, while the power switch activates the motor․ The spool pin holds the thread, and the tension dial adjusts thread tightness․ The stitch length control allows customization of stitch size․ An LED light illuminates the sewing area for better visibility․ The battery compartment powers the machine, and an extension cord or adapter may be included for alternative power․ Additional accessories like extra needles, bobbins, and a carrying case enhance convenience․ Each part is designed to ensure smooth functionality and portability, making the machine ideal for various sewing tasks․

2․3 Intended Use and Applications

The Singer Handheld Sewing Machine is designed for quick and easy sewing tasks, making it ideal for small repairs, alterations, and crafting projects․ Its portability and compact design allow for use on-the-go, perfect for sewing enthusiasts and DIY enthusiasts alike․ The machine is suitable for lightweight fabrics such as cotton, polyester, and silk, as well as thin layers of denim or canvas․ It excels at straight stitching, making it great for hemming clothes, repairing tears, or sewing small patches․ Additionally, it can be used for crafting projects like making bags, accessories, or decorative items․ The machine’s ease of use and versatility make it a valuable tool for both beginners and experienced sewists, offering a convenient solution for a variety of sewing needs without the bulk of a full-sized machine․

Setting Up the Singer Handheld Sewing Machine

Setting up your Singer Handheld Sewing Machine involves unpacking, installing batteries, and threading the machine properly․ This ensures it’s ready for seamless operation and optimal performance․

3․1 Unpacking and Preparing the Machine

Unboxing your Singer Handheld Sewing Machine is an exciting first step․ Carefully open the package and ensure all components are included, such as the machine, batteries, threading guide, and instruction manual․ Inspect the device for any visible damage․ Before use, wipe the machine with a soft cloth to remove any dust or packaging residue․ Familiarize yourself with the machine’s parts, such as the needle, spool pin, and power switch․ If your model requires batteries, install them as specified in the manual; Finally, thread the machine according to the instructions provided․ Proper preparation ensures smooth operation and extends the machine’s lifespan․ Take your time to align everything correctly before proceeding to sewing․

3․2 Installing Batteries or Power Sources

Properly installing batteries or connecting a power source is crucial for your Singer Handheld Sewing Machine to function․ Start by locating the battery compartment, usually found at the base or side of the machine․ Open it gently and insert the required number of batteries (typically 4 AA) as indicated in the manual․ Ensure the batteries are aligned correctly, with the positive and negative terminals facing the right direction․ Close the compartment securely․ If your machine uses a power adapter, plug it into a compatible outlet․ Always use the recommended battery type or voltage to avoid damage․ Turn on the machine to test its operation․ Refer to your manual for specific instructions, as some models may vary․ Proper installation ensures reliable performance and extends the machine’s lifespan․

3․3 Threading the Machine

Threading your Singer Handheld Sewing Machine is a straightforward process that ensures smooth stitching․ Begin by locating the spool pin and thread guide․ Gently pull the thread from the spool and insert it through the machine’s tension dial, following the arrows indicated on the device․ Next, pass the thread through the take-up lever and finally through the needle eye․ Hold the fabric taut to ensure the thread is properly seated․ If your machine has an automatic threading feature, follow the specific instructions provided in the manual․ For manual threading, be patient and ensure no twists or tangles are present․ Proper threading is essential for consistent stitch quality and machine performance․ Always refer to your Singer Handheld Sewing Machine manual for model-specific guidance․ This step is crucial for achieving professional-looking results in your sewing projects․

Operating the Singer Handheld Sewing Machine

Operating the Singer Handheld Sewing Machine is straightforward, offering versatility for various sewing tasks․ Familiarize yourself with controls, start sewing, and adjust settings as needed for optimal results․

4․1 Basic Sewing Techniques

Mastering basic sewing techniques with the Singer Handheld Sewing Machine ensures smooth and efficient stitching․ Begin by threading the machine correctly, as outlined in the manual, and ensuring the tension is balanced․ Place the fabric under the needle, aligning the edge with the guide․ Gently press the sewing lever or button to start stitching․ For straight lines, maintain steady movement․ To backstitch, reverse the fabric slightly before continuing․ Practice on scrap fabric to perfect your technique․ Always use the appropriate needle type and thread for the fabric․ Keep the work area well-lit and clear of obstructions․ These foundational skills will help you achieve professional-looking results and build confidence in your sewing abilities․

4․2 Adjusting Stitch Length and Tension

Adjusting the stitch length and tension on your Singer Handheld Sewing Machine is crucial for achieving the desired seam quality․ To modify the stitch length, locate the adjustment dial on the machine and turn it clockwise for shorter stitches or counterclockwise for longer ones․ For tension, refer to the manual to identify the tension knob, typically located near the spool or bobbin area․ Turning the knob clockwise increases tension, while counterclockwise decreases it․ Proper tension ensures fabric lies flat without puckering or sagging․ Always test adjustments on scrap fabric before sewing your final project․ Incorrect tension can lead to uneven stitching or fabric damage․ If stitches are too loose or tight, re-adjust the tension and stitch length accordingly․ This customization allows you to tailor the machine’s performance to various fabrics and sewing tasks, ensuring professional-looking results every time․

4․3 Sewing Different Fabrics and Materials

The Singer Handheld Sewing Machine is versatile for various fabrics and materials․ For lightweight fabrics like cotton or silk, use a standard sewing needle and medium tension․ Heavier fabrics, such as denim or canvas, require a heavier-duty needle and increased stitch length․ Always choose the appropriate thread type to match your fabric for consistent results․

To sew delicate materials, reduce stitch length and tension to prevent tearing․ For stretchy fabrics, consider using a zigzag stitch or adjusting the machine’s settings for elastic materials․ Testing on scrap fabric before sewing ensures the best results․

By adjusting stitch length, tension, and needle type, you can effortlessly work with a wide range of fabrics, from thin chiffon to thick upholstery, making the Singer Handheld Sewing Machine suitable for diverse sewing projects․

Maintenance and Troubleshooting

Regular maintenance ensures optimal performance․ Clean the machine after use, lubricate moving parts, and check for thread jams․ Troubleshoot common issues like uneven stitches or motor issues promptly․ Always refer to the manual for solutions or contact Singer support for complex problems․

5․1 Cleaning and Lubricating the Machine

Regular cleaning and lubrication are crucial for maintaining the performance and longevity of your Singer Handheld Sewing Machine․ Start by turning off the machine and removing any batteries or power sources․ Use a soft, dry cloth to wipe down the exterior, paying attention to areas around the needle and bobbin․ For internal cleaning, gently brush away lint and debris using a small, dry brush․ Avoid using harsh chemicals or moisture, as they may damage the machine․ Apply a few drops of sewing machine oil to moving parts, such as the needle bar and shuttle hook, to ensure smooth operation․ Refer to the manual for specific lubrication points․ Proper maintenance will prevent jams, reduce wear, and keep your machine running efficiently for years․

5․2 Common Issues and Solutions

Like any sewing machine, the Singer Handheld Sewing Machine may encounter occasional issues․ One common problem is thread breakage, which can be resolved by checking the tension settings and ensuring the thread is properly threaded through the machine․ Fabric jams can occur if the material is not fed smoothly; simply stop the machine, remove the fabric, and restart․ Uneven stitches may result from incorrect needle size or improper threading․ Re-threading the machine or replacing the needle often fixes this․ If the machine overheats, allow it to cool down before resuming use․ For persistent issues, consult the manual or contact Singer support․ Regular maintenance, such as cleaning and lubricating, can prevent many of these problems․ Always refer to the manual for specific troubleshooting guidance tailored to your machine․

5․3 When to Contact Professional Support

If you encounter issues that cannot be resolved through basic troubleshooting, it may be necessary to contact professional support․ This includes situations where the machine experiences mechanical failure, electrical malfunctions, or persistent operational problems despite proper maintenance․ Additionally, if you are unsure about complex repairs or adjustments, seeking expert assistance is advisable to avoid further damage․ For advanced technical issues or warranty-related concerns, reaching out to Singer’s customer service or authorized service centers is recommended․ They can provide specialized guidance, repair services, or genuine replacement parts․ Remember, professional support ensures your machine is repaired safely and effectively, maintaining its performance and longevity․ Always prioritize professional help when dealing with issues beyond your expertise to ensure optimal results and prevent potential hazards․

Advanced Features and Techniques

Explore advanced features like decorative stitching, reverse sewing, and attachment usage to enhance your sewing projects․ These techniques unlock creativity and precision for skilled users․

6․1 Using Different Attachments and Accessories

The Singer Handheld Sewing Machine supports various attachments and accessories to enhance your sewing experience․ These include zipper feet, embroidery hoops, and specialized presser feet, which can be easily attached to the machine․ To use an attachment, ensure it is compatible with your machine model and follow the manual’s instructions for installation․ For example, the Singer Stitch Quick comes with a spool pin for threading, while other models may include additional accessories like carry cases or extra needles․

  • Always refer to the specific accessory manual for installation guidance․
  • Ensure the machine is turned off before attaching or detaching accessories․
  • Using genuine Singer accessories guarantees optimal performance and safety․

Explore these accessories to expand your sewing capabilities and achieve professional-quality results․

6․2 Sewing in Reverse

The Singer Handheld Sewing Machine allows for reverse sewing, a feature that enhances control and precision․ To sew in reverse, locate the reverse stitch button on your machine and press it before starting your seam․ This function is particularly useful for securing the beginning and end of stitches, ensuring a professional finish․ For models like the Singer Stitch Quick, reverse sewing is activated by pressing and holding the stitch button while sewing․ Always refer to your specific model’s manual for exact instructions, as some machines may have slightly different methods․ Regular maintenance, such as cleaning the machine and updating accessories, ensures smooth reverse stitching․ Troubleshooting tips for reverse sewing can often be found in the manual or online resources, including step-by-step guides and YouTube tutorials․

  • Use reverse stitching to reinforce seams for durability․
  • Clean the machine regularly to maintain reverse stitch functionality․
  • Consult the manual or online videos for model-specific instructions․
  • 6․3 Creating Decorative Stitches

    To add a personal touch to your projects, the Singer Handheld Sewing Machine offers the ability to create decorative stitches․ Depending on your model, such as the Singer Stitch Quick or Singer Handy Stitch, you can explore various stitch patterns like straight, zigzag, or even custom designs․ Start by selecting the desired stitch option using the control panel or dial․ For handheld models, some machines allow switching between stitches by adjusting the speed or using specific buttons․ Experiment with different thread colors and fabric types to enhance your designs․ To achieve consistent results, ensure the machine is properly threaded and tension is adjusted․ If your model supports attachments, consider using decorative presser feet for intricate patterns․ Always refer to your manual for model-specific instructions and tips on mastering decorative stitching techniques․ This feature is perfect for embellishing clothing, home decor, or craft projects․

    • Use the stitch selection feature to choose decorative patterns․
    • Experiment with thread colors and fabric types for unique effects․
    • Adjust tension settings for consistent stitching quality․
    • Explore optional attachments for intricate designs․

    Safety Precautions

    Ensure safe operation by keeping loose clothing and long hair tied back․ Avoid handling sharp needles carelessly․ Keep children away while sewing․ Store the machine properly when not in use․

    • Handle needles and sharp objects with care․
    • Keep the machine out of children’s reach․
    • Store the device in a dry, secure location․

    7․1 General Safety Guidelines

    Always handle the Singer Handheld Sewing Machine with care to ensure safe and effective operation․ Keep sharp objects like needles and scissors out of reach of children․ Avoid sewing near flammable materials or in poorly ventilated areas․ Use the machine on a stable, flat surface to prevent accidental movement․ Never touch electrical components with wet hands or while standing on a damp surface․ Ensure proper lighting to avoid eye strain and maintain visibility of your work․ Avoid distractions while sewing to prevent accidents․ Store the machine in a dry, cool place when not in use․ Keep children and pets away while operating the machine․ Use only genuine Singer parts and accessories to maintain safety standards․ Regularly inspect the machine for damage and ensure all parts are securely attached before use․

    7․2 Avoiding Accidents and Injuries

    To prevent accidents while using the Singer Handheld Sewing Machine, always keep the work area clear of clutter and ensure good lighting․ Avoid wearing loose clothing or jewelry that could get caught in the machine․ Keep fingers away from the needle and presser foot during operation․ Never touch the needle or moving parts with bare hands․ Use the machine on a stable surface to avoid sudden movements․ Keep children and pets at a safe distance while sewing․ Regularly inspect the needle for damage and replace it if necessary․ Avoid sewing over pins, as they can cause injury or damage; If the machine malfunctions, turn it off immediately and consult the manual or contact support․ Always unplug the machine when not in use or during maintenance to prevent electrical accidents․ Proper handling and care will ensure safe and efficient sewing experiences․

    7․3 Storing the Machine Safely

    Proper storage of the Singer Handheld Sewing Machine is essential to maintain its functionality and longevity․ Always store the machine in its original carrying case or a protective cover to shield it from dust and damage․ Ensure the needle is in the down position and covered with the provided needle cover to prevent accidents․ Clean the machine thoroughly before storing it, as dirt or debris can attract moisture and cause damage․ Store the machine in a cool, dry place away from direct sunlight and extreme temperatures․ Avoid storing it in humid environments or areas prone to moisture․ Keep the machine out of reach of children and pets to prevent accidental damage or injury․ For extended storage, remove batteries to prevent corrosion and place silica gel packets in the storage container to absorb moisture․ This ensures the machine remains in optimal condition for future use․

    Thank you for exploring the Singer Handheld Sewing Machine Manual․ This guide has equipped you with the knowledge to use, maintain, and troubleshoot your machine effectively․ Happy sewing!

    8․1 Recap of Key Points

    8․2 Encouragement to Practice and Explore

    Now that you’ve acquainted yourself with the Singer Handheld Sewing Machine, it’s time to embrace creativity and experimentation․ Regular practice will enhance your sewing skills and confidence․ Explore various fabrics, stitches, and techniques to unlock the machine’s full potential․ Don’t hesitate to try new projects, from simple repairs to intricate designs․ Troubleshooting and maintenance are part of the learning process, and they will deepen your understanding of the machine․ Remember, sewing is not just a practical skill but also an art form․ With patience and curiosity, you can create beautiful, functional pieces that reflect your personal style․ Keep experimenting, and enjoy the journey of mastering your Singer Handheld Sewing Machine!