nikon d200 owners manual
Welcome to the Nikon D200 Owner’s Manual, your comprehensive guide to mastering this high-performance DSLR camera. Designed for both professionals and enthusiasts, this manual covers everything from basic operations to advanced features, ensuring you optimize your photography experience with the D200.
Overview of the Nikon D200
The Nikon D200 is a mid-range DSLR camera designed for enthusiasts and professionals, offering robust performance and advanced features. It features a 10.2-megapixel DX-format CCD sensor, ensuring high-quality images with excellent detail and color accuracy. Built with durability in mind, the D200 boasts a magnesium alloy body and weather-sealing for reliable use in challenging conditions. Its compatibility with a wide range of Nikon lenses and accessories makes it versatile for various photography needs, from portraits to landscapes and action shots.
Importance of Reading the Manual
Reading the Nikon D200 Owner’s Manual is essential to unlock its full potential and ensure optimal performance. The manual provides detailed explanations of features, customization options, and troubleshooting tips, helping you navigate its advanced settings and modes. By understanding the camera’s capabilities, you can enhance your photography skills and avoid common errors. It serves as a comprehensive guide for mastering the D200, offering insights into its operation, maintenance, and advanced functionalities to elevate your creative workflow.
Key Features of the Nikon D200
The Nikon D200 boasts a 10.2-megapixel DX-format CCD sensor, delivering sharp and detailed images. It features an 11-area autofocus system for precise subject tracking and a wide ISO range of 100-1600, expandable to 3200. The camera supports various shooting modes, including Aperture Priority, Shutter Priority, and Manual, offering flexibility for creative control. With a robust build and intuitive menu system, the D200 is designed to meet the demands of professional photographers while remaining accessible to enthusiasts.

Technical Specifications of the Nikon D200
The Nikon D200 is a 10.2-megapixel DSLR featuring a DX-format CCD sensor, 2.5-inch LCD, and compatibility with Nikon F-mount lenses. It supports ISO 100-1600, extendable to 3200, and offers a maximum shutter speed of 1/8000 seconds. The camera weighs approximately 830 grams and supports CF and MicroDrive storage, ensuring versatility for professional and enthusiast photographers.
Camera Sensor and Image Quality
The Nikon D200 features a 10.2-megapixel DX-format CCD sensor, delivering high-resolution still images with vibrant colors and sharp details. The APS-C-sized sensor ensures excellent light capture, while the EXPEED image processing engine enhances color accuracy and noise reduction. The camera supports a wide ISO range of 100-1600, expandable to 3200, making it versatile for various lighting conditions. With its advanced sensor technology, the D200 produces professional-grade images, balancing detail and dynamic range for exceptional photography results.
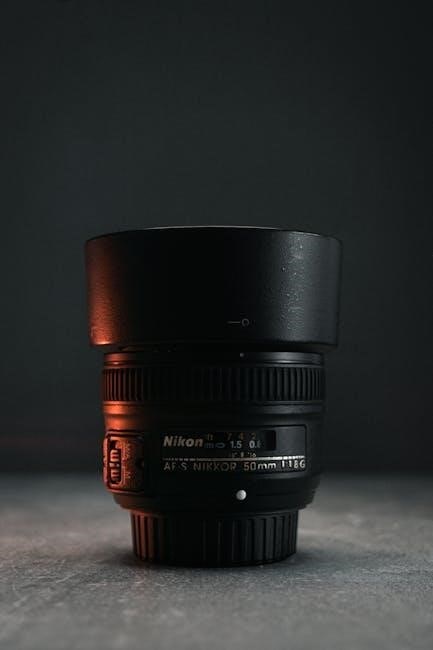
Lens Compatibility
Lens Compatibility
The Nikon D200 is compatible with a wide range of lenses, including AF-S, AF-I, and DX-format lenses designed for Nikon DSLRs. It supports both DX and FX lenses, with FX lenses operating in a cropped mode due to the APS-C sensor. The camera also works with older AF and AI lenses, though some features like autofocus may not be supported. This versatility allows photographers to choose from a broad selection of lenses to suit their creative needs and enhance image quality.
Shutter Speed and ISO Range
The Nikon D200 offers a wide range of shutter speeds, from 1/8000 to 30 seconds, plus a Bulb mode for extended exposures. The ISO range spans 100 to 1600, with a Hi-1 setting equivalent to ISO 3200 for low-light conditions. These features provide flexibility for capturing sharp images in various lighting scenarios, from freezing fast-moving subjects to creating stunning low-light photography. The combination of precise shutter control and adjustable ISO ensures optimal image quality across diverse shooting environments.
Viewfinder and LCD Screen
The Nikon D200 features a bright, high-eyepoint viewfinder with 100% frame coverage, ensuring precise composition. The 2.5-inch color LCD screen offers a 230,000-dot resolution for clear image review and menu navigation. The LCD displays histograms, shooting data, and playback options, making it essential for post-shot analysis. Both the viewfinder and screen are designed to enhance your shooting experience, providing accurate previews and intuitive control over camera settings for optimal results in various photography situations.
Setting Up the Nikon D200
Unbox and initialize your Nikon D200 by charging the battery, inserting memory cards, and setting the date, time, and language for a seamless start.
Unboxing and Initial Setup
Carefully unbox your Nikon D200, ensuring all accessories, including the battery, charger, and manual, are included. Handle the camera by the body to avoid damaging the lens. Before use, charge the battery fully using the provided charger. Insert a compatible memory card into the slot, ensuring it clicks securely into place. Power on the camera and follow the on-screen prompts to set the date, time, and language. Familiarize yourself with the camera’s controls and settings to prepare for your first shoot.
Charging the Battery and Using Memory Cards
Charge the Nikon D200’s EN-EL3e lithium-ion battery using the provided MH-18a charger until the indicator turns green. Insert the battery into the camera, ensuring it clicks securely into place. Use compatible memory cards, such as CF cards, to store your images. Format the card in the camera for optimal performance. For best results, use high-speed cards with sufficient storage capacity. Always safely eject memory cards to prevent data loss.
Setting the Date, Time, and Language
Set the date, time, and language to ensure proper file naming and EXIF data accuracy. Access these settings via the Setup Menu. Use the multi-selector to scroll to the desired option, then press the center button to select. Choose your preferred language and adjust the date and time using the multi-selector. Confirm your settings to save changes. Accurate date and time settings are crucial for organizing your photos. The camera also allows syncing with an external GPS for location data. Ensure all settings are correct before shooting.
Navigating the Camera Menus
Access the menu system by pressing the Menu button. Use the multi-selector to scroll through options. Highlight your desired menu item and press the center button to select. The Playback, Shooting, Custom Settings, and Setup menus provide comprehensive control over camera functions. Navigate through sub-menus to adjust settings. Press the Menu button to exit when finished. This intuitive system allows quick customization of camera settings to suit your photography needs.
Understanding the Playback Menu
The Playback Menu on the Nikon D200 allows you to review and manage your photos. Use the multi-selector to scroll through images. Press the Thumbnail button to view multiple images at once. Select Delete to remove unwanted photos or use Protect to prevent accidental deletion. Access Slide Show to create a presentation of your images. The Histogram feature displays exposure data, helping you analyze your shots. Use the Zoom button to enlarge details for closer inspection. These tools make reviewing and organizing your photos efficient and straightforward.
Exploring the Shooting Menu
The Shooting Menu on the Nikon D200 offers essential settings for capturing images. Adjust AF Mode to choose between single or continuous autofocus. Select Metering Mode to control exposure measurement, such as Matrix, Center-Weighted, or Spot. Set White Balance to match lighting conditions, like Auto, Daylight, or Fluorescent. Configure ISO Sensitivity for optimal performance in various lighting. Customize Image Quality and Image Size to suit your needs. These settings empower you to tailor the camera for precise control over your photography.
Custom Settings Menu
The Custom Settings Menu on the Nikon D200 allows advanced users to personalize camera functions. Adjust Autofocus Modes for precise focus control, fine-tune Metering Modes to optimize exposure, and customize White Balance for accurate color reproduction. Additional settings like Noise Reduction and Image Optimization enable enhanced image quality. These options provide flexibility to tailor the camera’s performance to your shooting style, ensuring consistency and creativity in your photography. Explore and adjust these settings to unlock the full potential of your Nikon D200.
Setup Menu
The Setup Menu on the Nikon D200 provides essential tools for configuring your camera. Use it to format memory cards, set the date, time, and language, and adjust LCD brightness. Options like auto rotation and file naming conventions simplify workflow. Customize firmware updates, restore default settings, and manage camera locks. This menu ensures optimal performance and personalized use, making it a crucial part of your camera setup routine. Explore these settings to tailor your D200 to your preferences and shooting needs.
Shooting Modes and Techniques
Shooting Modes and Techniques on the Nikon D200 offer flexible options for photographers. Choose from Aperture Priority (A), Shutter Priority (S), Manual (M), and Program Mode (P) to capture images with precision and creativity.
Aperture Priority Mode (A)
Aperture Priority Mode (A) allows you to set the aperture while the camera automatically adjusts the shutter speed. This mode is ideal for controlling depth of field, making it perfect for portraits, landscapes, and group photos. A smaller aperture (higher f-stop) sharpens the entire image, while a larger aperture (lower f-stop) blurs the background. Use this mode to creatively emphasize subjects or ensure everything is in focus. The D200 automatically adjusts ISO for optimal exposure, giving you more time to focus on composition and creativity.
Shutter Priority Mode (S)
Shutter Priority Mode (S) lets you set the shutter speed, while the camera adjusts the aperture automatically. This mode is perfect for capturing motion, freezing fast-moving subjects, or creating artistic blur. A faster shutter speed (1/1000th of a second) is ideal for sports and wildlife, while a slower speed (1 second) creates smooth waterfalls or light trails. Use this mode to control the motion effect in your images, allowing the D200 to handle the rest for optimal exposure and creative results.
Manual Mode (M)
Manual Mode (M) offers full control over both aperture and shutter speed, allowing you to tailor settings for precise creative results. Ideal for experienced photographers, this mode is best used in specific lighting conditions where automatic modes may not deliver the desired outcome. Adjust the aperture for depth of field and shutter speed for motion effects, then check the exposure meter for guidance. Manual Mode empowers you to experiment and achieve unique photographic styles, making it a favorite for those who prefer hands-on control over their camera settings.
Program Mode (P)
Program Mode (P) offers a balance between convenience and control, ideal for everyday shooting. The camera automatically selects aperture and shutter speed, but you can adjust settings like ISO, white balance, and exposure compensation for tailored results. This mode is perfect for photographers who want flexibility without manual adjustments. It’s great for quick shots while still allowing creative input, making it a versatile choice for various lighting conditions and subjects.
Custom Settings and Advanced Features
The Nikon D200 offers extensive customization options, allowing photographers to tailor settings to their preferences. Explore advanced features like autofocus modes, metering modes, white balance, and noise reduction to enhance your shooting experience and achieve superior image quality.
Autofocus Modes and Settings
The Nikon D200 offers advanced autofocus capabilities with multiple modes to suit various shooting scenarios. Choose from Single Area AF for precise focus on stationary subjects, Dynamic Area AF for tracking moving subjects, or Group Dynamic AF for enhanced accuracy in dynamic situations. Customizable AF settings allow photographers to tailor focus behavior to their style, ensuring sharp images in both still and action photography. These features make the D200 versatile for wildlife, sports, and portrait photography, delivering reliable autofocus performance in demanding conditions.
Metering Modes
Metering Modes
The Nikon D200 features three metering modes to ensure accurate exposure control. Matrix Metering analyzes the entire scene for balanced results, ideal for complex lighting. Center-Weighted Metering prioritizes the central area, focusing on your main subject. Spot Metering measures a small area, perfect for challenging lighting conditions or precise exposure adjustments. These modes allow photographers to adapt to various shooting scenarios, ensuring optimal results in diverse environments and lighting setups for professional-grade images.
White Balance and Color Settings
The Nikon D200 offers versatile white balance options to capture accurate colors in various lighting conditions. Choose from Auto, Preset, Daylight, Shade, Fluorescent, Incandescent, and Flash modes. Preset white balance allows manual measurement for precise control. Fine-tuning options enable adjustments to suit personal preferences or specific lighting scenarios. Additionally, color settings like saturation and hue can be customized to enhance creativity. These features ensure vibrant, natural-looking images, giving photographers full control over color reproduction and artistic expression in their work.
Noise Reduction and Image Optimization
The Nikon D200 provides tools to minimize noise and enhance image quality. Long Exposure NR reduces noise in shots taken with exposures over 1 second. High ISO NR lowers grain in high-sensitivity images. Additionally, in-camera image optimization features like sharpening, contrast, and color balance ensure photos are polished. These settings help photographers achieve clear, detailed images even in challenging lighting conditions, preserving the integrity of every shot and delivering professional-grade results with minimal post-processing effort required.
Playback and Reviewing Images
The Nikon D200 allows easy playback of captured images, enabling quick review, deletion, and protection. Use zoom to inspect details and histograms to analyze exposure accuracy.
Viewing and Deleting Photos
The Nikon D200 allows you to review images on its LCD screen immediately after capture. Use the multi-selector to navigate through photos, protect or delete them. Pressing the Delete button brings up options to erase selected images or all photos on the memory card. Protected images cannot be deleted accidentally. Use the Playback menu to adjust image review settings, ensuring efficient management of your captured shots. This feature helps maintain organized storage and quick access to your favorite photos.
Zooming In and Out of Images
To zoom in on images, press the Zoom In button (magnifying glass with a plus sign) while in playback mode. This allows detailed examination of image sharpness and composition. Continue pressing to increase magnification up to 27x. Use the multi-selector to scroll across the image. To zoom out, press the Zoom Out button (magnifying glass with a minus sign) or OK to reset the view. The Thumbnail view option displays multiple images, enabling quick browsing through your photos.
Slide Shows and Histograms
The Nikon D200 allows you to create and play back slide shows directly on the camera’s LCD screen. Use the Playback Menu to select images and set intervals. For histograms, enable the RGB Histogram option in the Playback Menu to view detailed exposure data. This feature displays luminance and color channels, helping you assess brightness and color balance. Use the multi-selector to scroll through histogram views, ensuring precise control over image review and analysis for optimal photo quality.
Maintenance and Care
Regular maintenance ensures the Nikon D200 performs optimally. Clean the camera and lens with soft cloths, avoid harsh chemicals, and store in a cool, dry place. Use silica gel packets to prevent moisture damage. Handle the camera gently to avoid scratches and internal damage. For long-term care, consider professional servicing every 2-3 years for optimal performance and longevity.
Cleaning the Camera and Lens
Regular cleaning is essential to maintain the Nikon D200’s performance. Use a soft, dry cloth to wipe the camera body and lens, avoiding harsh chemicals. For stubborn smudges, dampen the cloth slightly but ensure no moisture enters the camera. Avoid touching the lens surface to prevent fingerprints. Use a microfiber cloth for the lens and a blower to remove dust. For thorough cleaning, consider professional servicing every 2-3 years to ensure optimal functionality and image quality.
Updating Firmware
Updating the Nikon D200’s firmware ensures optimal performance and compatibility. Visit Nikon’s official website to check for the latest firmware version, such as Firmware A:Ver.2.01/B:Ver.2.01. Download and follow the installation instructions carefully. Before updating, ensure the battery is fully charged and avoid interruptions. This process enhances functionality, fixes bugs, and improves compatibility with lenses and Speedlights. Regular firmware checks are recommended to maintain peak performance and ensure all features work seamlessly.
Regular Maintenance Tips
Regular maintenance is crucial to ensure the Nikon D200’s longevity and performance. Clean the camera and lens regularly with a soft cloth and brush to prevent dust buildup. Store the camera in a dry, cool place to avoid moisture damage. Use a UV filter to protect the lens from scratches and dust. Check for firmware updates periodically to keep the camera optimized. For thorough servicing, consult a Nikon-authorized service center every two years, especially for the Speedlight and shutter mechanisms. Proper care ensures reliable operation and image quality.
Troubleshooting Common Issues
Address common issues like error messages, autofocus malfunctions, and battery or memory card problems. Refer to the manual for detailed solutions and maintenance tips to resolve these issues effectively.
Resolving Error Messages
Encounter error messages like “ERR” or “CARD” on your Nikon D200? These indicate issues with the camera or memory card. Turn the camera off and on to reset it. If the error persists, check the memory card for damage or corruption. Use the camera’s format function to reset the card. For severe errors, update the firmware or contact Nikon support for assistance. Regular maintenance and updates can help prevent such issues and ensure smooth operation of your camera.
Fixing Autofocus Problems
Experiencing autofocus issues with your Nikon D200? Ensure the lens is clean and free from debris. Check the autofocus settings in the Custom Settings menu and verify that the AF mode is set correctly; If focusing is inconsistent, perform a factory reset or update the camera’s firmware. Clean the image sensor to prevent dust from interfering with autofocus. For persistent problems, consult the manual or contact Nikon customer support for professional assistance. Regular maintenance can help maintain optimal autofocus performance.
Solving Battery and Memory Card Issues
If your Nikon D200 battery drains quickly, charge it using the provided charger; Ensure the battery is compatible and clean the terminals. For memory card issues, check for damage, format the card in the camera, or use a card reader. Ensure the card is compatible with the D200. If problems persist, reset the camera to factory settings or update the firmware. Regularly cleaning the memory card contacts can prevent errors, ensuring smooth operation and reliable performance during photography sessions.
Additional Resources
Access the Nikon D200 PDF manual online for free, explore forums, or contact Nikon customer support for further assistance and troubleshooting, ensuring optimal camera performance always.
Downloading the PDF Manual
The Nikon D200 owner’s manual is available for free download as a PDF from trusted sources like ManualsDir.com or ManyManuals.com. The manual spans 221 pages, covering all features, settings, and troubleshooting tips. It can be accessed in English and other languages, ensuring global accessibility. Simply visit the website, search for the Nikon D200, and download the PDF. No registration is required, making it a convenient resource for understanding and mastering your camera’s capabilities effectively.
Online Communities and Forums
Active online communities and forums dedicated to the Nikon D200 provide valuable support and resources for users. Platforms like Nikon’s official forums, ManualsDir.com, and ManyManuals.com offer spaces to discuss camera settings, troubleshooting, and creative techniques. These communities are ideal for connecting with fellow photographers, sharing tips, and resolving technical issues. Many forums also host tutorials and guides, making them indispensable for mastering the D200’s advanced features and enhancing your photography skills effectively.
Nikon Customer Support
Nikon Customer Support offers comprehensive assistance for D200 users, providing official resources and expert guidance. Visit Nikon’s support website for firmware updates, repair manuals, and troubleshooting guides. Contact support directly via phone, email, or live chat for personalized help. Nikon’s global network ensures reliable service, whether you need technical assistance or maintenance. Additionally, authorized service centers provide professional repairs and maintenance, ensuring your D200 operates at its best. Rely on Nikon’s dedicated support team for all your camera-related needs.
Mastering the Nikon D200 requires practice and exploration of its features. Refer to this manual for guidance, and enjoy capturing stunning images with your D200.
Mastering the Nikon D200
Mastering the Nikon D200 begins with understanding its powerful features and customizing settings to suit your photography style. This manual guides you through modes like Aperture Priority (A) and Shutter Priority (S), allowing creative control. Experiment with autofocus settings and metering modes to enhance your shots. Regular maintenance ensures optimal performance. With practice and exploration, unlock the D200’s full potential and capture stunning images consistently.
Continuous Learning and Improvement
Continuous learning is key to unlocking the full potential of your Nikon D200. Explore advanced techniques, experiment with custom settings, and refine your skills through practice. Stay updated with firmware updates and new features to ensure optimal performance. Engage with online communities and forums to share knowledge and gain insights from fellow photographers. By dedicating time to learning, you’ll master the D200’s capabilities and elevate your photography to new heights.