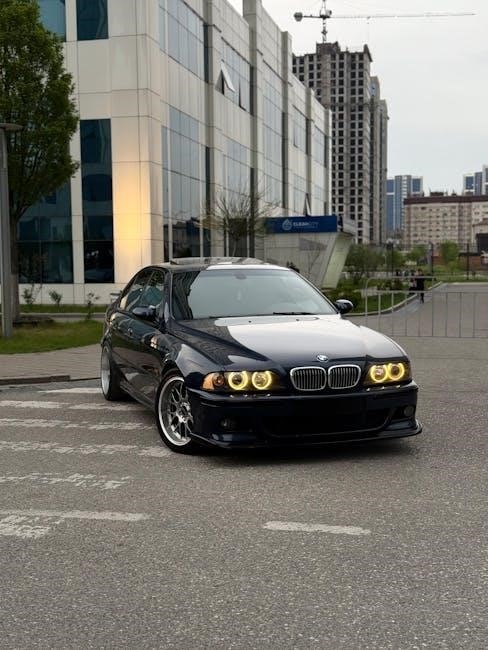
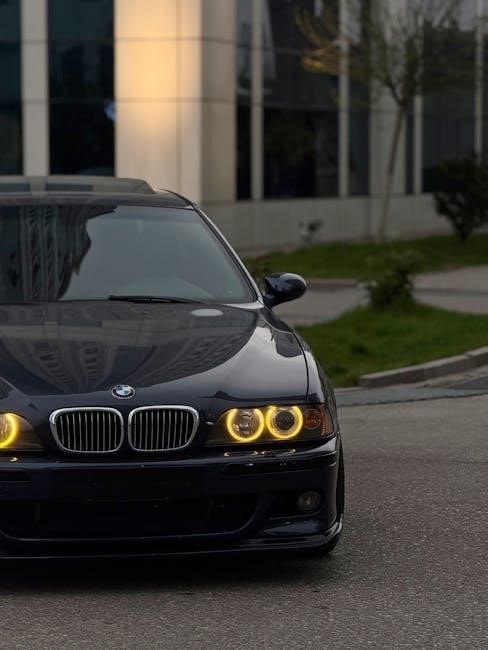
christian premarital counseling questions pdf

PDF

christian premarital counseling questions pdf

Christian premarital counseling is a vital step for couples preparing for marriage, fostering deeper connections and mutual understanding. It emphasizes faith, communication, and shared values, guided by scripture. Using a PDF guide offers structured, accessible resources to navigate discussions, ensuring a strong foundation for a lasting, God-centered marriage.

Overview of Christian Premarital Counseling

Christian premarital counseling is a structured process designed to guide couples in building a strong, faith-centered marriage. It typically involves exploring key topics such as biblical principles, communication, conflict resolution, financial management, and intimacy. Many couples use PDF guides to organize their discussions, ensuring they address essential questions and topics. These guides often include worksheets, reflection exercises, and scripture-based insights to deepen understanding and alignment. The goal is to foster open dialogue, uncover potential challenges, and strengthen the couple’s spiritual and emotional connection. By addressing these areas, Christian premarital counseling equips couples with tools to navigate life’s challenges together, rooted in their shared faith and commitment to one another. This foundational preparation is seen as vital for a healthy, enduring marriage.

The Role of Faith in Premarital Counseling

Faith serves as the cornerstone of Christian premarital counseling, guiding couples to build a marriage rooted in biblical principles. Through scripture-based discussions, couples explore their spiritual beliefs, values, and visions for their relationship. Many PDF guides incorporate biblical teachings, encouraging couples to reflect on their shared faith and how it will influence their decisions and interactions. Faith is not only a source of unity but also a foundation for resolving conflicts and understanding each other’s roles within the marriage. By integrating faith into counseling, couples develop a deeper spiritual connection and a shared framework for navigating life’s challenges together. This emphasis on faith ensures that their relationship is not only emotionally strong but also spiritually grounded, fostering a lasting and harmonious marriage.

Benefits of Using a PDF Guide for Counseling

A Christian premarital counseling PDF guide offers numerous benefits, providing couples with a structured and accessible resource for their journey. These guides are often filled with relevant questions, exercises, and biblical insights, ensuring a comprehensive preparation for marriage. The portability of PDFs allows couples to access the material anytime, anywhere, making it convenient for busy schedules. Additionally, PDF guides are cost-effective, often available at minimal or no cost, and can be easily shared between partners. They also promote organization, helping couples track their progress and reflections. Perhaps most importantly, they provide a private space for personal reflection before discussions, fostering honesty and deeper understanding. This tool is invaluable for couples seeking to build a strong, faith-centered marriage.

Importance of Addressing Key Questions

Importance of Addressing Key Questions

Addressing key questions in Christian premarital counseling ensures clarity, aligns expectations, and fosters a strong foundation for marriage, helping couples navigate challenges with unity and understanding.

Why Couples Should Engage in Premarital Counseling

Engaging in Christian premarital counseling is essential for building a strong, faith-centered marriage. It provides a safe space for couples to explore their beliefs, values, and expectations. By addressing key questions, couples can deepen their understanding of each other and align their visions for the future. Counseling also equips them with tools for effective communication and conflict resolution, fostering unity and resilience. Additionally, it allows couples to reflect on their spiritual journey together, ensuring a shared foundation rooted in faith. This proactive approach helps couples navigate potential challenges and strengthens their commitment to one another, laying the groundwork for a harmonious and lasting marriage.

Common Challenges Addressed Through Counseling

Christian premarital counseling helps couples address potential challenges before they arise. Issues such as communication styles, financial disagreements, and intimacy concerns are commonly explored. Couples may also discuss expectations about roles, in-laws, and household responsibilities. Additionally, counseling provides a space to navigate differences in faith practices, parenting styles, and long-term goals. Addressing these topics early on can prevent misunderstandings and conflicts in the future. Counseling also helps couples work through past experiences, such as previous relationships or family dynamics, that may impact their marriage. By tackling these challenges in a supportive environment, couples can build a stronger, more resilient relationship rooted in mutual understanding and faith. This proactive approach fosters unity and prepares them for a lifelong commitment.

How Questions Promote Healthy Communication

Guided questions in Christian premarital counseling encourage open and honest dialogue, fostering healthy communication. By addressing topics like expectations, values, and concerns, couples gain clarity and understanding. These questions help individuals articulate their thoughts and feelings, ensuring both partners feel heard. They also promote active listening and empathy, which are essential for resolving conflicts. Open dialogue creates a safe environment where couples can express vulnerabilities and align their expectations. This process strengthens emotional intimacy and trust, laying a solid foundation for marriage. Regular communication practices learned through counseling help couples navigate future challenges effectively. Ultimately, thoughtful questions empower couples to build a relationship rooted in transparency, respect, and mutual support. This proactive approach ensures they are well-prepared to address life’s ups and downs together.

Categories of Questions in Christian Premarital Counseling

Christian premarital counseling explores key areas such as faith, communication, finances, family, intimacy, commitment, lifestyle, and parenting. These categories ensure a holistic preparation for marriage.

Faith and Spirituality

Faith and spirituality form the cornerstone of Christian premarital counseling, helping couples align their beliefs and values. Discussions often center on shared beliefs about God, Jesus, and the Bible, ensuring spiritual alignment. Couples explore their denominational backgrounds, church attendance, and personal prayer habits to foster unity. Questions address how faith influences decision-making, conflict resolution, and daily life. Understanding each partner’s spiritual practices and expectations is crucial for building a harmonious, God-centered marriage. These conversations also highlight the importance of worship, fellowship, and service, guiding couples to strengthen their spiritual bond. A PDF guide can provide structured questions to deepen this exploration, ensuring a strong spiritual foundation for their future together.

Communication and Conflict Resolution

Effective communication and conflict resolution are essential for a healthy marriage. Christian premarital counseling emphasizes active listening, expressing emotions clearly, and understanding each other’s perspectives. Couples learn to address disagreements in a constructive, God-honoring manner. Questions in this category help partners identify their communication styles, how they handle disagreements, and strategies for resolving conflicts without harming the relationship. Practicing empathy and patience is encouraged, as these traits foster a deeper connection. A PDF guide often includes exercises and prompts to help couples practice these skills, ensuring they build a strong foundation for resolving conflicts in a loving and respectful way. This focus nurtures a relationship rooted in mutual understanding and respect.

Financial Planning and Management

Financial planning and management are crucial for building a stable and harmonious marriage. Christian premarital counseling addresses topics like budgeting, saving, and debt management, encouraging couples to align their financial practices with biblical principles. Questions in this category help partners discuss their spending habits, financial goals, and attitudes toward money. Understanding each other’s perspectives on budgeting and saving fosters unity and prevents future conflicts. Couples are also encouraged to explore how tithing and giving align with their faith. A PDF guide often provides practical exercises to help couples create a shared financial plan, ensuring they are on the same page before marriage. This foundation of financial harmony reduces stress and strengthens their commitment to a shared future.

Family and Relationships

Exploring family dynamics and relationships is essential in Christian premarital counseling. Couples are encouraged to discuss their upbringing, family values, and expectations for their future home. Questions address how each partner’s family of origin influences their communication style, conflict resolution, and parenting beliefs. Understanding each other’s relationships with in-laws and extended family helps build harmony. Topics also include aligning family roles with biblical teachings and fostering a supportive, faith-centered home environment. A PDF guide often provides structured exercises to navigate these conversations, ensuring couples establish a strong relational foundation. By addressing these areas, couples can create a loving, Christ-honoring family life that reflects their shared values and commitment to one another. This section equips them to build a united, God-centered home.

Intimacy and Emotional Connection

Nurturing intimacy and emotional connection is a cornerstone of Christian premarital counseling. Couples explore how to build a deep, Christ-centered relationship, focusing on emotional support and understanding. Questions address communication styles, shared values, and expectations for physical and emotional intimacy. Understanding each other’s needs and desires fosters a strong bond, essential for a healthy marriage. Discussions also cover biblical teachings on love, respect, and unity, helping couples create a foundation of trust and mutual care. A PDF guide often includes exercises to help partners articulate their feelings and aspirations, ensuring open and honest dialogue. By addressing these areas, couples can cultivate a meaningful, enduring connection that honors God and strengthens their relationship. This section emphasizes the importance of emotional and spiritual closeness in marriage.

Commitment and Long-Term Goals

Exploring commitment and long-term goals is essential in Christian premarital counseling, as it helps couples align their visions for a shared future. Discussions focus on understanding each other’s life aspirations, financial priorities, and spiritual objectives. Questions address how couples plan to support one another through life’s challenges and celebrate its joys. Commitment is framed within a biblical context, emphasizing perseverance and mutual support. Couples are encouraged to reflect on how their goals align with their faith and values. A PDF guide often includes exercises to help partners articulate their expectations and create a unified vision for their marriage. This section ensures that both individuals are prepared to work together toward a harmonious and purpose-driven life. Open dialogue fosters a strong foundation for long-term commitment and shared goals.

Personal Habits and Lifestyle Choices

Christian premarital counseling explores personal habits and lifestyle choices to ensure compatibility and understanding. Questions address daily routines, health practices, and leisure activities, helping couples identify potential areas of harmony or conflict. Discussions also cover how faith influences decisions about habits such as spending, exercise, and entertainment. Couples are encouraged to reflect on how their lifestyles align with biblical principles and their shared vision for marriage. A PDF guide often includes exercises to help partners openly discuss their habits and preferences, fostering mutual respect and understanding. This section emphasizes the importance of aligning personal choices with spiritual values and creating a balanced, God-centered life together. Open dialogue about habits and lifestyles strengthens the foundation for a harmonious marriage.

Children and Parenting

Christian premarital counseling often addresses expectations and values surrounding children and parenting. Couples explore topics such as parenting styles, discipline methods, and family size. Discussions also cover how faith influences decisions about raising children and fostering a biblically grounded home environment. Questions may include views on education, spiritual training, and balancing parental responsibilities with marital intimacy. A PDF guide provides structured questions to help couples align their parenting philosophies with their shared values and goals. This section encourages open dialogue about potential challenges and ensures both partners are united in their approach to parenting. By addressing these topics early, couples can build a strong, faith-centered foundation for their future family life.

Advantages of Using a PDF Guide

A PDF guide offers accessibility, structure, and convenience, allowing couples to explore topics at their own pace. It provides organized content, ensuring comprehensive coverage of key areas. Privacy is maintained, enabling personal reflection and open discussions. Cost-effective and easily shareable, it serves as a valuable resource for faith-based preparation, enhancing the counseling experience with practical insights and biblical guidance.

Accessibility and Convenience

A Christian premarital counseling PDF guide is highly accessible, allowing couples to engage with its content anytime and anywhere. Its portability ensures that it can be downloaded and viewed on various devices, making it ideal for busy schedules. The guide’s offline accessibility eliminates the need for internet connectivity, providing flexibility for couples to review materials in any setting. The consistent formatting of a PDF ensures readability across devices, maintaining a seamless experience. Additionally, the ability to share the guide easily between partners or counselors facilitates collaborative preparation. This convenience fosters a stress-free environment for couples to focus on building a strong, faith-centered marriage.

Structure and Organization

A well-organized Christian premarital counseling PDF guide provides a clear and logical structure, ensuring couples can systematically address essential topics. The guide is typically divided into sections, each focusing on key areas such as faith, communication, finances, and long-term goals. This structured approach helps couples progressively build a strong foundation for their marriage. The inclusion of categorized questions and exercises ensures that all critical aspects of the relationship are explored. The guide’s organization also allows for easy navigation, making it simple for couples to track their progress and refer back to specific sections as needed. This thoughtful design ensures that premarital counseling is both comprehensive and effective, guiding couples toward a deeper understanding of each other and their commitment.

Privacy and Personal Reflection

Using a Christian premarital counseling PDF guide offers couples the opportunity for private and personal reflection. The guide allows individuals to explore sensitive topics at their own pace, fostering honest dialogue without external pressures. The privacy of a PDF format ensures that personal thoughts and feelings can be expressed freely, creating a safe space for introspection. Couples can independently review questions and exercises, reflecting on their beliefs, values, and goals before discussing them together. This personal reflection strengthens individual understanding and prepares each partner to engage more meaningfully in joint discussions. The ability to revisit sections of the guide also supports ongoing growth and deeper connection as couples prepare for marriage. This privacy and personal reflection are key benefits of using a PDF guide for premarital counseling.

Cost-Effectiveness

A Christian premarital counseling PDF guide is a cost-effective resource for couples and counselors alike. It offers a one-time purchase option, providing extensive materials that can be revisited and shared without additional costs. This affordability makes it an excellent investment for churches, counselors, or couples seeking budget-friendly solutions. The guide eliminates the need for multiple books or expensive programs, consolidating essential questions and exercises into a single, accessible document. Its reusability also makes it a valuable tool for counselors working with numerous couples. By reducing financial barriers, the PDF guide ensures that premarital counseling is more accessible and affordable for everyone involved. This cost-effectiveness is a significant advantage, making it a practical choice for those preparing for marriage.

Common Concerns and Fears

Couples often fear commitment, compatibility, and unresolved past issues; Christian premarital counseling addresses these anxieties, offering guidance through structured questions and discussions to build trust and understanding.

Fears About Marriage and Commitment

Fears about marriage and commitment are common, often rooted in concerns about loss of personal freedom, financial stress, or unresolved past experiences. Couples may worry about meeting expectations or maintaining independence. These fears can stem from societal pressures, family dynamics, or previous relationships. Christian premarital counseling addresses these anxieties by fostering open dialogue and providing biblical perspectives on commitment. Through guided discussions, couples explore their concerns, reinforcing trust and mutual support. The process helps couples align their values and goals, ensuring a strong foundation for their marriage. By acknowledging and addressing these fears, couples can build confidence in their decision to commit, fostering a healthier and more resilient relationship.

Concerns About Compatibility

Concerns about compatibility often arise as couples prepare for marriage, focusing on differences in values, lifestyles, or long-term goals. These worries may stem from differing backgrounds, personalities, or unresolved conflicts. Christian premarital counseling provides a safe space to explore these issues, helping couples assess their alignment on key matters like faith, finances, and family dynamics. By addressing these concerns early, couples can better understand each other’s perspectives and work toward harmony. The process encourages open communication and mutual understanding, equipping couples with tools to navigate potential challenges. Through guided reflection and biblical principles, couples can strengthen their relationship and build a united vision for their future together. Addressing compatibility concerns fosters a deeper connection and prepares couples for a lifelong commitment rooted in love and shared values.

Addressing Past Experiences

Addressing past experiences is crucial in Christian premarital counseling, as unresolved issues can impact a couple’s future together. Counselors guide couples to reflect on previous relationships, family dynamics, and personal history, helping them understand how these experiences shape their beliefs and behaviors. This process fosters healing and clarity, enabling couples to approach marriage with emotional and spiritual readiness. By exploring past hurts or patterns, couples can identify areas for growth and develop healthier relationship habits. Biblical principles are often used to promote forgiveness, grace, and reconciliation. Addressing past experiences ensures that both partners enter marriage with openness, mutual understanding, and a shared commitment to building a strong, God-centered relationship. This step is essential for fostering trust and unity in the marriage.

Effective Use of Counseling Questions

Effective counseling questions guide couples to explore their beliefs, values, and expectations, fostering deeper understanding and connection. They encourage open dialogue and mutual insight, creating a safe space for growth and unity, essential for a strong, God-centered marriage.

Creating a Safe and Open Environment

Creating a safe and open environment in Christian premarital counseling is essential for fostering honest dialogue and trust. Couples must feel comfortable sharing their thoughts, fears, and aspirations without judgment. This can be achieved by establishing mutual respect, active listening, and empathy. The counselor plays a key role in setting this tone, ensuring both partners feel heard and valued. Guided questions and discussions help couples explore their beliefs, values, and expectations openly. A non-judgmental space allows them to address sensitive topics, such as past experiences or concerns about marriage, with confidence. This environment not only strengthens their relationship but also deepens their understanding of each other, laying a solid foundation for a harmonious and faith-centered marriage.

Encouraging Honest Dialogue

Encouraging honest dialogue is a cornerstone of effective Christian premarital counseling. Open and sincere communication helps couples address potential issues before they escalate. Counselors often use guided questions to facilitate meaningful conversations, ensuring both partners share their thoughts and feelings frankly. This process fosters transparency and trust, essential for building a strong marital bond. By creating a safe environment, couples feel comfortable discussing sensitive topics, such as financial habits, intimacy, and long-term goals. Honest dialogue also helps couples align their expectations and values, promoting unity and understanding. Through this open exchange, they can navigate challenges with a biblical perspective, ensuring their relationship is rooted in truth and mutual respect. This foundational honesty paves the way for a resilient and fulfilling marriage.

Following Up and Reviewing Progress

Following up and reviewing progress is a critical component of Christian premarital counseling, ensuring couples remain on track with their growth and understanding. Counselors often schedule regular check-ins to assess how well the couple has absorbed and applied the principles discussed. These sessions allow for reflection on strengths and areas needing improvement. By reviewing key topics, such as communication, financial planning, and spiritual alignment, couples can reinforce their commitment to a healthy, God-centered marriage. Feedback and adjustments are made collaboratively, fostering a deeper understanding of each other’s needs and values. This ongoing process strengthens their relationship and equips them to address future challenges with wisdom and unity. Regular follow-ups also provide accountability, ensuring the couple remains focused on their shared goals.

Christian premarital counseling provides couples with a strong foundation for a faith-centered marriage, fostering unity, understanding, and spiritual growth. Using a PDF guide ensures structured preparation, guiding couples toward a harmonious and lasting relationship grounded in shared values and biblical principles.

Summarizing the Benefits of Counseling

Christian premarital counseling offers numerous benefits, fostering open dialogue, emotional intimacy, and spiritual alignment. Couples gain clarity on shared values, communication strategies, and conflict resolution. By addressing key questions, they build a strong foundation for marriage, ensuring mutual understanding and compatibility. The use of a PDF guide provides structured resources, enabling couples to reflect on their beliefs, goals, and expectations privately or with a counselor. This proactive approach helps identify potential challenges early, promoting healthier relationships. Ultimately, counseling equips couples with tools to navigate life’s ups and downs together, fostering resilience and unity. It also strengthens their faith, creating a resilient, God-centered marriage.

Final Thoughts on Preparing for Marriage

Christian premarital counseling is a transformative process that equips couples with essential tools for a resilient and fulfilling marriage; By addressing key questions and exploring faith, communication, and shared goals, couples build a strong foundation rooted in mutual understanding and commitment. The use of a PDF guide provides a structured and accessible way to reflect on these critical areas, ensuring a thoughtful and intentional approach to marriage. As couples embark on this lifelong journey, they are reminded that marriage is a sacred covenant requiring effort, grace, and faith. With proper preparation, they can navigate life’s challenges with unity and confidence, creating a marriage that honors God and fosters lasting joy.

dry:soon 3 tier heated airer instructions

The Dry:Soon 3-Tier Heated Airer is a popular, energy-efficient solution for drying clothes indoors. Its space-saving design and heated bars ensure faster drying times, making it ideal for households without outdoor drying options. With a cover available to retain heat, it’s a cost-effective alternative to traditional drying methods.

Overview of the Product

The Dry:Soon 3-Tier Heated Airer is a practical and energy-efficient solution for indoor laundry drying. Designed with three spacious tiers, it offers ample drying space while maintaining a compact footprint. The airer features heated bars that gently warm clothes, reducing drying time significantly compared to traditional methods. Lightweight and foldable, it is easy to set up and store. The included cover enhances drying efficiency by retaining heat, making it ideal for households seeking a cost-effective and eco-friendly alternative to tumble dryers. Its portability and versatility make it suitable for various home environments.

Key Features and Benefits

The Dry:Soon 3-Tier Heated Airer offers a space-saving design with three tiers, providing ample drying space while maintaining a compact footprint. Its heated bars ensure faster drying times, while the optional cover retains heat for even greater efficiency. Lightweight and foldable, it is easy to set up and store, making it ideal for small spaces. Energy-efficient and cost-effective, it uses minimal electricity, making it an eco-friendly alternative to traditional drying methods. The airer also features a timer function, allowing users to control drying times conveniently. Its portability and versatility make it suitable for various home environments, ensuring clothes dry quickly and evenly without the need for a tumble dryer.

Unpacking and Initial Setup

Unpack the Dry:Soon 3-Tier Heated Airer carefully, ensuring all components are included. Remove packaging materials and place the airer on a dry, stable surface before first use.

Step-by-Step Unpacking Instructions

Carefully unpack the Dry:Soon 3-Tier Heated Airer from its box, ensuring all components are included.
Remove protective packaging materials, such as plastic covers and inserts.
Place the airer on a dry, stable surface to ensure stability during setup.
Inspect the airer for any damage or missing parts before proceeding.
Familiarize yourself with the components, including the heated bars, frame, and legs.
Ensure all accessories, like the cover, are accounted for before moving to assembly.

Assembling the Airer

Place the frame on a dry, stable surface.
Attach the legs to the base of the airer using the provided screws.
Connect the heated bars to the frame, ensuring they are securely locked in place.
Align the tiers horizontally and vertically for even drying.

Tighten all connections to ensure stability.
Plug in the power cord and test the thermostat to ensure it functions properly.
Allow the airer to heat up for a few minutes before placing laundry.

Positioning the Airer in Your Space

Position the Dry:Soon 3-Tier Heated Airer in a well-ventilated area, away from direct water sources and sunlight. Ensure it is on a level, dry surface near an electrical outlet. Place it in a central location for easy access, away from children and pets. Avoid cramped spaces to maintain airflow and efficiency. Consider the room’s aesthetics and ensure it doesn’t obstruct doorways or views. If noise is a concern, place it in a less quiet area. Follow the instructions for ideal placement to ensure safe and effective operation.

Safety Precautions and Guidelines

Ensure safe operation by keeping the airer away from water and flammable materials. Place it on a stable, heat-resistant surface and never leave it unattended. Keep children away and avoid touching hot surfaces. Always follow the provided instructions for optimal safety.

General Safety Tips

Always place the airer on a stable, heat-resistant surface away from water and flammable materials. Ensure the area is well-ventilated and avoid overloading the racks. Never touch the heated bars or surfaces while in operation, as they can cause burns. Keep children and pets at a safe distance to prevent accidents. Regularly inspect the power cord and plug for damage. Avoid using the airer near open windows or damp environments. Follow the manufacturer’s instructions for setup and operation to ensure safe and efficient use. Always unplug the airer when not in use or before cleaning.

Electrical Safety Considerations

Ensure the airer is plugged into a grounded electrical outlet to prevent shocks. Avoid using extension cords or overloaded sockets. Never operate the airer with a damaged cord or plug. Keep the electrical components dry and away from water splashes. Do not alter or modify the airer’s wiring or electrical parts. Always unplug the device before cleaning or maintaining it. Ensure the airer is used on a stable, dry surface to prevent electrical hazards. Follow all electrical safety guidelines provided in the user manual to maintain safe operation and extend the product’s lifespan.

Precautions for Children and Pets

Keep children and pets away from the airer while it is in operation to avoid accidental burns or injuries. Ensure the airer is positioned in a stable location where it cannot tip over. Never allow children to play with the airer or its components. Teach children not to touch the heated bars, as they can become extremely hot during use. Supervise pets to prevent them from rubbing against or jumping onto the airer. Always maintain a safe distance between the airer and flammable materials to ensure a safe environment for everyone in the household.

Operating the Dry:Soon 3-Tier Heated Airer

Effortlessly dry clothes indoors with the Dry:Soon 3-Tier Heated Airer. Place laundry on the heated bars, set the temperature, and use the timer for optimal drying results.

Placing Laundry on the Airer

Place laundry evenly across the airer’s three tiers, ensuring proper airflow. Avoid overloading to prevent uneven drying. Delicates can be positioned on the upper tiers, while heavier items like towels go on the lower bars. Use the open shelves to accommodate bulky garments. For optimal results, avoid overlapping clothes and ensure they drape naturally. The airer’s design allows for efficient heat circulation, so arrange items to maximize exposure to heated air. Always ensure clothes are secured and not dangling to maintain balance and stability during operation.

Setting the Temperature

Adjust the thermostat to your desired temperature using the control panel. The Dry:Soon 3-Tier Heated Airer features multiple heat settings to suit different fabric types. For delicate items, select a lower temperature, while heavier fabrics like towels can withstand higher heat. Use the remote control for convenience or the built-in interface. Ensure the temperature is set before turning on the airer for optimal performance. The thermostat maintains consistent heat, preventing overheating and ensuring energy efficiency. Always monitor the temperature to avoid damage to sensitive materials.

Using the Timer Function

The Dry:Soon 3-Tier Heated Airer features a convenient timer function, allowing you to set drying sessions up to 12 hours in advance. Simply use the remote control or built-in interface to select your preferred duration. This feature ensures your laundry dries evenly without constant supervision. The airer will automatically turn off once the timer expires, saving energy and preventing over-drying. Ideal for busy households, the timer function optimizes drying efficiency and convenience, making it easy to manage your laundry routine.

Maintenance and Cleaning

Regular maintenance ensures optimal performance. Clean the heated bars with a damp cloth, wipe the frame, and check for blockages. Allow the airer to cool before cleaning for safety.

Cleaning the Heated Bars

To clean the heated bars, switch off and unplug the airer, allowing it to cool completely. Use a soft, damp cloth to wipe down each bar, ensuring no moisture remains. Avoid harsh chemicals or abrasive materials, as they may damage the finish. Regular cleaning prevents mineral buildup and maintains efficiency. For tougher stains, a mild soap solution can be used, but rinse thoroughly with a clean, damp cloth afterward. Always dry the bars before storing or using the airer again to prevent rust or damage.

Wipe Down the Frame

To maintain the Dry:Soon 3-Tier Heated Airer, regularly wipe the frame using a soft, clean cloth. Dampen the cloth with mild soap and water, but avoid harsh chemicals or abrasive materials. Gently scrub any visible stains or splatters, then wipe clean with a damp cloth to remove soap residue. Ensure the frame is completely dry before using or storing the airer to prevent water spots or rust. For a polished finish, use a microfiber cloth. Regular cleaning keeps the airer looking new and functioning efficiently.

Checking for Blockages

Regularly inspect the Dry:Soon 3-Tier Heated Airer for blockages to ensure optimal performance. Check the heated bars and frame for dust, lint, or debris buildup. Use a soft cloth or brush to remove any obstructions, ensuring proper airflow. This maintains efficiency and prevents overheating. Always unplug the airer before cleaning and allow it to cool. Keeping the airer free from blockages ensures even drying and prolongs its lifespan. Regular maintenance also enhances safety by preventing potential hazards. Make this a routine part of your maintenance schedule for consistent results.

Storage and Portability

The Dry:Soon 3-Tier Heated Airer folds compactly for easy storage. Its lightweight design makes it portable, while the included cover helps protect it during transport or storage.

Folding and Storing the Airer

To store the Dry:Soon 3-Tier Heated Airer, ensure it has cooled completely. Fold the heated bars downward on each side and close the frame securely. Use the provided cover to protect the airer during storage, which also helps retain heat during drying. Store in a dry, cool place to maintain its efficiency. The compact design allows for easy placement in closets or under beds, making it a space-saving solution for year-round use.

Transporting the Airer Safely

When transporting the Dry:Soon 3-Tier Heated Airer, handle it with care to avoid damage. Ensure the airer is completely cool before moving to prevent burns or electrical issues. Use the provided cover to protect the heated bars during transport. Always lift from sturdy parts of the frame to avoid bending or breaking. If moving to another location, secure the airer in a stable position to prevent tipping. Avoid exposing the airer to direct sunlight or moisture during transport. Clean the airer before moving to ensure optimal performance at its new location.

Troubleshooting Common Issues

If the airer doesn’t heat up, check the power connection and thermostat. For uneven drying, ensure proper airflow and balanced laundry distribution. Address noise issues by leveling the airer or tightening loose parts.

What to Do if the Airer Doesn’t Heat Up

If the Dry:Soon 3-Tier Heated Airer fails to heat up, first ensure it is properly plugged into a functioning power outlet. Check the thermostat settings to confirm it is turned on and set to the correct mode. Verify that no clothing or debris is blocking the heated bars, as obstructions can prevent proper heating. If issues persist, refer to the user manual or contact customer support for further assistance. Always ensure the airer is used on a dry, flat surface to maintain optimal performance.

Addressing Uneven Drying

If your laundry is drying unevenly, ensure the airer is not overloaded and that clothes are evenly distributed across the tiers. Check for any blockages in the heated bars and clean them if necessary. Use the timer function to extend drying time for thicker items. Avoid placing delicate fabrics directly over heating elements. For optimal results, maintain good airflow around the airer and consider using the optional cover to retain heat evenly. Regularly cleaning the airer and ensuring proper spacing between items will help achieve consistent drying performance.

Resolving Noise Issues

If your Dry:Soon 3-Tier Heated Airer is making unusual noises, ensure it is assembled correctly and placed on a level surface. Check for loose parts and tighten any screws if necessary. Regularly clean the heated bars and surrounding areas to prevent blockages that may cause noise. Lubricate any moving parts if recommended in the manual. If the issue persists, contact customer support for assistance. Always refer to the user manual for maintenance tips to ensure quiet and efficient operation.

Energy Efficiency and Cost Savings

The Dry:Soon 3-Tier Heated Airer is designed for energy efficiency, using minimal power while effectively drying clothes. Its low energy consumption reduces utility costs, making it a cost-effective solution for indoor drying. With an estimated 9p per hour running cost, it’s both eco-friendly and budget-friendly, offering long-term savings compared to traditional drying methods.

Understanding Energy Consumption

The Dry:Soon 3-Tier Heated Airer is designed to minimize energy use while maximizing efficiency. It operates on low power consumption, typically costing around 9p per hour, making it an eco-friendly and cost-effective option for indoor drying. The airer’s thermostat regulates temperature, ensuring optimal energy use without overheating. Additionally, the timer function allows users to schedule drying sessions, further reducing energy waste. This combination of features makes the Dry:Soon airer a practical choice for households seeking to lower their energy bills while efficiently drying laundry.

Calculating Running Costs

To estimate the running costs of the Dry:Soon 3-Tier Heated Airer, consider its energy efficiency. It typically costs around 9p per hour to operate, making it a cost-effective option; Calculate your monthly expenses by multiplying the hourly rate by the number of hours used daily and the number of days per month. For example, using it for 2 hours daily over 15 days would cost approximately £2.70. Adjust based on your usage and local electricity rates to get an accurate estimate of your monthly running costs.

Maximizing Energy Efficiency

The Dry:Soon 3-Tier Heated Airer is designed with energy efficiency in mind, using minimal power while ensuring quick drying. To maximize efficiency, use the timer function to avoid unnecessary operation and maintain a consistent temperature with the thermostat. Ensure good airflow around the airer and use the provided cover to retain heat, reducing drying time. Regularly cleaning the heated bars and ensuring proper spacing between clothes also enhances efficiency. These practices help lower energy consumption, making the airer a cost-effective and eco-friendly choice for indoor drying.

Comparisons with Other Heated Airers

The Dry:Soon 3-Tier Heated Airer stands out for its energy efficiency, faster drying times, and affordable running costs compared to other models on the market.

Key Differences from Competitors

The Dry:Soon 3-Tier Heated Airer distinguishes itself with its innovative Tri:Mode technology, offering three drying settings for optimal efficiency. Unlike competitors, it includes a remote control for convenience and a built-in timer, allowing users to schedule drying up to 12 hours in advance. Its compact foldable design and lightweight construction make it easier to store and transport. Additionally, the optional cover enhances drying speed by retaining heat, a feature not commonly found in other airers. These advancements make it a preferred choice for energy-conscious households seeking reliable performance.

Performance Benchmarks

The Dry:Soon 3-Tier Heated Airer excels with its 22.5m of drying space, accommodating up to 30kg of laundry. Its thermostatically controlled heating system ensures efficient drying while maintaining low energy consumption, costing approximately 9p per hour to run. With a 4/5-star rating, it outperforms competitors in drying speed and reliability. The optional cover further enhances performance by retaining heat, reducing drying time significantly. Its versatile design and advanced features make it a top choice for households seeking a practical and efficient drying solution.

Customer Reviews and Feedback

The Dry:Soon 3-Tier Heated Airer boasts a 4/5-star rating, praised for its rapid drying time and energy efficiency. Customers highlight its cost-effectiveness and reliable performance.

Positive Experiences and Praise

Customers rave about the Dry:Soon 3-Tier Heated Airer for its exceptional performance and energy efficiency. Many highlight its ability to dry clothes quickly, even in humid conditions. The compact design and foldable structure are praised for saving space, making it ideal for small homes or apartments. Users appreciate the included cover, which accelerates drying by retaining heat. The thermostat and timer functions are also commended for their convenience. Overall, the product is lauded as a cost-effective and reliable solution for indoor drying, with many considering it a worthwhile investment.

Common Complaints and Solutions

Some users report issues with the airer not heating up, which can often be resolved by checking the power supply and ensuring the thermostat is functioning correctly. Others mention uneven drying, which can be addressed by rearranging clothes to ensure proper airflow. Noise during operation is another minor complaint, typically resolved by ensuring the airer is assembled correctly and free from blockages. Overall, these issues are rare, and the product is well-regarded for its performance and reliability.

Accessories and Optional Add-Ons

The Dry:Soon 3-Tier Heated Airer can be enhanced with a cover to retain heat and speed up drying, as well as additional laundry hangers for extra capacity.

Using the Dry:Soon Cover

The Dry:Soon Cover is specifically designed to enhance your 3-Tier Heated Airer’s performance by trapping heat and reducing drying time. Simply slip it over the top tier to create a warm, enclosed space that promotes faster evaporation. This accessory is especially useful for thicker fabrics or during colder months. The cover is lightweight, easy to install, and compact for storage. It not only improves efficiency but also keeps your laundry area tidy by containing the drying process. Regular use can significantly lower energy costs and ensure consistent results.

Additional Laundry Hangers

Additional laundry hangers, such as the Dry:Soon 6 Peg Hanger, complement the 3-Tier Heated Airer by providing extra space for garments that require air drying. These hangers are designed to hold delicate or heavier items that may not fit on the airer. They are lightweight, durable, and easy to use, ensuring your laundry dries evenly without overcrowding the tiers. Using these hangers alongside the airer maximizes drying efficiency and prevents moisture buildup, ensuring fresher results for all your clothes.

Advanced Features and Settings

The Dry:Soon 3-Tier Heated Airer features advanced settings like a remote control for convenient operation and a thermostat to regulate heat, optimizing drying efficiency and safety.

Understanding the Thermostat

The Dry:Soon 3-Tier Heated Airer features a thermostat that automatically regulates heat output, ensuring efficient and safe operation. This feature prevents overheating and optimizes drying time. Users can set specific temperatures for different fabrics, enhancing energy efficiency and protecting delicate items. The thermostat also promotes consistent drying and reduces energy consumption, making it a cost-effective solution. Regular use of the thermostat can also extend the appliance’s lifespan by preventing excessive heat buildup.

Utilizing the Remote Control

The remote control for the Dry:Soon 3-Tier Heated Airer offers convenient control over its functions, allowing users to adjust settings without physical interaction. This feature is particularly useful for managing the airer’s operation from a distance. The remote enables easy adjustment of the temperature, timer, and other settings, ensuring a seamless experience. Its user-friendly design enhances the overall efficiency and comfort of using the airer, making it a practical addition for hassle-free laundry drying.

Frequently Asked Questions (FAQ)

General Usage Questions

How do I operate the timer function? Simply press the timer button and select your preferred duration using the remote or control panel.

Troubleshooting FAQs

What if the airer doesn’t heat up? Check the power connection and ensure the thermostat is set correctly. If issues persist, contact customer support.

Common questions about the Dry:Soon 3-Tier Heated Airer include how to operate the timer, optimal temperature settings, and energy consumption. Users often ask how to place laundry evenly and whether the cover is necessary for faster drying. Many inquire about the noise level and portability of the airer. Additionally, questions arise about the best way to clean the heated bars and frame. These questions address everyday use and maximizing the airer’s efficiency. The product’s energy-efficient design and ease of use make it a practical solution for indoor drying needs.

Common issues with the Dry:Soon 3-Tier Heated Airer include the airer not heating up, uneven drying, or excessive noise. If it doesn’t heat, check the power connection and thermostat. For uneven drying, ensure proper airflow and balanced laundry distribution. Noise issues may arise from loose parts or blockages, so inspect and clean the airer regularly. Refer to the user manual for detailed troubleshooting steps. These FAQs help users resolve common problems efficiently, ensuring optimal performance and extending the product’s lifespan.

The Dry:Soon 3-Tier Heated Airer is an excellent choice for efficient, cost-effective indoor drying. Highly rated and a top pick for its performance and convenience.

Final Thoughts on the Dry:Soon 3-Tier Heated Airer

The Dry:Soon 3-Tier Heated Airer is a standout solution for efficient indoor drying, offering impressive performance, energy efficiency, and convenience. Its compact design, coupled with the optional cover, accelerates drying times while retaining heat. With a 4.5-star rating and customer praise for its cost-effectiveness, this airer is a practical investment for any household. Its ability to handle large loads and operate quietly makes it a top choice for those seeking a reliable, space-saving drying solution.

PDF

tyranids codex 10th edition pdf download

The Tyranids Codex 10th Edition is a comprehensive guide for collectors, offering detailed rules, background lore, and strategies. It’s essential for competitive play, featuring unique artwork and limited print runs.

Overview of the 10th Edition Codex

The 10th Edition Tyranids Codex is a comprehensive guide for players, detailing updated rules, background lore, and army composition. It introduces new units, revised datasheets, and adaptive biology mechanics. The codex also features unique artwork and limited editions, appealing to collectors. Designed for competitive play, it aligns with the 10th Edition ruleset, ensuring balance and strategic depth. This codex is essential for both new and veteran players seeking to master the Tyranid Hive Fleets.

Key Features and Updates in the 10th Edition

The 10th Edition Tyranids Codex introduces significant updates, including new unit datasheets, enhanced adaptive biology mechanics, and revised army-wide rules. It features updated points values, ensuring balance across all units. Additionally, the codex includes new subfactions with unique abilities, offering players more strategic options. The book also explores the lore of the Tyranid Hive Fleets, providing a deeper understanding of their biology and motivations. These updates ensure the Tyranids remain a formidable force in competitive play.

History of the Tyranids in Warhammer 40,000

The Tyranids are an ancient, hive-minded species driven by an insatiable hunger for biomass. Originating from the Tyranus region, they traverse the galaxy in vast Hive Fleets, consuming entire civilizations to sustain their evolution and growth. Their relentless march across the stars has cemented their lore as unstoppable predators, feared throughout the Warhammer 40,000 universe.

Background and Lore of the Tyranid Hive Fleets

The Tyranid Hive Fleets are vast, bio-engineered armadas driven by the insatiable hunger of the Hive Mind. Originating from the Tyranus region, these fleets traverse the galaxy, consuming entire civilizations to sustain their endless evolution. The Great Rift’s emergence brought them into the Milky Way, unleashing their horrors. Led by the enigmatic Norn-Queen, the Tyranids embody a culture of relentless consumption, adapting to threats by evolving terrifying biological weapons, making them one of Warhammer 40,000’s most feared foes.

Evolution of Tyranid Rules Across Editions

The Tyranid rules have undergone significant evolution, refining their unique playstyle. Earlier editions focused on swarm tactics and Synaptic Linkage, while later updates introduced adaptive biology and strategic flexibility. The 10th Edition Codex enhances these mechanics, offering updated datasheets and balance adjustments to reflect their relentless biological adaptation. These changes ensure Tyranids remain a formidable and competitive force, embodying their lore as an unstoppable, evolving threat in Warhammer 40,000.

Understanding the Hive Fleets

Hive Fleets are vast, nomadic armadas of Tyranid organisms, driven by insatiable hunger and the Hive Mind. Each fleet adapts to threats, evolving biologically to conquer and consume.

Notable Hive Fleets and Their Unique Abilities

Hive Fleets like Behemoth, Kraken, and Leviathan are renowned for their distinct strategies. Behemoth excels in overwhelming numbers, while Kraken emphasizes speed and teleportation. Leviathan adapts to foes through rapid evolution, and Jormungandr specializes in burrowing and ambush tactics. Each fleet’s unique biology and abilities reflect the Tyranids’ relentless pursuit of survival and domination.

Significance of Adaptive Biology and Evolution

Adaptive biology and evolution are central to the Tyranids’ identity, enabling them to survive and dominate. Their ability to evolve during battles ensures resilience against threats, while their biology allows for constant adaptation. The 10th Edition Codex highlights these traits, showcasing how they impact gameplay and strategy. This adaptability makes the Tyranids a dynamic and formidable force, embodying the relentless pursuit of perfection through evolution.

Units and Datasheets in the 10th Edition

The 10th Edition Codex features updated datasheets for iconic Tyranid units, introducing new abilities and refining existing ones for improved gameplay and strategic depth.

Updated Datasheets for Iconic Tyranid Units

The 10th Edition Codex includes revised datasheets for beloved Tyranid units, enhancing their battlefield performance. Iconic units like the Hive Tyrant and Tyranid Warriors have received updates, offering improved stats, abilities, and wargear options. These changes ensure units remain competitive while staying true to their lore. Players can now field more resilient and adaptable armies, making the Tyranids a formidable force in the 10th Edition metagame.

New Units and Their Role in the Army

The 10th Edition Codex introduces exciting new units that expand the Tyranid roster. These additions, such as the Hive Tyrant variants and specialized bioforms, bring fresh tactical options to the battlefield. Each new unit is designed to complement existing forces, enhancing the army’s adaptability and lethality. Players can now field more specialized and synergistic armies, leveraging these units to dominate in competitive play and narrative campaigns alike.

Rules and Mechanics

The 10th Edition Codex introduces updated datasheets and refined Synaptic Linkage rules, enhancing the Tyranids’ unique abilities. Adaptive biology and special rules like Regeneration and Toxin Sacks are key features.

Synaptic Linkage and Hive Mind Rules

The Synaptic Linkage and Hive Mind rules are central to Tyranid armies, enabling units to function cohesively under a unified command structure. The Hive Mind ensures that Tyranid units operate seamlessly, with Synapse Creatures like Hive Tyrants and Zoanthropes acting as focal points for coordination. These rules enhance army synergy, allowing for better control and strategic decision-making on the battlefield. Updates in the 10th Edition refine these mechanics, ensuring greater balance and playability while maintaining the Tyranids’ unique biological advantages.

Other Key Mechanics and Special Rules

Beyond Synaptic Linkage, the Tyranids benefit from unique mechanics like Adaptive Biology, allowing units to evolve during battles. The Combat Patrol rules integrate seamlessly, enabling flexible army composition. Points adjustments ensure balance, while special rules like To Wound On 6+ for certain units add strategic depth. These mechanics enhance the Tyranids’ adaptability and biological horrors, making them a formidable force in the 10th Edition meta.

Army Composition and Strategies

The Tyranids excel through adaptability and coordination, leveraging Synaptic Linkage to synchronize attacks. Players can craft armies emphasizing swarm tactics, heavy hitters, or a balanced mix, ensuring flexibility in battle.

Optimal Detachments for Competitive Play

For competitive play, focus on Hive Fleet detachments like Leviathan or Behemoth, which enhance unit synergy. Combine Hive Tyrants with Lictors for board control and Synaptic coordination. The Outrider detachment excels for fast, aggressive armies, while Supreme Command maximizes powerful HQ units. Recent point adjustments have made Tyrant Guards and Zoanthropes more viable, enabling resilient, adaptive list builds. Pairing Synaptic Linkage units with Adaptive Physiology ensures durability and flexibility in high-stakes matches.

Subfactions and Their Strategic Implications

Subfactions like Hive Fleet Leviathan and Behemoth offer unique bonuses, shaping army composition; Leviathan excels at overwhelming foes with speed and numbers, while Behemoth emphasizes durability and relentless assault. Each subfaction’s traits, such as Adaptive Physiology or Endless Hunger, influence strategic choices. Players can tailor their armies to suit aggressive or defensive playstyles, leveraging subfaction abilities to enhance unit performance and achieve battlefield dominance. This customization deepens strategic depth and competitive potential.

Impact of the 10th Edition on the Meta

The 10th Edition Tyranids Codex brings balance changes, refining unit points and abilities. These adjustments enhance competitive viability, ensuring Tyranids remain a formidable force in the evolving meta landscape.

Balance Changes and Their Effects on Play

The 10th Edition Tyranids Codex introduces significant balance changes, refining unit points and abilities to enhance competitive viability. Key adjustments include tweaks to iconic units like the Hive Tyrant, improving their offensive capabilities while maintaining thematic consistency. These changes promote strategic flexibility, encouraging players to adapt their armies to the evolving meta. The updated datasheets ensure Tyranids remain a potent force, offering new ways to dominate the battlefield while addressing previous imbalances.

Competitive Viability of Tyranids in 10th Edition

The 10th Edition has revitalized Tyranids’ competitive potential, with updated rules enhancing their adaptability and strength. Units like the Hive Tyrant and Warriors have seen significant improvements, making them formidable on the battlefield. The introduction of new strategies and subfactions ensures Tyranids can now contend with top-tier armies, offering a balanced yet powerful force in the current meta.

Collectors Edition and Physical Copies

The Collectors Edition of the Tyranids Codex 10th Edition features a soft-touch cover with silver foil detailing and purple foil page edges. It includes a black ribbon bookmark, making it a premium option for enthusiasts. This limited print run is available only while stocks last, adding exclusivity to the physical copy.

Features of the Collectors Edition

The Collectors Edition of the Tyranids Codex 10th Edition boasts a luxurious soft-touch cover with intricate silver foil detailing. The pages are edged with striking purple foil, and the book includes a black ribbon bookmark for easy navigation. This premium edition is crafted with high-quality materials, making it a standout addition for any Warhammer 40,000 enthusiast. Its exclusive design and limited availability enhance its collectibility, offering fans a unique way to celebrate the Tyranids’ legacy.

Availability and Limited Print Runs

The Collectors Edition of the Tyranids Codex 10th Edition is available in limited quantities, making it highly sought after by enthusiasts. It can be purchased through official retailers and select online stores. Once the limited print run is exhausted, this edition will no longer be available, adding to its exclusivity. Fans are encouraged to act quickly to secure a copy, as demand often exceeds supply for such premium releases.

Downloading the Tyranids Codex 10th Edition PDF

The Tyranids Codex 10th Edition PDF is available for download from official sources like Games Workshop. Ensure you access it from trusted platforms to avoid unauthorized versions.

Official Sources for the PDF

The Tyranids Codex 10th Edition PDF can be downloaded from Games Workshop’s official website or through the Warhammer Community page. Additional sources include the Leviathan starter set and Battlecribe updates. Ensure you access the PDF from trusted platforms to avoid unauthorized versions. The official PDF includes updated datasheets, FAQs, and rules commentary. It’s available for purchase or as part of a subscription service like Warhammer+. Always verify the source to ensure authenticity and the latest updates.

URLs like this may provide direct access. The Leviathan set, released in 2023, also contains essential resources for players. Remember, official sources guarantee compliance with the 10th Edition rules.

Guidance on Accessing Digital Copies

To access the Tyranids Codex 10th Edition PDF, visit Games Workshop’s official website or the Warhammer Community page. The PDF is available for purchase or as part of a subscription. Ensure you download from trusted sources to avoid unauthorized versions. The Leviathan starter set also includes digital resources. For updates, check Battlecribe or the official FAQ section. Always verify the source to ensure authenticity and compliance with the latest rules.

Example: Official Warhammer Community Link. Avoid unofficial sites to prevent downloading outdated or incorrect files.

Tips for Building a Tyranid Army

Start with iconic units like Hive Tyrants and Warriors. Focus on swarms for overwhelming opponents. Include Genestealers and Lictors for versatility. Upgrade biomorphs strategically. Consult the Codex PDF for optimized list-building and competitive strategies.

Starting a 1000-Point Army

Begin with core units like Hive Tyrants and Tyranid Warriors for leadership and firepower. Include swarms of Termagants or Hormagaunts for overwhelming numbers. Add specialized units such as Genestealers or Lictors for versatility. Use the Codex PDF to guide your list-building, ensuring a balance of offense, defense, and mobility. Focus on essential wargear upgrades and biomorphs to optimize your army’s effectiveness on the battlefield. Remember to include Synapse units to maintain control over your swarm.

Essential Units for New Players

New players should start with Hive Tyrants for leadership and combat prowess. Tyranid Warriors provide durable, versatile troops. Termagants and Hormagaunts are cost-effective swarm units. Include Genestealers for close combat and Lictors for ambush tactics. These units form a solid foundation, allowing new players to learn core mechanics and strategies. The Codex PDF details their rules and wargear, helping you build a competitive and fun army from the start.

Frequently Asked Questions

Common queries include where to download the 10th Edition Codex PDF and how to access official digital copies. Players often seek rule clarifications and updates for competitive play.

Common Queries About the 10th Edition Codex

Players often ask where to download the Tyranids Codex 10th Edition PDF, how to access official digital copies, and whether the Collector’s Edition is worth purchasing. Queries also include updates on limited print runs and guidance on identifying the correct edition without opening it. Many seek clarification on rule changes and compatibility with previous editions. Additionally, users inquire about optimal ways to access the PDF legally and avoiding outdated versions.

Clarifications on Rules and Updates

The 10th Edition Tyranids Codex introduces significant rule updates, including adjustments to synaptic linkage and hive mind mechanics. Points values for certain units, like the Lictor and Hive Tyrant, have been revised for balance. Additionally, datasheets for iconic units have been updated to reflect new abilities and playstyles, ensuring compatibility with the latest edition’s core rules.

The FAQ section addresses common rule interpretations, while errata ensures clarity on controversial points. These updates aim to enhance gameplay while maintaining the Tyranids’ unique flavor, making the codex essential for both casual and competitive players.

The Tyranids Codex 10th Edition is a must-have for fans, offering updated rules and lore. It future-proofs armies, ensuring they thrive in the evolving metagame, making it essential for competitive and casual players alike.

Final Thoughts on the Tyranids Codex 10th Edition

The Tyranids Codex 10th Edition is a comprehensive guide that enhances gameplay with updated rules and lore. It balances competitive viability while maintaining the faction’s unique flavor. The limited Collectors Edition, with its stunning artwork, is a must-have for enthusiasts. Digital access ensures convenience for modern players. Overall, this codex solidifies the Tyranids’ role in the Warhammer 40,000 universe, offering endless possibilities for army composition and strategic depth. A must-own for any Tyranid fan, it future-proofs armies in the evolving meta.

Future Prospects for Tyranid Players

Tyranid players can anticipate a dynamic and evolving meta with regular updates. The 10th Edition Codex provides a strong foundation, ensuring competitive viability. New units and potential expansions will keep armies fresh, while digital access offers convenience. The limited Collectors Edition and exclusive content encourage early adoption. As the edition progresses, adaptability will be key, making Tyranids a compelling choice for both casual and competitive play in the Warhammer 40,000 universe.

PDF

hyrox 8 week training plan pdf

Hyrox combines running with functional fitness challenges, requiring a strategic approach to training. This 8-week plan progressively builds endurance, strength, and skill, ensuring race readiness. It includes running, functional exercises, and HIIT, customizable for all fitness levels. The structured program helps athletes peak for race day with a final taper week. Downloadable as a PDF, it offers a clear path to improving fitness and mental toughness for Hyrox success.

What is Hyrox?

Hyrox is a global fitness race that combines endurance with functional strength training. It involves an 8km run interspersed with 8 functional fitness stations, such as sandbag carries, burpees, and rowing. Designed for all fitness levels, Hyrox tests endurance, strength, and mental strategy; Participants alternate between running and completing functional exercises, making it a unique hybrid of running and strength training. The event is accessible to both beginners and elite athletes, with categories like Individual, Doubles, and Relay. Hyrox has gained popularity worldwide, offering a challenging and rewarding experience for those seeking to push their limits in a competitive yet inclusive environment.

Benefits of Following an 8-Week Training Plan

FOLLOWING an 8-week Hyrox training plan offers numerous benefits, including improved fitness, enhanced endurance, and increased strength. The structured approach ensures progressive overload, allowing athletes to build capacity safely and effectively. By balancing running and functional training, participants develop well-rounded fitness tailored to Hyrox demands. The plan also enhances mental resilience, helping athletes prepare for race day challenges. With a focus on peak performance, the program includes a final taper week to optimize recovery and readiness. Whether aiming to complete the race or achieve a personal best, the 8-week plan provides a clear path to success, ensuring athletes are physically and mentally prepared for Hyrox.

Understanding the Hyrox Event Format

Hyrox combines 8km of running with 8 functional fitness stations, alternating between running and exercises like sandbag carries and burpees, testing endurance, strength, and strategic pacing.

Structure of the Hyrox Race

The Hyrox race is a hybrid fitness event combining endurance and strength. It features 8 kilometers of running interspersed with 8 functional fitness stations. Each station includes exercises like sandbag carries, burpees, and sled pushes, requiring both aerobic capacity and muscular endurance. The race starts with a 1-kilometer run, followed by a functional workout station, and this pattern repeats, ending with a final 1-kilometer run. The alternating format demands strategic pacing and mental toughness, as participants must manage fatigue while maintaining performance across both running and strength challenges. This structure tests overall fitness, making Hyrox a unique and comprehensive athletic challenge.

Key Components of Hyrox Training

Hyrox training focuses on balancing running endurance, functional strength, and high-intensity interval training (HIIT). It incorporates sandbag carries, burpees, sled pushes, and other functional movements to build full-body fitness. The program includes interval runs to improve cardiovascular endurance and tempo runs for pacing. Strength training targets core stability, power, and muscular endurance, essential for handling the demands of race day. HIIT sessions enhance speed and mental toughness, simulating race conditions. The plan progressively increases intensity, ensuring athletes adapt and peak for the event. Customizable for fitness levels, it emphasizes consistency, recovery, and strategic progression to master the unique challenges of Hyrox.

Methodology Behind the 8-Week Plan

The plan uses progressive overload, balancing running endurance, strength, and HIIT. It strategically increases intensity, with a final taper week for recovery, ensuring peak race performance.

Progressive Overload and Adaptation

Progressive overload is central to the 8-week plan, gradually increasing workout intensity through added reps, weight, or speed. This approach ensures continuous adaptation, building strength and endurance effectively. Each week introduces new challenges, allowing the body to adapt without overtraining. The structured progression prevents plateaus, enhancing overall performance. By incrementally increasing demands, athletes achieve optimal fitness levels, preparing them for race-day challenges. This method ensures steady improvement, making it a cornerstone of the Hyrox training strategy.

Balancing Running and Functional Training

The 8-week plan seamlessly integrates running and functional training to build endurance and strength. Running sessions focus on improving cardiovascular fitness and pacing, while functional exercises enhance power, agility, and full-body coordination. The balance ensures athletes develop the stamina needed for prolonged efforts and the strength to excel in Hyrox-specific tasks. Alternating between these disciplines prevents overtraining and optimizes recovery, allowing for consistent progress. This dual approach prepares athletes for the race’s alternating format, ensuring they can transition smoothly between running and functional challenges. The plan’s structure ensures both aspects are prioritized, creating a well-rounded athlete ready for the demands of Hyrox.

Weekly Breakdown of the Training Plan

The 8-week plan is divided into weekly segments, each focusing on building specific skills and endurance. Weeks 1-2 establish a foundation, while Weeks 3-4 enhance strength and stamina. Weeks 5-6 introduce Hyrox-specific workouts, and Weeks 7-8 focus on race preparation and tapering. This structured progression ensures athletes are fully prepared for race day.

Weeks 1-2: Building the Foundation

These initial weeks focus on establishing a solid base of fitness and familiarity with Hyrox-style workouts. Workouts include short interval runs, core exercises, and introductory functional movements like sandbag carries and squats. The plan introduces mobility drills and light strength training to build resilience. Sessions are moderate in intensity, allowing athletes to adapt gradually. Running volumes are kept manageable, with one longer run each week to improve endurance. Functional training is simplified to focus on proper form and technique. This phase ensures athletes develop a consistent routine and build confidence before progressing to more demanding workouts in later weeks.

Weeks 3-4: Increasing Strength and Endurance

During weeks 3 and 4, the focus shifts to enhancing strength and cardiovascular endurance. Workouts introduce more complex functional exercises, such as weighted squats, sandbag carries, and pull-ups, while running intervals and tempo runs become longer and more intense. The plan incorporates progressive overload, gradually increasing the weight or repetitions in strength sessions. Running sessions are balanced with functional training to avoid overtraining. Each week builds on the previous one, ensuring athletes adapt and improve without injury. This phase prepares the body for the demands of Hyrox-specific workouts in later weeks and builds a solid foundation for race performance.

Weeks 5-6: Introducing Hyrox-Specific Workouts

Weeks 5 and 6 focus on integrating Hyrox-specific workouts to simulate race conditions. Athletes engage in functional exercises like sandbag runs, burpees, and weighted carries, alternating with short running intervals. These sessions mimic the Hyrox race format, building adaptability and mental resilience. Running segments are paired with strength challenges to mirror the event’s demands. The intensity and volume of training increase progressively, ensuring athletes are prepared for the physical and mental stresses of competition. This phase emphasizes proper pacing and technique, allowing for optimal adaptation and performance improvements ahead of the final race-specific preparation weeks.

Weeks 7-8: Race-Specific Preparation and Taper

Weeks 7 and 8 focus on race-specific preparation and tapering to ensure peak performance on race day. Training volume and intensity are gradually reduced to allow for recovery and adaptation. Athletes practice Hyrox simulations, including running and functional exercises in race order, to build mental and physical readiness. Active recovery techniques, such as stretching and foam rolling, are emphasized to prevent injury and maintain mobility. Nutrition and hydration strategies are refined to optimize energy levels during the event. The taper period ensures athletes feel rested and prepared, both physically and mentally, to tackle the challenges of the Hyrox race with confidence and strength.

Key Components of the Training Plan

The Hyrox 8-week training plan focuses on running endurance, functional strength, and HIIT to build overall fitness. It integrates race-specific workouts, recovery strategies, and nutrition advice for optimal preparation.

Running and Endurance Training

Running is a cornerstone of Hyrox, demanding a mix of speed and stamina. The 8-week plan includes interval runs, tempo runs, and endurance sessions to boost cardiovascular fitness. Progressively increasing distances and intensities help build mental and physical resilience. Incorporating running under fatigue mirrors race conditions, preparing athletes for the demands of alternating between functional exercises and sprints. Each week’s running workload is tailored to enhance lactate threshold and VO2 max, ensuring participants can maintain pace during the event. Proper pacing strategies and recovery techniques are emphasized to prevent burnout and optimize performance.

Functional Strength and Skill Development

Functional strength is vital for mastering Hyrox’s eight functional exercises, such as sandbag carries, burpee broad jumps, and sled pushes. The 8-week plan integrates skill-specific workouts to build proficiency and endurance. Athletes start with foundational movements, progressively increasing intensity and complexity. Proper form and technique are emphasized to prevent injury and maximize efficiency. Accessory exercises, such as core work and mobility drills, support overall performance. The plan also includes scaling options to accommodate different fitness levels, ensuring everyone can improve their functional capacity and confidence. By week 8, athletes are proficient in all Hyrox exercises, ready to tackle the race with precision and strength.

High-Intensity Interval Training (HIIT)

HIIT is a cornerstone of the Hyrox 8-week plan, designed to enhance cardiovascular fitness and muscular endurance. These short, intense workouts alternate between bursts of maximum effort and brief recovery periods. Examples include sprint intervals, burpee challenges, and sandbag carries. HIIT improves speed, endurance, and mental toughness while mimicking Hyrox’s race demands. The plan incorporates HIIT sessions twice weekly, progressively increasing intensity. This approach ensures athletes adapt to the physical and mental stresses of Hyrox, building resilience and stamina. By race day, participants are well-prepared to handle the event’s intensity and pacing, making HIIT a key component of the training strategy.

Nutrition and Recovery Strategies

Proper fueling and recovery are crucial for Hyrox success. Balanced nutrition, adequate hydration, and recovery techniques like stretching and foam rolling support muscle repair and peak performance.

Fueling for Performance

A well-balanced diet is essential for optimizing performance in Hyrox. Focus on complex carbohydrates for sustained energy, lean proteins to repair muscles, and healthy fats for recovery. Hydration is critical, especially during intense workouts. Aim to fuel 2-3 hours before training with nutrient-dense meals and replenish with electrolytes and protein post-workout. Timing and portion control are key to avoiding GI distress during exercises. Listen to your body and adjust your nutrition plan based on energy levels and recovery needs. A structured eating schedule ensures you’re prepared for both training and race day, supporting endurance and strength throughout the 8-week program.

Recovery Techniques for Optimal Progress

Recovery is a cornerstone of the Hyrox 8-week training plan, ensuring your body adapts and performs at its best. Incorporate rest days, stretching, and foam rolling to reduce muscle tension and prevent injury; Prioritize sleep, aiming for 7-9 hours nightly, to aid muscle repair and mental refreshment. Active recovery, such as light jogging or yoga, promotes blood flow without overtaxing your body. Additionally, consider techniques like ice baths or compression garments to alleviate soreness. By balancing intense training with proper recovery, you’ll maintain consistency and progress throughout the program, ensuring peak performance on race day. Consistency in recovery routines is key to long-term success.

Mental Preparation and Strategy

Mental preparation is crucial for Hyrox success. Develop mental toughness, strategies for pacing, and focused breathing techniques. A clear race-day strategy and positive self-talk enhance performance and resilience.

Building Mental Toughness

Building mental toughness is essential for mastering Hyrox. Techniques like visualization, positive self-talk, and mindfulness help athletes stay focused under pressure. Embrace discomfort during training to develop resilience. Break the race into manageable segments to maintain confidence. Practice breathing exercises to calm nerves and stay present. Celebrate small victories to build motivation. Surround yourself with a supportive community to enhance accountability and belief in your abilities. Mental strength training should be integrated into your daily routine, just like physical workouts, to ensure peak performance on race day. A strong mind is your most powerful ally in overcoming Hyrox challenges.

Race Day Strategy and Pacing

On race day, maintain a steady pace to avoid early burnout. Start with a sustainable rhythm, gradually increasing effort as the race progresses. Focus on consistent pacing during both running and functional exercises. Practice hydration and nutrition strategies to fuel performance. Train your mind to stay disciplined under fatigue. Learn to balance speed with endurance, ensuring you can manage the transitions between running and strength challenges. Simulate race conditions during training to refine your strategy. Analyze your progress to adjust pacing effectively. A well-executed plan ensures you maximize your potential and cross the finish line strong, making the most of your 8-week preparation.

Complete the 8-week Hyrox plan and download the PDF for continued progress. Use community support and coaching to enhance your fitness journey and achieve long-term success.

Final Tips for Success

To excel in Hyrox, stay consistent with your 8-week training plan. Prioritize recovery, nutrition, and mental preparation. Gradually increase intensity and listen to your body. Incorporate race-specific workouts, like run-work intervals, to build endurance and adaptability. Embrace the challenge, stay disciplined, and trust the process. Download the PDF plan for structured guidance and join the Hyrox community for support. With dedication and focus, you’ll be race-ready and confident to achieve your goals.

Continuing Your Hyrox Journey

After completing the 8-week training plan, continue your Hyrox journey by exploring advanced programs and resources. Join the Hyrox community for motivation and expert advice. Participate in local or global events to test your progress and connect with fellow athletes. Download additional PDF guides, such as the Hyrox Strong or Run Speed Developer plans, to further enhance your skills. Set new goals, track your progress, and stay consistent. With dedication, you can progress from beginner to elite levels, ensuring long-term success in Hyrox and beyond. The Hyrox community and resources are here to support your ongoing fitness evolution.

Additional Resources

Download the Hyrox 8-week training plan PDF for a structured approach to race preparation. Access calculators and guides for customizable training. Join the Hyrox community for support, coaching, and exclusive resources to enhance your fitness journey.

Downloading the Hyrox 8-Week Training Plan PDF

The Hyrox 8-week training plan PDF is a comprehensive guide designed to help athletes prepare for the Hyrox race. Available for download, it provides structured workouts, training schedules, and progression tracking. The plan is tailored for both beginners and advanced athletes, offering customizable options to suit individual fitness levels. It includes detailed instructions for running, strength training, and Hyrox-specific exercises, ensuring a well-rounded approach to race preparation. The PDF also features calculators for pacing and intensity, making it a valuable resource for anyone aiming to optimize their performance. Download the plan today and take the first step toward Hyrox success!

Community Support and Coaching Options

Joining the Hyrox community provides valuable support and resources to enhance your training journey. Online forums, social media groups, and local meetups connect athletes, fostering motivation and knowledge sharing. Certified Hyrox coaches offer personalized guidance, helping you tailor the 8-week plan to your needs. Many coaches provide video tutorials, live sessions, and progress tracking to ensure optimal results. Additionally, the Hyrox website offers downloadable resources, including workout calculators and nutrition advice, to complement your training. These tools and support networks help athletes stay accountable, overcome challenges, and achieve their fitness goals effectively. Embrace the community to elevate your Hyrox experience and success.

2015 jeep cherokee user guide

Welcome to the 2015 Jeep Cherokee User Guide, your comprehensive resource for understanding and maximizing your vehicle’s features, performance, and safety․ This guide provides detailed insights into operating, maintaining, and customizing your Cherokee, ensuring a seamless and enjoyable driving experience․ Whether you’re navigating off-road adventures or urban commutes, this manual is your essential companion for optimal vehicle utilization and care․

Overview of the 2015 Jeep Cherokee

The 2015 Jeep Cherokee is a compact SUV known for its rugged off-road capability and modern design․ Introduced in 2014, it continued to impress in 2015 with its advanced technology and versatile features․ Available in models like the Latitude, Trailhawk, and Limited, the Cherokee offers a balance of comfort and adventure․ Its sleek exterior and spacious interior make it a practical choice for both urban and off-road enthusiasts․ The 2015 Jeep Cherokee user guide provides detailed insights into its operation, maintenance, and customization options, ensuring a seamless driving experience․

Importance of Reading the User Guide

Reading the 2015 Jeep Cherokee User Guide is essential for understanding your vehicle’s features, safety systems, and maintenance requirements․ It provides critical information on operating advanced technology, troubleshooting common issues, and ensuring proper vehicle care․ By familiarizing yourself with the guide, you can optimize performance, prevent errors, and enjoy a safe, enjoyable driving experience․ This resource is your key to unlocking the full potential of your Cherokee while maintaining its longevity and reliability․

Key Features of the 2015 Jeep Cherokee

The 2015 Jeep Cherokee boasts a rugged yet modern design, combining Selec-Terrain traction control for enhanced off-road capability with a sleek, aerodynamic exterior․ Inside, you’ll find a user-friendly Uconnect infotainment system, offering Bluetooth connectivity, voice commands, and navigation․ Advanced safety features like Forward Collision Warning and LaneSense ensure a secure driving experience․ With its powerful engine options and versatile 4×4 system, the Cherokee delivers unmatched versatility for both on-road comfort and off-road adventures․

Instrument Cluster and Controls

The 2015 Jeep Cherokee features a sleek, driver-focused instrument cluster with a speedometer, odometer, and trip meter․ Intuitive controls and customizable settings ensure a user-friendly experience, while warning lights provide vital vehicle status updates for safe and informed driving․

Understanding the Dashboard Layout

The 2015 Jeep Cherokee dashboard is designed for clarity and convenience, featuring a central Uconnect infotainment system, analog gauges for speed and RPM, and digital displays for vital information․ The layout prioritizes driver accessibility, with controls for climate, audio, and navigation within easy reach․ Warning lights and indicators are strategically placed to ensure quick recognition, while customizable settings allow you to tailor the display to your preferences․ Familiarizing yourself with this intuitive design enhances your driving experience․

Speedometer, Odometer, and Trip Meter

The 2015 Jeep Cherokee features a clear analog speedometer displaying your vehicle’s speed in miles per hour (MPH) or kilometers per hour (km/h)․ The odometer tracks the total distance traveled, while the trip meter allows you to monitor shorter journeys․ Located on the instrument cluster, these gauges provide essential driving data at a glance․ The trip meter can be reset for tracking specific legs of a trip, helping you monitor fuel efficiency and plan maintenance schedules effectively․

Warning Lights and Indicators

The 2015 Jeep Cherokee dashboard features various warning lights and indicators that alert you to the vehicle’s status․ The check engine light illuminates if an issue is detected in the engine or emissions system․ The oil pressure light warns of low oil levels, while the parking brake light indicates the brake is engaged․ Other indicators include low fuel, high beam headlights, and cruise control activation․ Refer to the electronic manual for detailed explanations of each light’s meaning and recommended actions to ensure safe operation and maintenance․

Infotainment and Navigation System

The 2015 Jeep Cherokee features an advanced Uconnect infotainment system with a high-resolution touchscreen display․ It supports voice commands, Bluetooth connectivity, and integrates seamlessly with navigation and entertainment functions for a enhanced driving experience․

Operating the Uconnect System

The Uconnect system in the 2015 Jeep Cherokee is a high-resolution touchscreen infotainment system designed for intuitive operation․ It allows users to manage navigation, audio, and climate controls with ease․ Voice command functionality enables hands-free operation, while Bluetooth connectivity supports seamless pairing with smartphones․ The system also integrates with USB and auxiliary inputs for expanded media options․ Its user-friendly interface ensures a smooth and connected driving experience, enhancing convenience and entertainment on the go․

Pairing Bluetooth Devices

To pair a Bluetooth device with your 2015 Jeep Cherokee, enable Bluetooth on your device and navigate to the Uconnect system’s settings․ Select “Bluetooth” and initiate a device search․ Once your device appears, confirm the pairing on both the touchscreen and your device․ Enter any required passcode, typically “0000” or “1234․” After confirmation, your device will connect, enabling hands-free calls and audio streaming․ For multiple devices, repeat the process and manage connections via the Uconnect menu․

Using Voice Commands

Activate voice commands in your 2015 Jeep Cherokee by pressing the voice command button on the steering wheel․ Speak clearly to control functions like calling, navigation, and audio․ Use phrases like “Call [name]” or “Navigate to [location]․” The system responds to natural language, making it intuitive to use․ Ensure the Uconnect system is properly paired with your device for seamless voice command functionality․ This feature enhances safety by minimizing manual interactions while driving․

Safety Features and Advanced Technology

The 2015 Jeep Cherokee offers a comprehensive suite of safety features, including Forward Collision Warning, LaneSense, and adaptive cruise control․ Advanced technology integrates seamlessly for enhanced protection and driving confidence․

Jeep Cherokee Safety Systems

The 2015 Jeep Cherokee is equipped with advanced safety systems designed to protect occupants and prevent accidents․ Features include electronic stability control, anti-lock braking, and a robust body structure․ Additionally, technologies like Forward Collision Warning and Lane Departure Warning enhance driver awareness․ These systems work together to provide a safe and secure driving environment, ensuring peace of mind on every journey․

Forward Collision Warning and LaneSense

The 2015 Jeep Cherokee features Forward Collision Warning and LaneSense technologies, enhancing driver safety․ Forward Collision Warning alerts drivers of potential frontal impacts, while LaneSense assists with lane-keeping, subtly steering the vehicle back on course if it drifts․ These systems utilize cameras and sensors to monitor the road, providing critical assistance and reducing the risk of accidents, ensuring a safer and more confident driving experience․

Child Seat Anchors and Safety Belts

The 2015 Jeep Cherokee is equipped with LATCH (Lower Anchors and Tethers for Children) systems in the rear seats, simplifying the installation of child seats․ The vehicle also features advanced safety belts with pretensioners to ensure optimal protection․ Properly securing child seats and using safety belts is crucial for passenger safety․ Always refer to the owner’s manual for detailed instructions on installing child seats and adjusting safety belts correctly to ensure maximum protection for all occupants․

Driving Modes and Performance

The 2015 Jeep Cherokee offers versatile driving modes, including Sport, Snow, Sand, and Mud, optimized for various conditions․ Its advanced 4×4 system ensures superior traction and control, delivering exceptional off-road capability while maintaining smooth on-road performance, making it a reliable choice for diverse driving adventures․

Selec-Terrain Traction Control System

The Selec-Terrain Traction Control System in the 2015 Jeep Cherokee optimizes performance across various driving conditions․ With modes like Auto, Sport, Snow, Sand, and Mud, it adjusts engine torque, transmission shift points, and braking to enhance stability and control․ This advanced system ensures the Cherokee delivers exceptional capability both on-road and off-road, providing drivers with confidence in diverse terrains․

Switching Between Driving Modes

To switch between driving modes in the 2015 Jeep Cherokee, use the Selec-Terrain dial located on the center console․ Rotate the dial to select from modes like Auto, Sport, Snow, Sand, or Mud․ The system adjusts engine torque, transmission, and braking for optimal performance in each condition․ The selected mode will be displayed on the instrument cluster, ensuring you’re informed and in control of your vehicle’s settings․

4×4 System Operation

The 2015 Jeep Cherokee features a sophisticated 4×4 system designed for enhanced traction and control․ The system automatically engages when needed, adapting to road conditions․ Use the Selec-Terrain dial to switch modes like Auto, Snow, or Sand․ The transfer case distributes power between front and rear axles, optimizing stability․ In 4×4 Lock mode, torque is evenly split for maximum grip․ This system ensures superior performance on both paved roads and off-road terrain, minimizing wheel slippage and improving overall control․

Maintenance and Care

Regular maintenance is crucial for the 2015 Jeep Cherokee’s performance and longevity․ Schedule oil changes, tire pressure checks, and fluid inspections as outlined in the manual․ Proper care ensures reliable operation and prevents potential issues, keeping your vehicle in optimal condition․

Scheduled Maintenance Requirements

Regular maintenance is essential for the 2015 Jeep Cherokee․ Follow the recommended schedule in your user guide, including oil changes every 5,000 to 7,500 miles, tire pressure checks, and fluid level inspections․ Rotate tires and replace air filters as specified to ensure optimal performance․ Addressing these requirements helps prevent mechanical issues and extends the vehicle’s lifespan, keeping it running smoothly and reliably for years to come․

Checking Tire Pressure

Proper tire pressure is crucial for the 2015 Jeep Cherokee․ Check pressure monthly and before long trips using a reliable tire pressure gauge․ Refer to the tire information placard on the driver’s doorjamb or in the owner’s manual for recommended levels․ Ensure the spare tire is also at the specified pressure; Maintaining correct tire pressure enhances fuel efficiency, handling, and safety, while preventing uneven tire wear and potential damage to your vehicle․

Oil Change and Fluid Levels

Regular oil changes are essential for the 2015 Jeep Cherokee․ Use synthetic oil (5W-20 or 5W-30) as specified in the owner’s manual․ Check fluid levels, including coolant, brake fluid, and windshield washer fluid, under the hood․ The coolant reservoir is marked with a fill line; ensure it’s at the recommended level when the engine is cold․ Avoid overfilling any fluids․ If unsure, consult a certified technician to maintain optimal vehicle performance and prevent potential damage․

Electrical System and Accessories

The 2015 Jeep Cherokee features a robust electrical system with fuses and circuit breakers protecting key components; Power outlets are conveniently located throughout the cabin for charging devices․ The vehicle’s alarm system enhances security, while accessories like remote keyless entry add convenience․ Proper maintenance ensures reliable operation of all electrical features․

Understanding Fuses and Circuit Breakers

The 2015 Jeep Cherokee uses a combination of fuses and circuit breakers to protect its electrical systems․ Fuses are located in the power distribution center under the hood and in the interior fuse box․ Each fuse corresponds to specific components, such as lights or accessories․ Circuit breakers, often resettable, protect high-current systems like the rear window defroster․ Regular inspection ensures electrical reliability and prevents potential damage from overloaded circuits․ Always refer to the fuse diagram in your owner’s manual for accurate identification and replacement․

Power Outlet Usage

The 2015 Jeep Cherokee features multiple power outlets for convenient charging and powering accessories․ The 12V DC outlets, located in the front console and rear seat area, support devices like phones and portable electronics․ Always ensure devices do not exceed the outlet’s maximum power capacity to avoid damage․ For energy management, avoid leaving devices plugged in when the engine is off to prevent battery drain․ Consult your owner’s manual for specific outlet locations and usage guidelines․

Alarm and Remote Keyless Entry

The 2015 Jeep Cherokee is equipped with a sophisticated alarm system and remote keyless entry for enhanced security and convenience․ The key fob allows you to lock, unlock, and start your vehicle remotely․ The panic button emits a high-pitched sound to deter unauthorized access․ The alarm is triggered by unauthorized entry or tampering․ The system includes an LED indicator to show when it’s armed․ Always consult your owner’s manual for troubleshooting and proper usage to ensure optimal functionality and security․

Legal and Safety Information

Always follow safety guidelines and legal requirements when operating your 2015 Jeep Cherokee․ Adhere to emission standards, ensure proper vehicle maintenance, and refer to the warranty for coverage details․

Important Safety Precautions

Always follow safety guidelines to ensure a secure driving experience․ Wear seat belts, properly secure child restraints, and avoid distractions while driving․ Adhere to vehicle load limits and maintain proper tire pressure․ Never ignore warning lights or alarms, and keep emergency contacts accessible․ Regular maintenance is crucial for optimal performance and safety․ Refer to the manual for detailed instructions and precautions to minimize risks and ensure compliance with legal standards․

Compliance with Emission Standards

The 2015 Jeep Cherokee is designed to meet strict EPA and CARB emission standards, ensuring environmental compliance․ Equipped with advanced emissions control technologies, including catalytic converters and exhaust gas recirculation systems, this vehicle minimizes its ecological footprint․ Regular maintenance, as outlined in the user guide, is essential to sustain optimal performance and emissions control․ Adhering to scheduled inspections and maintenance helps preserve the vehicle’s efficiency and compliance with regulatory requirements․

Warranty Information

The 2015 Jeep Cherokee is backed by a comprehensive warranty program, designed to protect your investment․ The vehicle comes with a Basic Warranty and a Powertrain Warranty, providing coverage for parts and labor against defects in materials and workmanship․ Proper maintenance, as outlined in the user guide, is essential to ensure warranty validity․ For detailed terms, conditions, and coverage periods, refer to the warranty section in your owner’s manual or contact your local Jeep dealership or authorized service center․

Accessories and Customization

Explore a wide range of approved accessories for the 2015 Jeep Cherokee, including exterior enhancements, interior upgrades, and performance improvements․ Customize your vehicle to suit your style and needs with genuine parts designed specifically for your Cherokee, ensuring compatibility and quality․ Discover how to install aftermarket components and personalize your SUV for a unique driving experience․

Approved Accessories for the 2015 Jeep Cherokee

The 2015 Jeep Cherokee offers a variety of approved accessories designed to enhance functionality, style, and performance․ From roof racks and cargo carriers to interior trim kits, these accessories are engineered to fit seamlessly with your vehicle․ Genuine Jeep parts ensure compatibility and quality, while aftermarket options provide additional customization choices․ Explore exterior enhancements, tech upgrades, and lifestyle accessories to personalize your Cherokee and elevate your driving experience with trusted, durable products․

Installing Aftermarket Parts

Installing aftermarket parts on your 2015 Jeep Cherokee can enhance performance and style․ Always consult the user guide to ensure compatibility and safety․ Use genuine or approved parts to maintain warranty coverage and avoid system conflicts․ Start with simple upgrades like roof racks or floor mats, and proceed to more complex modifications like suspension lifts or performance tuning․ For electrical installations, consult wiring diagrams to avoid system malfunctions․ Proper installation ensures reliability and optimal vehicle performance․

Personalizing Your Vehicle

Personalizing your 2015 Jeep Cherokee allows you to tailor it to your preferences and lifestyle․ From interior accessories like custom seat covers to exterior enhancements such as decals or roof racks, you can enhance both functionality and aesthetics․ The user guide provides guidance on compatible modifications to ensure safety and performance․ Explore approved accessories and customization options to make your Cherokee uniquely yours while maintaining its rugged capability and modern style․

Troubleshooting Common Issues

This section helps identify and resolve common issues with your 2015 Jeep Cherokee․ From warning lights to mechanical concerns, the guide provides clear steps for diagnosis and repair․

Diagnosing Warning Lights

Understanding warning lights is crucial for maintaining your 2015 Jeep Cherokee․ This guide explains the meaning of each indicator, from the check engine light to traction control alerts․ Refer to the detailed diagrams and descriptions to identify issues promptly․ Use the Uconnect system for real-time data and consult the troubleshooting section for solutions․ Addressing warning lights early ensures optimal performance and prevents potential damage to your vehicle․

Resolving Common Electrical Problems

Identify and address electrical issues in your 2015 Jeep Cherokee by checking fuses, circuit breakers, and wiring connections․ Consult the fuse box diagram in your user guide to locate the correct fuse․ Replace blown fuses with the specified amperage rating․ For connectivity issues, restart the Uconnect system or re-pair Bluetooth devices․ If problems persist, refer to the troubleshooting section or seek professional assistance to avoid further damage․

Addressing Mechanical Concerns

For mechanical issues in your 2015 Jeep Cherokee, start by identifying symptoms like unusual noises, leaks, or reduced performance․ Check fluid levels, belts, and hoses for wear․ Refer to the service manual for diagnostic procedures and repair guidance․ If problems persist, such as transmission slipping or engine misfires, consult a certified mechanic to ensure proper repairs and maintain your vehicle’s reliability and longevity on both on-road and off-road terrains․

Technical Specifications

The 2015 Jeep Cherokee features a 2․4L engine, 9-speed transmission, and 4×4 drivetrain, offering up to 4,500 lbs towing capacity for versatile performance․

Engine and Transmission Details

The 2015 Jeep Cherokee is powered by a 2․4L Tigershark MultiAir2 I-4 engine, delivering efficient fuel economy and responsive performance․ Paired with a 9-speed automatic transmission, it ensures smooth shifting and optimal power delivery․ Available in both front-wheel and four-wheel drive configurations, the Cherokee offers versatility for various driving conditions, while the advanced engine technology enhances overall efficiency and durability for a reliable driving experience․

Brake and Suspension System

The 2015 Jeep Cherokee features a robust brake system with four-wheel disc brakes, ensuring reliable stopping power․ The suspension system includes a MacPherson strut front setup and an independent multi-link rear configuration, providing a smooth ride and precise handling․ Electronic stability control and traction control enhance stability, while the suspension’s design optimizes both on-road comfort and off-road capability, making the Cherokee versatile for various driving conditions․

Weight and Towing Capacity

The 2015 Jeep Cherokee has a curb weight ranging from 3,900 to 4,400 pounds, depending on the trim and options․ It offers a maximum towing capacity of up to 4,500 pounds when properly equipped, making it suitable for trailers, boats, or small RVs․ The Gross Vehicle Weight Rating (GVWR) is approximately 5,300 pounds, ensuring stability and control during towing․ This capability complements its versatility for both urban and off-road adventures․

Congratulations on completing the 2015 Jeep Cherokee User Guide! Follow these tips to enjoy your vehicle, ensure safety, and maximize performance while staying informed about updates․

Maximizing Vehicle Performance

To maximize your 2015 Jeep Cherokee’s performance, regular maintenance is essential․ Ensure proper tire pressure, oil changes, and fluid levels․ Understand and utilize the Selec-Terrain system for optimal traction in various conditions․ Drive responsibly, avoiding aggressive acceleration to maintain fuel efficiency․ Familiarize yourself with the 4×4 system for enhanced off-road capability․ Customize your vehicle with approved accessories to enhance its functionality and personal style, ensuring peak performance in all driving scenarios․

Staying Informed About Updates

Stay informed about updates for your 2015 Jeep Cherokee by regularly checking official Jeep websites or contacting authorized dealers․ Register your vehicle to receive notifications about software updates, recalls, or maintenance alerts․ Utilize the provided DVD or online resources for the latest user guide updates․ This ensures your Cherokee operates with the most current features and safety enhancements, keeping your driving experience up-to-date and optimized for performance․

Enjoying Your 2015 Jeep Cherokee

Your 2015 Jeep Cherokee is designed to deliver a blend of adventure, comfort, and reliability․ Whether exploring off-road trails or navigating city streets, this vehicle offers a dynamic driving experience․ Use the user guide to explore its features, from advanced infotainment to robust safety systems․ Regular maintenance and updates ensure optimal performance, allowing you to fully enjoy the freedom and capability your Cherokee provides, making every journey a memorable one․

kenmore elite oven manual

Welcome to the Kenmore Elite Oven Manual! This comprehensive guide provides essential information for safe operation, advanced features, and troubleshooting. Explore setup, maintenance, and cooking tips for optimal performance.

Overview of the Kenmore Elite Oven Series

The Kenmore Elite Oven Series offers high-quality appliances designed for versatile cooking needs. Popular models like the Kenmore Elite 790.4111, 790.49413, and 49113 feature advanced cooking technologies. These ovens are known for their innovative designs, including convection cooking, self-cleaning functions, and intuitive control panels. The series caters to different kitchen setups with options for electric, gas, and combination ovens. Whether you prefer wall-mounted or slide-in models, Kenmore Elite ovens deliver reliability and performance. Their sleek designs and user-friendly interfaces make them a favorite for home cooks and professional chefs alike.

Importance of Reading the Manual

Reading the Kenmore Elite Oven Manual is crucial for safe and effective use. It provides detailed instructions for installation, operation, and maintenance. The manual explains advanced features like convection cooking and self-cleaning, ensuring you maximize your oven’s potential. It also outlines safety precautions and troubleshooting tips to prevent issues. By understanding the guidelines, you can avoid accidental damage and ensure optimal performance. Regular maintenance procedures, such as cleaning and replacing parts, are also covered to prolong the oven’s lifespan and efficiency.

Key Features of the Kenmore Elite Oven

The Kenmore Elite Oven boasts advanced features for enhanced cooking performance. It includes electronic oven controls with a clock timer, decorative accent lighting, and a self-cleaning function for effortless maintenance. The oven offers convection cooking for faster and even heating, while adjustable racks provide versatility for various dish sizes. Additional features include a broil element, upper oven vent, and a lock mechanism for safety. These innovations ensure precise control, energy efficiency, and a superior culinary experience, making the Kenmore Elite Oven a versatile and reliable choice for home cooks.

Installation and Setup

Proper installation ensures safe and efficient operation. Carefully unpack, align mounting holes, and level the oven. Follow manufacturer guidelines for electrical and gas connections to avoid hazards.

Unpacking and Preparing the Oven

Begin by carefully unpacking your Kenmore Elite Oven, ensuring all components are included and undamaged. Remove protective packaging materials, paying attention to fragile parts. Place the oven on a stable, heat-resistant surface. Use the mounting holes in the side trims as a template for appliance mounting screws. Ensure the oven is level and properly aligned before proceeding. Refer to the manual for precise instructions to avoid installation errors. Proper preparation ensures safe and efficient operation of your Kenmore Elite Oven;

Mounting and Leveling the Oven

Mounting and leveling your Kenmore Elite Oven is crucial for safe and efficient operation. Begin by ensuring the floor is even and sturdy. Use a spirit level to check the oven’s alignment. If necessary, adjust the feet or use shims to achieve proper leveling. Secure the oven to adjacent surfaces using the provided mounting hardware. Double-check the alignment to prevent uneven heating or potential safety hazards. Proper installation ensures optimal performance and longevity of your Kenmore Elite Oven.

Connecting Electrical and Gas Components

Before connecting electrical and gas components, ensure the power and gas supply are turned off. Locate the electrical connector behind the oven and attach it to the appropriate outlet, following the manual’s wiring diagram. For gas models, connect the gas line securely to the oven’s inlet, using a gas-rated connector. Tighten all connections firmly and check for leaks using a soap solution. Ensure all connections comply with local safety codes and consult a professional if unsure. Proper connections ensure safe and efficient operation of your Kenmore Elite Oven.

Initial Start-Up and Testing

Before first use, ensure all connections are secure and the oven is properly installed. Plug in the oven and turn on the power. Check that the display lights up and all controls are responsive. Set the clock and timer to ensure proper functionality. Run a test cycle by preheating the oven to 350°F (175°C) for 30 minutes to verify heating performance. Listen for unusual noises and ensure no gas leaks (for gas models). Allow the oven to cool before wiping it clean. If issues arise, refer to the troubleshooting section for guidance.

Operating the Kenmore Elite Oven

Mastering your Kenmore Elite Oven starts with understanding its intuitive controls. Navigate through cooking modes, set timers, and utilize advanced features like convection and self-cleaning effortlessly.

Understanding the Control Panel Layout

The Kenmore Elite Oven’s control panel is designed for simplicity and efficiency. Key features include electronic oven controls, a clock timer, and a decorative accent light. The panel allows easy access to cooking modes such as bake, roast, and broil. Functions like Timer Set/Off and Add 1 Minute enable precise control over cooking times. Familiarizing yourself with the layout ensures seamless operation, helping you navigate settings and advanced features like convection and self-cleaning with confidence. Proper use of the control panel enhances your cooking experience and optimizes oven performance.

Setting the Timer and Clock

To set the timer and clock on your Kenmore Elite Oven, start by accessing the timer function via the control panel. Use the numerical keypad to input your desired cooking time, then press Start to begin the countdown. The Add 1 Minute feature allows quick adjustments. For the clock, select the clock button and use the arrows to set the current time. Ensure the clock is accurate for timer functionality. To cancel the timer, press Timer Set/Off. These features help you manage cooking times efficiently and maintain precise control over your oven’s operations.

Using Basic Cooking Functions

Your Kenmore Elite Oven offers straightforward controls for basic cooking functions; To begin, select your desired mode—such as Bake, Roast, or Broil—using the control panel. Enter the temperature using the numerical keypad and press Start. The oven will preheat and notify you with a beep when ready. For baking, ensure even cooking by placing racks in the recommended positions. Adjust settings as needed for precise results. These functions provide a foundation for everyday cooking, ensuring your dishes turn out perfectly every time.

Advanced Cooking Features (Convection, Broiling, etc.)

The Kenmore Elite Oven offers advanced cooking features for precision and versatility. The Convection mode circulates hot air for even cooking and faster results, ideal for roasting and baking. To activate, press the Convection button and adjust temperature and time as needed; For Broiling, select the mode and choose your desired intensity level; The oven also features a Self-Cleaning function, which uses high heat to burn food residue. Always follow manual guidelines for these settings to ensure optimal performance and safety.

Using the Self-Cleaning Function

The Kenmore Elite Oven’s self-cleaning feature uses high heat to burn food residue, simplifying maintenance. Before use, remove racks and ensure the oven is empty. Set the mode, select the cleaning time, and let the oven heat. After cooling, wipe away ash with a damp cloth. Avoid harsh cleaners. Note: This function may produce fumes, so ensure proper ventilation. For lighter messes, a shorter cycle is sufficient. Always follow manual guidelines for safe operation.

Maintenance and Care

Regular cleaning is essential for your Kenmore Elite Oven’s longevity. Wipe spills promptly and use the self-cleaning function. Check for worn parts and refer to the manual for deep cleaning instructions.

Cleaning the Oven Exterior and Interior

Regular cleaning is crucial for maintaining your Kenmore Elite Oven’s performance. For the exterior, wipe surfaces with a damp cloth and mild detergent. Avoid abrasive cleaners to prevent damage. The interior can be cleaned using the self-cleaning feature, which locks the oven door and heats to high temperatures to burn off food residue. For manual cleaning, remove racks and trays, and soak them in warm soapy water. Always refer to the manual for specific cleaning recommendations to ensure longevity and optimal functionality of your oven.

Regular Maintenance Checks

Performing regular maintenance checks ensures your Kenmore Elite Oven operates efficiently and safely. Check oven racks and trays for wear and tear, and clean or replace them as needed. Ensure proper ventilation by verifying that vents are unobstructed. Inspect the door seals for integrity to maintain even heating. Additionally, test all functions, such as convection and broiling, to ensure they are working correctly. Refer to the manual for a detailed maintenance schedule to prevent potential issues and extend the lifespan of your oven.

Replacing Oven Lamps and Filters

Regularly replacing oven lamps and filters ensures optimal performance and safety. To replace the oven lamp, turn off power, remove the glass cover, and install a new bulb. For filters, check the manual for specific locations and removal steps. Clean or replace filters as needed to maintain air quality and cooking efficiency. Always use genuine Kenmore parts for replacements to ensure compatibility and safety. Refer to the manual for detailed instructions and part numbers to make the process quick and hassle-free.

Deep Cleaning the Oven

Deep cleaning your Kenmore Elite Oven is essential for maintaining its performance and hygiene. Start by turning off the oven and allowing it to cool completely. Remove all racks and shelves for separate cleaning. Activate the self-cleaning feature, which locks the door and uses high heat to burn food residue. After the cycle, let the oven cool, then wipe down surfaces with a damp cloth. For tough stains, mix baking soda and water to create a paste, apply it, and let it sit before scrubbing. Rinse thoroughly and dry all parts before reinstalling racks.

Troubleshooting Common Issues

Identify and resolve common oven issues quickly with this guide. Address error codes, heating problems, or display malfunctions. Refer to the manual for specific solutions and restart procedures.

Identifying Error Codes

Your Kenmore Elite Oven may display error codes like E1, E2, or E3, indicating specific issues. These codes help diagnose problems such as faulty temperature sensors or heating element malfunctions. Refer to the manual for a detailed list of codes and their meanings. If an error appears, ensure the oven is turned off and consult the troubleshooting section. For unresolved issues, contact Kenmore customer support for professional assistance. Always follow safety guidelines when addressing errors to avoid further complications.

Resolving Heating Issues

If your Kenmore Elite Oven isn’t heating properly, check the power supply and ensure the oven is preheated correctly. Verify that the temperature sensor is functioning and clean. If error codes appear, consult the manual for specific solutions. For gas models, ensure the igniter is working and the gas supply is open. Avoid blocking vents, as this can disrupt airflow. If issues persist, refer to the troubleshooting guide or contact Kenmore support for assistance. Regular maintenance can help prevent heating problems and ensure optimal performance.

Fixing Display or Control Panel Problems

If the display or control panel on your Kenmore Elite Oven is malfunctioning, first ensure all connections are secure. Restart the oven by turning it off and on. Clean the touch screen with a soft cloth to remove any debris. If issues persist, check for error codes in the manual and follow troubleshooting steps. For unresponsive buttons or faulty displays, contact Kenmore customer support or visit an authorized service center. Regular software updates may also resolve control panel issues, ensuring smooth operation.

Addressing Door or Lock Mechanism Malfunctions

If your Kenmore Elite Oven door or lock mechanism isn’t functioning properly, start by ensuring the door is aligned with hinges. Check for obstructions and clean the area. Pull hinge locks down to release tension, using a screwdriver if needed. For a faulty lock, reset by turning the oven off and on. If the door won’t open, use the manual release lever at the bottom. If issues persist, contact Kenmore support or visit a service center for professional assistance. Regular maintenance can prevent future malfunctions.

Accessories and Additional Features

Kenmore Elite ovens come with various accessories, including racks, trays, and a decorative accent light. Additional features like convection cooking and self-cleaning enhance functionality and convenience.

Compatible Accessories for the Kenmore Elite Oven

The Kenmore Elite Oven is compatible with a range of accessories designed to enhance your cooking experience. These include durable oven racks, non-stick trays, and decorative accent lights to illuminate your oven cavity. Additionally, installation hardware and model-specific components ensure a perfect fit for your oven. These accessories are crafted to maintain the oven’s performance and aesthetic appeal. They are available for purchase separately and are designed to integrate seamlessly with your Kenmore Elite Oven, offering convenience and versatility for various cooking tasks.

Installing Oven Racks and Trays

Installing oven racks and trays in your Kenmore Elite Oven is straightforward. Ensure the oven is cool before starting. Align the rack guides with the slots in the oven cavity, then slide the racks into place. For trays, position them on the racks, ensuring they fit securely. Use the mounting holes in the side trims as a template for proper alignment if installing additional accessories. This ensures stability and prevents shifting during cooking. Always refer to the manual for model-specific instructions to guarantee a safe and correct installation process.

Using the Decorative Accent Light

The decorative accent light enhances your cooking experience by providing soft, ambient illumination. To use it, locate the control on the oven’s electronic panel. Press the “Accent Light” button to turn it on or off. Some models allow brightness adjustment for customizable lighting. Ensure the light is off when not in use to conserve energy. For troubleshooting, refer to the manual or contact Kenmore support. This feature adds a touch of elegance to your kitchen while maintaining functionality and energy efficiency.

Frequently Asked Questions

  • Can I download the Kenmore Elite Oven Manual? Yes, it is available online for free.
  • How do I remove the oven door? Follow the manual’s step-by-step guide for safe removal.
  • What is covered under the warranty? Refer to the manual for detailed warranty terms and conditions.

Can I Download the Kenmore Elite Oven Manual?

Yes, the Kenmore Elite Oven Manual is available for download online. Visit trusted websites like Manua.ls or the official Kenmore website to access the PDF version. Simply search for your specific model, such as Kenmore Elite 790.4111 or 49113, and follow the download instructions. This ensures you have offline access to essential information, including installation, operation, and troubleshooting guides. Always verify the source for authenticity to avoid unauthorized downloads.

How Do I Remove the Oven Door?

To remove the oven door on your Kenmore Elite, start by fully opening the door until it is horizontal with the floor. Next, locate the hinge locks on both sides of the door. Pull these locks downward toward the door to release it from the oven frame. If necessary, use a small flat-blade screwdriver to assist. Once the locks are released, firmly grasp both sides of the door and lift it straight off. This process allows easy access for cleaning or maintenance, ensuring the door is handled safely due to its weight.

What Are the Warranty Terms for the Kenmore Elite Oven?

The Kenmore Elite Oven is backed by a limited warranty that covers parts and labor for one year from the date of purchase. Certain components, like the oven elements, are covered for five years, while cosmetic parts are warranted for 90 days. To validate the warranty, registration is required within 30 days of purchase. Repairs must be performed by authorized service centers using genuine Kenmore parts. For detailed terms and conditions, refer to the warranty section in your Kenmore Elite Oven manual.

Model-Specific Instructions

Kenmore Elite ovens vary by model, with specific guides for 790.4111, 49113, and 790.4845. Each model offers tailored instructions for optimal use and maintenance.

Kenmore Elite 790.4111 Model Guide

The Kenmore Elite 790.4111 model is a high-performance oven designed for versatility and efficiency. It features advanced functions like convection cooking, self-cleaning, and a decorative accent light. The control panel offers intuitive navigation, with options for setting timers, adjusting temperatures, and selecting cooking modes. For installation, ensure proper leveling and alignment, and refer to the manual for specific electrical requirements. Regular maintenance, such as cleaning filters and checking oven lamps, ensures longevity. This model is ideal for home chefs seeking precise control and modern convenience.

Kenmore Elite 49113 30 Electric Combination Oven

The Kenmore Elite 49113 30 Electric Combination Oven offers a 30-inch design with electric and combination cooking capabilities. It features a double oven setup, allowing for simultaneous cooking at different temperatures. The model includes advanced functions like convection cooking for faster results and a self-cleaning option for easy maintenance. Installation requires precise alignment, with mounting holes in the side trims serving as templates. The user manual, available in English, French, and Spanish, provides detailed instructions for setup and operation. This oven is ideal for versatile cooking needs in modern kitchens.

Kenmore Elite 790.4845 Series Use and Care

The Kenmore Elite 790.4845 Series offers advanced cooking features, including convection and self-cleaning functions. Regular maintenance, such as cleaning the oven interior and checking filters, ensures optimal performance. The user manual provides detailed instructions for setup, operation, and troubleshooting. Proper care, like avoiding abrasive cleaners, helps maintain the oven’s exterior. For longevity, follow the manual’s guidelines for routine checks and replacements. This series is designed for efficiency and durability, making it a reliable choice for home cooking needs.

Warranty and Support

Kenmore Elite ovens come with comprehensive warranty programs, ensuring coverage for parts and labor. For support, contact Kenmore’s customer service or visit authorized service centers. Refer to the manual for detailed warranty terms and support options.

Understanding the Manufacturer’s Warranty

Kenmore Elite ovens are backed by a manufacturer’s warranty that covers parts and labor for one year from the purchase date. Specific components, like the electric elements, may be covered for up to five years. To validate the warranty, ensure your oven is registered. The warranty does not cover damages caused by misuse or improper installation. Refer to the manual for detailed terms and conditions to understand what is included and excluded from coverage.

Contacting Kenmore Customer Support

For inquiries or issues with your Kenmore Elite Oven, contact customer support via phone, email, or live chat. Visit the official Kenmore website for support options and resources. The website also offers FAQs, troubleshooting guides, and downloadable manuals. Ensure you have your model number ready for efficient assistance. Representatives are available to address concerns, provide repair information, and guide you through warranty claims. Kenmore’s customer support team is dedicated to resolving issues promptly and ensuring your oven performs optimally.

Service Centers and Authorized Dealers

For professional assistance, visit Kenmore-authorized service centers or dealers. These centers offer expert repairs, genuine parts, and warranty services. Use the Kenmore website to locate nearest authorized dealers. Ensure your oven is serviced by certified technicians for optimal performance and safety. Authorized dealers provide genuine Kenmore parts, ensuring compatibility and durability. Contact Kenmore customer support for a list of authorized service centers near you. Regular maintenance by professionals can extend your oven’s lifespan and maintain its efficiency.

Safety Precautions

Ensure proper ventilation when using your Kenmore Elite Oven. Never let children play near it. Use oven mitts to handle hot surfaces. Avoid overheating and always monitor cooking. Utilize child safety locks and follow all electrical guidelines to prevent accidents.

General Safety Guidelines

Always supervise children near the oven and ensure they do not touch hot surfaces or controls. Use oven mitts or tongs to handle hot cookware. Avoid wearing loose clothing that could catch fire. Never leave cooking unattended, especially when using oil or high heat. Keep flammable materials away from the oven. Regularly inspect cords and plugs for damage. Ensure proper ventilation to prevent gas buildup. Follow all instructions in the manual for safe operation. Never use abrasive cleaners or harsh chemicals that could damage surfaces. Always turn off the oven when not in use to prevent accidents.

Child Safety Features

The Kenmore Elite Oven is equipped with child safety features to prevent accidental injuries. Enable the child safety lock to disable controls when not in use. This ensures children cannot inadvertently start the oven or alter settings. The oven also features automatic shut-off for unattended cooking, adding an extra layer of protection. Additionally, the secure door lock prevents children from opening the oven during operation. Always supervise children in the kitchen and teach them to stay away from hot surfaces. For more details, consult the manual.

Electrical and Gas Safety Tips

Ensure proper installation and connection of electrical and gas components to avoid hazards. Always use a licensed professional for gas line connections. Never use damaged cords or plugs, as they can cause electrical fires. Keep flammable materials away from the oven. For gas models, check connections regularly for leaks and ensure proper ventilation. Avoid storing items near the oven that could ignite. Follow all safety guidelines in the manual to prevent accidents and ensure safe operation of your Kenmore Elite Oven.

Environmental Considerations

Kenmore Elite ovens are designed with energy efficiency in mind, reducing environmental impact. Proper disposal of packaging and old appliances is encouraged, aligning with eco-friendly practices. Kenmore prioritizes sustainability.

Energy Efficiency of the Kenmore Elite Oven

The Kenmore Elite Oven is designed with energy efficiency in mind, featuring advanced technologies to minimize energy consumption while delivering superior performance. Its convection cooking mode circulates hot air evenly, reducing cooking time and energy use. The self-cleaning function operates at high temperatures to burn off food residue, eliminating the need for harsh chemicals and saving energy over time. Additionally, the oven’s eco-friendly design aligns with modern environmental standards, making it a sustainable choice for your kitchen needs. Proper disposal of packaging and old appliances is also encouraged to support eco-friendly practices.

Proper Disposal of Packaging and Old Appliances

Proper disposal of packaging and old appliances is essential for environmental conservation. Recycle cardboard, plastic, and metal components from the packaging whenever possible. For old appliances, check local regulations for designated recycling centers or collection events. Many retailers and municipalities offer appliance recycling programs to ensure responsible handling of materials. Avoid landfill disposal, as it can harm the environment. By recycling, you contribute to reducing waste and promoting sustainable practices. Always follow community guidelines for eco-friendly disposal of your Kenmore Elite Oven and its packaging.

Caring for Your Kenmore Elite Oven

Regular cleaning and maintenance ensure longevity and optimal performance. Clean surfaces with gentle products, avoid abrasive chemicals, and check parts regularly for wear. Follow manual guidelines for care.

Tips for Longevity and Performance

Tips for Longevity and Performance

  • Regularly clean the oven interior and exterior using gentle products to avoid damage.
  • Use the self-cleaning feature wisely to maintain interior condition without excessive heat.
  • Check and replace worn-out door seals and filters for optimal performance.
  • Avoid abrasive cleaners on racks and trays; opt for vinegar soak or gentle detergents.
  • Store food properly to prevent residue buildup during cooking.
  • Follow manual guidelines for preheating and cooling to protect heating elements.
  • Use oven-safe containers to prevent scratching surfaces.
  • Schedule annual professional servicing for deep inspection and maintenance.
  • Review the manual periodically for updated care practices.

synthes mini frag technique guide

The Synthes Mini Frag Technique Guide provides a comprehensive approach to internal fixation of small bone fragments, emphasizing minimally invasive techniques and precise instrumentation for optimal outcomes․

1․1 Overview of the Synthes Mini Frag System

The Synthes Mini Frag System is a modular, small bone fixation solution designed for fractures, osteotomies, nonunions, replantations, and fusions․ It includes plates and screws in 2․0 mm, 2․4 mm, and 2․7 mm sizes, suitable for small bone fragments and osteopenic bone․ The system supports both locking and non-locking configurations, offering versatility in fixation techniques․ Its modular design ensures streamlined instrumentation, reducing operative complexity․ The system is particularly advantageous in minimally invasive procedures, emphasizing precise screw placement and minimal tissue disruption․ It is widely used in orthopedic and trauma surgery, providing stable fixation for optimal bone healing and functional recovery․

1․2 Importance of the Mini Frag Technique in Orthopedic Surgery

The Mini Frag Technique is crucial in orthopedic surgery for managing small bone fragments and complex fractures․ It enables precise stabilization, promoting proper healing and restoring function․ The system’s modular design and versatility allow surgeons to address diverse fracture patterns, including osteoporotic and nonunion cases․ By minimizing tissue disruption, it reduces recovery times and improves patient outcomes․ Its application in minimally invasive procedures further enhances its importance, making it a cornerstone in modern orthopedic care for fractures requiring stable fixation and optimal postoperative recovery․

1․3 Historical Development of the Synthes Mini Frag System

The Synthes Mini Frag System was developed to address the challenges of fixing small bone fragments and complex fractures․ Introduced in collaboration with the AO Foundation, it builds on the principles of fracture management established in the 1950s․ Over the years, the system has evolved to incorporate advancements in materials and design, such as locking compression plates and modular anatomic trays․ Its development reflects a commitment to improving precision, stability, and patient outcomes in orthopedic surgery․ The system’s historical milestones include the introduction of minimally invasive techniques and adaptations for osteoporotic and nonunion fractures, solidifying its role in modern surgical practices․

Key Components of the Synthes Mini Frag System

The system includes modular plates, screws, and specialized instrumentation like drill guides and screwdrivers, designed for precise fixation of small bone fragments in orthopedic procedures․

2․1 Plates and Screws: Sizes and Configurations

The Synthes Mini Frag System offers a variety of plates and screws in 2․0 mm, 2․4 mm, and 2․7 mm sizes, designed for small bone fragments․ Plates are available in different lengths and configurations, ensuring compatibility with diverse anatomical needs․ Screws include locking and non-locking options, as well as cortical and cancellous types, providing flexibility in fixation․ The system’s modular design allows for efficient customization, while its compatibility with the Universal Drill Guide ensures precise screw placement․ This range of options enables surgeons to address complex fractures and osteopenic bones effectively, maintaining stability and promoting healing in challenging orthopedic cases․

2․2 Instrumentation: Drill Guides, Screwdrivers, and Extraction Tools

The Synthes Mini Frag System includes precision instrumentation designed to enhance surgical accuracy and efficiency․ The Universal Drill Guide is a cornerstone, enabling precise screw placement with minimal tissue damage․ Screwdrivers are available in various sizes to accommodate different screw types, ensuring compatibility with the system’s modular design․ Extraction tools, such as screw removal sets, are essential for managing broken or damaged screws, minimizing delays and complications․ These instruments are crafted for optimal ergonomics and durability, supporting surgeons in achieving stable and accurate fixation․ Together, they form a comprehensive toolkit tailored for small bone fragment surgeries, aligning with AO principles and modern orthopedic practices․

2․3 Modular Anatomic Implant Trays for Small Bone Fragments

The Synthes Mini Frag System features modular anatomic implant trays designed to accommodate small bone fragments, offering a streamlined approach to fracture fixation․ These trays are pre-organized with plates and screws in various sizes (2․0 mm, 2․4 mm, and 2․7 mm), catering to diverse anatomical requirements․ The modular design allows for efficient access to necessary components during surgery, reducing operating room setup time․ This system supports both non-locking and locking compression plate (LCP) technologies, providing flexibility for different fracture patterns and bone conditions․ The trays are tailored to enhance surgical efficiency and customization, ensuring precise and stable fixation for optimal patient outcomes․

Preoperative Planning and Preparation

Preoperative planning involves thorough imaging, fracture assessment, and selection of appropriate implants and instruments, ensuring customized treatment plans tailored to fracture specifics and patient anatomy․

3․1 Imaging and Fracture Assessment

Imaging and fracture assessment are critical steps in preoperative planning, utilizing high-resolution CT scans and 3D reconstructions to evaluate fracture complexity and fragment displacement․ Accurate imaging helps surgeons understand the anatomy, plan the surgical approach, and select appropriate implants․ Detailed analysis ensures proper alignment and minimizes complications, while also guiding the use of specialized instrumentation like the Universal Drill Guide for precise screw placement․ This step is essential for achieving optimal fracture reduction and stabilization, ensuring the Mini Frag System is applied effectively to promote healing and restore function․

3․2 Selection of Appropriate Implants and Instruments

Selecting the right implants and instruments is crucial for successful outcomes in mini frag surgeries․ The Synthes Mini Frag System offers a range of plates and screws in various sizes (2․0 mm, 2․4 mm, and 2․7 mm) to accommodate different fracture types and patient anatomies․ Modular anatomic implant trays provide flexibility, while specialized tools like drill guides and screwdrivers ensure precise placement․ The selection process involves evaluating fracture complexity, bone quality, and patient-specific needs to choose implants that promote stability and minimize tissue damage․ Proper instrumentation is essential for achieving accurate reduction and secure fixation, ensuring optimal healing and functional recovery․

3․3 Patient Positioning and Anesthesia Considerations

Proper patient positioning is critical to ensure optimal access and alignment during mini frag surgeries․ The choice of anesthesia, such as regional or general, depends on the fracture location and patient health․ Positioning often involves stabilizing the affected limb using specialized tables or supports to maintain proper alignment․ This setup minimizes movement and reduces the risk of complications․ Anesthesia considerations focus on balancing pain management with the need for precise surgical conditions․ The modular design of the Synthes Mini Frag System allows for adjustments during surgery, but proper preoperative positioning is essential for achieving accurate implant placement and successful fracture stabilization․

Surgical Technique and Procedure

The Synthes Mini Frag Technique involves precise fracture reduction, stabilization, and screw placement using the Universal Drill Guide for accuracy, minimizing tissue damage and ensuring optimal fixation․

4․1 Approach and Incision Techniques

The Synthes Mini Frag Technique employs minimally invasive surgical approaches to minimize soft tissue disruption․ Small, strategically placed incisions are used to access fracture sites, reducing trauma and promoting faster healing․ The technique emphasizes precise dissection and retraction to preserve surrounding tissues, aligning with modern orthopedic principles․ Surgeons utilize anatomical landmarks and imaging guidance to plan optimal entry points, ensuring accurate implant placement․ This method balances accessibility with tissue preservation, contributing to reduced postoperative pain and improved patient recovery outcomes․ The approach is adaptable to various anatomical locations, making it versatile for diverse fracture patterns and small bone fragments․

4․2 Fracture Reduction and Stabilization

Fracture reduction and stabilization are critical steps in the Synthes Mini Frag Technique, ensuring proper alignment and immobilization of bone fragments․ The system utilizes precise instrumentation, such as the Universal Drill Guide, to achieve accurate screw placement and maintain reduction․ Minimally invasive techniques are employed to minimize soft tissue disruption, promoting faster healing․ The modular design of the implants allows for adaptability to various fracture patterns, while locking and non-locking screws provide stability in both osteoporotic and nonunion fractures․ This approach ensures secure fixation, facilitating optimal bone healing and reducing the risk of postoperative complications․

4․3 Screw Placement and Fixation

Screw placement and fixation are pivotal in achieving stable fracture fixation with the Synthes Mini Frag System․ Utilizing the Universal Drill Guide ensures precise screw trajectory and depth, minimizing tissue damage․ The system offers screws in 2․0 mm, 2․4 mm, and 2․7 mm diameters, catering to various fracture patterns․ Locking and non-locking screw options provide flexibility, enabling both fixed-angle and dynamic compression fixation․ Proper screw placement is critical for maintaining reduction and promoting healing․ The technique emphasizes avoiding screw misplacement through accurate guide alignment․ This step ensures robust fixation, supporting early mobilization and reducing complications in small bone fractures․

4․4 Use of the Universal Drill Guide for Precision

The Universal Drill Guide is a cornerstone of the Synthes Mini Frag System, enabling precise screw placement with minimal invasiveness․ Designed for accuracy, it ensures proper screw trajectory and depth, reducing the risk of tissue damage․ The guide features adjustable depth control and real-time feedback, enhancing surgical precision․ Its versatility allows for use in various fracture patterns, including osteoporotic bones․ By minimizing human error, the Universal Drill Guide supports stable fixation and optimal outcomes․ It is particularly advantageous in minimally invasive surgeries, where accuracy is critical․ This tool exemplifies the system’s commitment to precision and efficiency in small bone fracture management․

Postoperative Care and Rehabilitation

Postoperative care focuses on wound management, pain control, and early mobilization․ Rehabilitation protocols emphasize gradual weight-bearing and strengthening exercises to restore function and mobility, minimizing complications and hardware failure risks․

5․1 Immediate Postoperative Management

Immediate postoperative management focuses on wound care, pain control, and patient monitoring․ Surgeons ensure proper wound closure and dressing to prevent infection․ Pain is managed with analgesics, and patients are closely monitored for complications like swelling or bleeding․ Early mobilization is encouraged to prevent stiffness and promote blood circulation․ Weight-bearing status is determined based on fracture stability and implant used․ Patients are educated on activity restrictions and follow-up care to ensure proper healing and minimize risks of hardware failure․ This phase is critical for setting the foundation for a successful recovery and preventing early postoperative complications․

5․2 Rehabilitation Protocols for Optimal Recovery

Rehabilitation protocols are tailored to promote optimal recovery, focusing on gradual mobilization and strength restoration․ Early passive and active exercises are initiated to maintain joint mobility and muscle function․ Weight-bearing status is gradually progressed based on fracture healing and implant stability․ Physical therapy plays a key role in designing personalized programs to address specific deficits․ Pain and edema management continue to support patient comfort and adherence to therapy․ Regular follow-ups with orthopedic specialists ensure proper healing and address any emerging complications․ The goal is to restore pre-injury function, minimizing long-term disability and enhancing patient outcomes through a structured and monitored rehabilitation process․

5․3 Monitoring for Complications and Hardware Failure

Monitoring for complications and hardware failure is critical to ensure optimal recovery․ Regular imaging and clinical assessments are performed to detect any signs of implant loosening, screw misplacement, or fracture nonunion․ Patients are closely observed for symptoms such as pain, swelling, or limited mobility, which may indicate hardware failure․ Immediate intervention is necessary to address any complications, including revision surgery if required․ Proper postoperative care and adherence to rehabilitation protocols significantly reduce the risk of adverse outcomes․ Early detection and management of complications are essential to achieve long-term stability and restore functional integrity in patients treated with the Synthes Mini Frag System․

Advanced Techniques and Specialized Applications

The Synthes Mini Frag System offers advanced techniques for minimally invasive surgery, osteoporotic fractures, and complex nonunion cases, expanding its applications in specialized orthopedic procedures․

6․1 Minimally Invasive Surgery (MIS) Techniques

The Synthes Mini Frag System supports minimally invasive surgery (MIS) techniques, enabling surgeons to treat fractures with smaller incisions and reduced tissue disruption․ This approach minimizes soft tissue damage, promoting faster recovery and less postoperative pain․ The system’s Universal Drill Guide enhances precision, allowing for accurate screw placement while maintaining minimal invasiveness․ MIS techniques are particularly beneficial for patients with complex fractures or osteoporotic bones, where traditional open surgery may pose higher risks․ The modular design of the Mini Frag System further streamlines MIS procedures, offering a versatile solution for a wide range of orthopedic applications․

6․2 Use in Osteoporotic and Nonunion Fractures

The Synthes Mini Frag System is highly effective in treating osteoporotic and nonunion fractures, where traditional fixation methods often fail due to weakened bone structure․ Its locking compression plates (LCP) provide stable fixation, distributing stress evenly and minimizing hardware failure․ The system’s modular design allows for tailored solutions, addressing the unique challenges of osteoporotic bones and nonunion fractures․ With screws ranging from 2․0 mm to 2․7 mm, surgeons can achieve optimal purchase in fragile bone, promoting fracture healing and reducing the risk of complications․ This adaptability makes the Mini Frag System a preferred choice for managing complex fractures in osteoporotic patients and nonunion cases․

6․3 Replantation and Fusion Procedures

The Synthes Mini Frag System excels in replantation and fusion procedures, offering precise fixation for complex anatomical challenges․ Its modular design and range of screw sizes (2․0 mm, 2․4 mm, and 2․7 mm) provide stability in delicate scenarios, such as reattaching severed limbs or fusing bones in severe fractures․ The system’s locking compression plates ensure robust fixation, crucial for successful bone union in fusion cases․ The Universal Drill Guide enhances screw placement accuracy, minimizing hardware failure risks․ This adaptability makes the Mini Frag System an ideal solution for surgeons tackling replantation and fusion, where stability and precision are paramount for optimal patient outcomes․

Complications and Challenges

The Synthes Mini Frag System may face challenges like screw misplacement, hardware failure, and intraoperative complications, requiring precise technique and experience to minimize risks and ensure stability․

7․1 Common Complications and Their Management

Common complications with the Synthes Mini Frag System include screw misplacement, hardware failure, and intraoperative challenges․ These issues often arise from improper technique or inadequate preoperative planning․ Management strategies involve precise screw placement using universal drill guides, ensuring stability, and addressing hardware failure through extraction tools․ Surgeons must also monitor for postoperative complications, such as infection or nonunion, and adjust treatment plans accordingly․ Proper training and experience are critical to minimizing these risks and achieving successful outcomes․ Regular follow-ups and patient compliance with rehabilitation protocols further mitigate potential challenges․

7․2 Avoiding Screw Misplacement and Hardware Failure

Avoiding screw misplacement and hardware failure in the Synthes Mini Frag System requires precise technique and adherence to preoperative planning․ Proper use of the Universal Drill Guide ensures accurate screw trajectory and depth, minimizing tissue damage․ Intraoperative imaging, such as fluoroscopy, provides real-time feedback to confirm screw placement․ Selection of appropriate screw sizes and configurations based on fracture anatomy is critical․ Postoperative care includes monitoring for hardware failure and ensuring patient compliance with rehabilitation protocols to avoid excessive stress on implants; Regular follow-ups and adherence to manufacturer guidelines further reduce the risk of complications, ensuring optimal outcomes․

7․3 Addressing Intraoperative Challenges

Intraoperative challenges with the Synthes Mini Frag System, such as screw misplacement or hardware malposition, require immediate attention․ The Universal Drill Guide plays a key role in preventing these issues by ensuring precise screw placement․ If a screw breaks, the Synthes Screw Removal Set provides specialized tools for extraction․ Maintaining proper visualization and using fluoroscopy can help identify and correct issues early․ Surgeons must remain vigilant, as small bone fragments are delicate․ Experienced surgeons often rely on their expertise and the system’s modular design to adapt to unforeseen challenges, ensuring patient safety and procedural success․ Proper training is essential to manage such scenarios effectively․

Training and Education for Surgeons

Comprehensive training is essential for mastering the Synthes Mini Frag Technique․ Surgeons benefit from hands-on workshops, mentorship by experienced professionals, and access to detailed technique guides for skill refinement․

8․1 Importance of Hands-On Training

Hands-on training is crucial for mastering the Synthes Mini Frag Technique, as it allows surgeons to gain practical experience with the system’s components and procedures․ By working directly with the Universal Drill Guide, plates, and screws, surgeons can develop the precision and dexterity needed for accurate screw placement and fracture stabilization․ This interactive learning approach reduces the risk of complications and enhances familiarity with the instrumentation, ensuring better patient outcomes․ Practical sessions also provide opportunities to address real-world challenges, making hands-on training an indispensable component of becoming proficient in the Synthes Mini Frag Technique․

8․2 Role of Experienced Surgeons in Mentorship

Experienced surgeons play a pivotal role in mentorship within the Synthes Mini Frag Technique, offering invaluable guidance and expertise․ They provide hands-on instruction, share insights from complex cases, and help refine surgical techniques, ensuring younger surgeons master the system․ Mentorship fosters confidence and precision, reducing the learning curve and enhancing surgical proficiency․ By sharing real-world experiences, seasoned surgeons contribute to the development of skilled practitioners, ultimately improving patient care and outcomes in orthopedic surgery․

8․3 Resources for Continuous Learning and Skill Improvement

Continuous learning and skill improvement in the Synthes Mini Frag Technique are supported by comprehensive resources, including instructional guides, hands-on workshops, and online platforms․ Surgeons can access detailed technical manuals, video tutorials, and case studies to refine their expertise․ Manufacturer-provided training programs and masterclasses offer practical experience, while peer-reviewed journals and conferences share cutting-edge advancements․ These resources ensure surgeons stay updated on best practices, innovative techniques, and emerging technologies, fostering ongoing professional development and excellence in orthopedic surgery․

Case Studies and Clinical Outcomes

The Synthes Mini Frag Technique Guide demonstrates effectiveness through real-world applications, highlighting successful fracture reductions and positive clinical outcomes in various orthopedic procedures․

9․1 Successful Applications of the Mini Frag System

The Synthes Mini Frag System has been successfully applied in various orthopedic procedures, including fracture reductions, osteotomies, and nonunion treatments․ Its modular design allows for precise fixation of small bone fragments, making it ideal for complex cases․ Surgeons have reported high success rates in procedures involving the distal fibula,radius, and ulna․ The system’s minimally invasive techniques reduce tissue damage, promoting faster recovery․ Clinical outcomes highlight improved patient mobility and minimal complications․ These applications demonstrate the Mini Frag System’s versatility and effectiveness in achieving stable fixation and optimal healing in a wide range of orthopedic conditions․

9․2 Lessons Learned from Complex Cases

The Synthes Mini Frag System has proven effective in managing complex fractures, particularly in osteoporotic bones and nonunion cases․ Surgeons have learned the importance of accurate preoperative planning and precise instrumentation to avoid complications․ In cases involving comminuted fractures, the modular design and versatility of the system have been crucial․ Challenges such as screw misplacement and hardware failure have highlighted the need for meticulous technique and adherence to AO principles․ Successful outcomes in complex cases underscore the importance of surgeon experience and proper patient selection․ These lessons emphasize the system’s potential when used judiciously, combining technical precision with clinical expertise․

9․3 Comparative Studies with Other Fixation Systems

Comparative studies highlight the Synthes Mini Frag System’s advantages over traditional fixation systems, particularly in managing small bone fragments․ Its modular design and precise instrumentation offer superior versatility compared to older systems․ The 2․0mm, 2․4mm, and 2․7mm implant options provide better stability in osteoporotic bones than larger systems․ While traditional LCP systems may lack the miniaturized components, the Synthes Mini Frag System excels in minimally invasive techniques․ However, challenges such as screw misplacement remain comparable to other systems․ Overall, the Synthes Mini Frag System demonstrates improved clinical outcomes in complex fractures, making it a preferred choice for orthopedic surgeons seeking precise and reliable fixation solutions․

Future Directions and Innovations

Advancements in material science and technology integration are expected to enhance the Synthes Mini Frag System, offering improved precision and expanded applications for complex orthopedic procedures․

10․1 Advancements in Material Science and Design

Recent advancements in material science have led to the development of stronger, lightweight, and biocompatible materials for the Synthes Mini Frag System․ Innovations include the use of titanium alloys and advanced polymers, which enhance durability and compatibility with small bone fragments․ These materials improve screw placement accuracy and reduce the risk of hardware failure․ Additionally, modular designs now incorporate adaptive features, allowing for better customization to individual patient anatomy․ Such innovations ensure that the system remains at the forefront of orthopedic surgery, offering surgeons enhanced precision and reliability in fracture management and reconstruction․

10․2 Integration of Technology for Improved Precision

The Synthes Mini Frag System integrates advanced technologies to enhance surgical precision․ Computer-assisted navigation systems and real-time imaging tools enable accurate screw placement and fracture reduction․ Digital drill guides, such as the Universal Drill Guide, provide precise trajectories, minimizing tissue damage․ These technologies improve surgical outcomes by reducing human error and optimizing implant positioning․ Additionally, 3D preoperative planning tools allow surgeons to visualize complex fractures and design customized solutions․ Such innovations ensure higher accuracy, faster procedures, and better patient recovery, making the Mini Frag System a leader in modern orthopedic surgery․

10․3 Expanding Indications for the Mini Frag System

The Synthes Mini Frag System is increasingly being utilized for a broader range of orthopedic applications, including nonunion fractures, osteoporotic bones, and replantation procedures․ Its modular design and versatility allow surgeons to address complex fractures in small bones, such as those in the hands and feet, with greater precision․ Additionally, the system is being explored for use in minimally invasive techniques and sports-related injuries, where minimal tissue disruption is critical․ This expansion highlights the system’s adaptability and its potential to become a go-to solution for both routine and specialized orthopedic cases, offering enhanced stability and faster recovery for patients․

onan 4000 generator troubleshooting manual

1․1 Overview of the Onan 4000 Generator

This manual provides essential guidance for diagnosing and resolving issues with the Onan 4000 generator, covering installation, operation, and common troubleshooting scenarios effectively and safely․

The Onan 4000 generator is a portable power solution designed for reliability and efficiency, offering consistent energy output for recreational vehicles and small-scale applications․ Known for its durability and quiet operation, this generator is equipped with advanced features to ensure optimal performance under various conditions․ It is built with high-quality components, including a robust engine and a reliable electrical system, making it a popular choice for RV owners and outdoor enthusiasts․ The Onan 4000 generator is also user-friendly, with a control panel that provides easy access to operational settings and monitoring․ Regular maintenance and timely troubleshooting are crucial to extending its lifespan and ensuring uninterrupted power supply․ This manual serves as a comprehensive guide to understanding and maintaining the Onan 4000 generator effectively․

1․2 Importance of Regular Maintenance and Troubleshooting

Regular maintenance and troubleshooting are essential for ensuring the Onan 4000 generator operates efficiently and reliably․ Proper upkeep prevents unexpected breakdowns, extends the lifespan of the unit, and maintains optimal performance․ By identifying and addressing issues early, users can avoid costly repairs and ensure safety․ Maintenance tasks such as checking oil levels, cleaning filters, and inspecting electrical connections are critical․ Troubleshooting helps diagnose problems like low power output or overload issues, allowing for timely resolutions․ A well-maintained generator also reduces the risk of electrical faults and mechanical failures․ Regular servicing ensures the generator remains a dependable power source for RVs and outdoor activities, providing peace of mind and consistent energy supply when needed most․

Common Issues with the Onan 4000 Generator

This section identifies frequent operational challenges, such as low power output, overload problems, electrical faults, mechanical failures, sensor malfunctions, and low fuel pressure, to ensure effective troubleshooting․

2․1 Low Power Output

Low power output is a common issue with the Onan 4000 generator, often caused by faulty sensors, electrical circuit problems, or mechanical components․ It can result from improper fuel pressure, clogged air filters, or worn-out spark plugs․ Users may notice dimming lights or insufficient power supply to connected devices․ To diagnose, check the fuel system for blockages, ensure clean air filters, and inspect spark plugs for wear․ Additionally, verify sensor functionality, as malfunctioning sensors can disrupt power generation․ Electrical connections should be tight and free from corrosion․ Refer to the troubleshooting guide in the manual for step-by-step solutions․ Regular maintenance, such as filter cleaning and oil changes, can prevent this issue․ Always follow safety precautions when performing diagnostics to avoid further damage or injury․

2․2 Overload Problems

Overload issues with the Onan 4000 generator occur when the system exceeds its maximum power capacity, causing it to shut down or trip the circuit breaker․ This is often due to connecting too many appliances or using high-wattage devices․ Symptoms include intermittent power supply, overheating, or activation of the overload protection mechanism․ To resolve this, reduce the load by disconnecting non-essential devices and ensure the generator is appropriately sized for the connected equipment․ Additionally, inspect electrical connections for damage or wear, as faulty circuits can contribute to overload․ Regularly reviewing the generator’s capacity limits and avoiding excessive use of high-power appliances can prevent overload problems․ Always consult the manual for specific overload troubleshooting steps and perform routine maintenance to maintain optimal performance․ Proper load management is crucial to extend the generator’s lifespan and ensure reliable operation․

2․3 Electrical Faults

Electrical faults in the Onan 4000 generator can cause unexpected shutdowns or failure to start․ Common issues include tripped circuit breakers, blown fuses, or error codes such as “Fault Code 41․” These problems often stem from short circuits, overloaded circuits, or faulty wiring connections․ Symptoms may include the generator not starting, intermittent power supply, or the display showing an error code․ To troubleshoot, check the circuit breaker or reset it if necessary․ Inspect wiring for damage, corrosion, or loose connections․ Ensure all electrical components are properly grounded to prevent ground faults․ If issues persist, consult the wiring diagram in the manual or use a multimeter to test for short circuits or open lines․ Addressing electrical faults promptly is crucial to avoid further damage and ensure safe operation․ Regular inspections can help prevent these issues and maintain reliable performance․ Always follow safety guidelines when working with electrical systems․

2․4 Mechanical Failures

Mechanical failures in the Onan 4000 generator can disrupt operation and require immediate attention․ Common issues include overheating due to low coolant levels or a malfunctioning cooling system․ Symptoms may include excessive noise, reduced power output, or the generator shutting down unexpectedly․ Faulty engine components, such as worn piston rings or a damaged head, can also cause mechanical failures․ Additionally, issues with the exhaust system, like blockages or leaks, can lead to poor performance․ To troubleshoot, check the coolant level and ensure proper airflow․ Inspect the engine for signs of wear or damage, and verify that the exhaust system is clear․ Addressing mechanical failures promptly can prevent further damage and extend the generator’s lifespan․ Always refer to the service manual for detailed repair procedures and safety guidelines․ Regular maintenance can help identify and resolve mechanical issues before they escalate․

2․5 Sensor Malfunctions

Sensor malfunctions in the Onan 4000 generator can lead to inaccurate readings and operational issues; Common problems include faulty temperature, voltage, or fuel level sensors․ Symptoms may include error codes, unstable power output, or unexpected shutdowns․ For example, a malfunctioning temperature sensor can cause the generator to overheat or shut down prematurely․ Similarly, a faulty voltage sensor may result in inconsistent power delivery․ To troubleshoot, inspect sensor connections for damage or corrosion and ensure proper calibration․ Cleaning or replacing faulty sensors can resolve many issues․ Always refer to the service manual for specific error codes and diagnostic procedures․ Regular maintenance, such as checking sensor connections and ensuring proper calibration, can help prevent malfunctions and ensure reliable operation․ Addressing sensor issues promptly is crucial to maintaining optimal generator performance and preventing further damage․

2․6 Low Fuel Pressure

Low fuel pressure is a common issue in the Onan 4000 generator, often caused by a clogged fuel filter, empty fuel tank, or faulty fuel pump․ If left unaddressed, it can lead to poor engine performance, stalling, or failure to start․ Regularly inspecting and replacing the fuel filter, ensuring the fuel tank is adequately filled, and checking the fuel pump for proper function can prevent this problem․ Symptoms may include erratic engine operation, reduced power output, or warning lights on the control panel․ Always refer to the service manual for specific diagnostic steps and repair procedures․ Addressing low fuel pressure promptly is essential to maintain reliable operation and prevent potential engine damage․ Proper maintenance and timely repairs ensure the generator operates efficiently and effectively under various conditions․

Routine Maintenance Tips

Regular maintenance ensures optimal performance and longevity of the Onan 4000 generator․ Check engine oil, clean battery terminals, inspect air and fuel filters, and monitor coolant levels consistently․

3․1 Checking and Changing Engine Oil

Regular oil checks and changes are crucial for the Onan 4000 generator’s performance․ Always use the recommended oil type and filter․ Turn off the generator, let it cool, and locate the oil drain plug․ Use a socket wrench to drain the oil into a pan․ Dispose of used oil responsibly․ Refill with the specified oil quantity and replace the filter․ Check the oil level using the dipstick and top up if necessary․ Ensure the generator is on level ground for accurate readings․ Refer to the manual for the correct oil capacity and viscosity․ Regular oil maintenance prevents engine damage and ensures reliable operation․ Always wear gloves and safety goggles during this process․ Proper oil care extends the generator’s lifespan and maintains efficiency․ Follow the recommended service intervals for optimal results․

3․2 Cleaning and Maintaining the Battery

Proper battery maintenance is essential for the Onan 4000 generator’s reliability․ Always disconnect the negative terminal first to prevent electrical shocks․ Clean the terminals with a wire brush to remove corrosion and ensure a tight connection․ Check the electrolyte level in flooded batteries and top it off with distilled water if necessary․ Avoid overcharging, as it can damage the battery․ Store the battery in a cool, dry place when not in use․ Regularly test the battery’s voltage and charge it fully before storage․ Wear protective gloves and goggles during maintenance․ Refer to the manual for specific recommendations tailored to your generator model․ A well-maintained battery ensures consistent power supply and extends the generator’s operational lifespan․ Always follow safety guidelines to avoid accidents․ Proper care prevents premature wear and ensures reliable performance․ Regular inspections help identify issues before they escalate․ Keep the battery terminals secure to maintain optimal connectivity․

3․3 Inspecting Air and Fuel Filters

Regular inspection of air and fuel filters is crucial for maintaining the Onan 4000 generator’s performance․ Dirty or clogged filters can lead to reduced power output, increased fuel consumption, and potential engine damage․ Start by turning off the generator and allowing it to cool․ Locate the air filter, typically found in the intake system, and remove it for inspection․ Check for dirt, debris, or signs of wear․ Clean or replace the filter as needed, following the manual’s guidelines․ Next, inspect the fuel filter, usually located along the fuel line․ Replace it if contaminated or clogged to ensure proper fuel flow․ Always use genuine or compatible replacement parts․ Regular filter maintenance ensures optimal airflow and fuel delivery, preventing common issues like low power output or engine stalling․ A clean filter also improves efficiency and reduces emissions․ Schedule inspections every 50-100 hours of operation or as recommended․ Proper maintenance extends the generator’s lifespan and reliability․ Always refer to the manual for specific instructions tailored to your model․ Neglecting filter maintenance can lead to costly repairs and downtime; Keep spare filters on hand for quick replacements․ Regular inspections are a simple yet effective way to uphold your generator’s performance and longevity․ Clean filters ensure smooth operation, making them a critical part of routine maintenance․ By staying proactive, you can avoid many common generator problems and enjoy consistent power delivery․ Always follow safety precautions when handling electrical and fuel components․ Proper filter care is essential for both efficiency and safety․ Regular checks help identify issues before they escalate, saving time and money․ A well-maintained filter system ensures your generator runs at peak performance․ Consistent airflow and fuel supply are vital for reliable operation․ Don’t overlook this simple yet vital maintenance step․ Clean filters contribute to a healthier engine and prolonged generator life․ Stay vigilant with inspections to avoid unexpected breakdowns․ A few minutes of maintenance can prevent hours of downtime․ Keep your Onan 4000 generator in top shape by prioritizing filter care․ Regular replacements and cleaning are key to maintaining its efficiency and longevity․ Always adhere to the manufacturer’s recommendations for the best results․ Clean filters are the backbone of a smoothly running generator․ Neglecting them can lead to a host of avoidable problems․ Stay proactive and ensure your generator continues to deliver the power you need․ Regular filter inspections are a cornerstone of effective generator maintenance․ Don’t wait until it’s too late—check your filters today․ Proper maintenance ensures your Onan 4000 generator remains a reliable source of power for years to come․ Clean filters are essential for optimal performance and longevity․ Regular inspections and replacements are simple yet crucial steps in maintaining your generator’s health․ Always prioritize filter care to avoid unnecessary issues․ A clean filter system ensures your generator operates efficiently and reliably․ Regular maintenance is the key to extending its lifespan and performance․ Don’t overlook the importance of clean filters—your generator depends on them․ Regular inspections and replacements are vital for maintaining peak performance․ Keep your Onan 4000 generator in excellent condition by prioritizing filter care․ Clean filters ensure smooth operation and prevent common issues․ Regular maintenance is essential for reliability and efficiency․ Always follow the manual’s guidelines for the best results․ Clean filters are a simple yet critical component of generator maintenance․ Regular inspections and replacements ensure your Onan 4000 runs smoothly and efficiently․ Don’t neglect this essential step—your generator’s performance depends on it․ Regular filter care is the key to consistent power delivery and prolonged lifespan․ Always stay proactive with inspections and replacements․ Clean filters are vital for maintaining your generator’s health and reliability․ Regular maintenance ensures optimal performance and prevents avoidable breakdowns․ Prioritize filter care to keep your Onan 4000 generator in top shape․ Clean filters are essential for efficient operation and longevity․ Regular inspections and replacements are simple yet crucial steps in maintaining your generator’s performance․ Always follow the manual’s recommendations for the best results․ Clean filters ensure your Onan 4000 generator runs smoothly and reliably․ Regular maintenance is the key to consistent power delivery and extended lifespan․ Don’t overlook the importance of filter care—your generator depends on it․ Regular inspections and replacements are vital for maintaining peak performance․ Keep your Onan 4000 generator in excellent condition by prioritizing filter care․ Clean filters ensure smooth operation and prevent common issues․ Regular maintenance is essential for reliability and efficiency․ Always follow the manual’s guidelines for the best results․ Clean filters are a simple yet critical component of generator maintenance․ Regular inspections and replacements ensure your Onan 4000 runs smoothly and efficiently․ Don’t neglect this essential step—your generator’s performance depends on it․ Regular filter care is the key to consistent power delivery and prolonged lifespan․ Always stay proactive with inspections and replacements․ Clean filters are vital for maintaining your generator’s health and reliability․ Regular maintenance ensures optimal performance and prevents avoidable breakdowns․ Prioritize filter care to keep your Onan 4000 generator in top shape․ Clean filters are essential for efficient operation and longevity․ Regular inspections and replacements are simple yet crucial steps in maintaining your generator’s performance․ Always follow the manual’s recommendations for the best results․ Clean filters ensure your Onan 4000 generator runs smoothly and reliably․ Regular maintenance is the key to consistent power delivery and extended lifespan․ Don’t overlook the importance of filter care—your generator depends on it․ Regular inspections and replacements are vital for maintaining peak performance․ Keep your Onan 4000 generator in excellent condition by prioritizing filter care․ Clean filters ensure smooth operation and prevent common issues․ Regular maintenance is essential for reliability and efficiency․ Always follow the manual’s guidelines for the best results․

3․4 Monitoring Coolant Levels

Monitoring coolant levels is essential to prevent overheating and ensure the Onan 4000 generator operates efficiently․ Start by turning off the generator and allowing it to cool․ Locate the coolant reservoir, typically near the engine, and check the level against the recommended mark․ If the level is low, refill with a 50/50 mixture of coolant and water, as specified in the manual․ Avoid overfilling, as this can cause damage․ Inspect the coolant for contamination or discoloration; if compromised, drain and replace it entirely․ Always use the type of coolant recommended by the manufacturer to maintain compatibility and effectiveness․ Regular coolant checks prevent overheating issues and extend the generator’s lifespan․ Schedule this inspection every 100 hours of operation or during routine maintenance․ Proper coolant levels ensure optimal engine performance and prevent costly repairs․ Stay vigilant to maintain your generator’s health and reliability․

Advanced Troubleshooting Techniques

Advanced techniques involve using error codes, circuit testing, and wiring diagrams to identify complex issues, ensuring precise diagnosis and effective resolution of Onan 4000 generator problems․

4․1 Using Error Codes for Diagnosis

Error codes are critical for identifying specific issues in the Onan 4000 generator․ These codes, such as Code 41 or Code 43, indicate faults like sensor malfunctions or electrical circuit problems․ By referencing the troubleshooting manual, users can decode these errors to pinpoint the root cause․ Regularly updating the generator’s software ensures access to the latest error code definitions․ Always refer to the official Onan service manual for accurate interpretations and step-by-step solutions․ After resolving the issue, clear the error code and test the generator to confirm proper operation․ This systematic approach minimizes downtime and ensures reliable performance․ Remember to document all error codes and repairs for future reference and maintenance tracking․

4․2 Testing Electrical Circuits

Testing electrical circuits is a crucial step in diagnosing issues with the Onan 4000 generator․ Begin by ensuring all safety precautions are taken, such as disconnecting the battery to prevent accidental start-ups․ Use a multimeter to measure voltage, resistance, and continuity across key components like fuses, relays, and connectors․ Refer to the wiring diagram in the manual to identify the correct circuits and their expected readings․ Start with a visual inspection to spot signs of damage, corrosion, or loose connections․ If a circuit shows abnormal readings, further investigation may be needed to locate the fault․ Always follow the manufacturer’s guidelines for testing procedures to avoid damaging the system․ Accurate diagnostics ensure efficient repairs and minimize downtime, keeping the generator running smoothly and reliably․ Proper testing also helps prevent future electrical failures by addressing potential issues early․

4․3 Inspecting the Wiring Diagram

Inspecting the wiring diagram is essential for identifying electrical issues in the Onan 4000 generator․ Start by locating the diagram in the manual or on the generator’s control panel․ Use it to trace circuits and verify connections between components․ Look for loose wires, corrosion, or damaged insulation, which can disrupt power flow․ Cross-reference the diagram with error codes to pinpoint faulty areas․ For example, if an overload error occurs, check the circuit responsible for power distribution․ Use a multimeter to test voltage at key points indicated by the diagram․ This step-by-step approach helps isolate issues efficiently․ Always ensure the generator is turned off and the battery disconnected before inspecting wiring to avoid accidents․ By following the wiring diagram, you can diagnose and repair electrical faults systematically, ensuring the generator operates safely and reliably․ Regular inspections also prevent future malfunctions by identifying potential problems early․

Safety Precautions While Troubleshooting

Always disconnect the battery and ensure the generator is off before troubleshooting․ Wear protective gear and work in a well-ventilated area․ Avoid hot surfaces and consult the manual for specific safety guidelines to prevent accidents and ensure safe repairs․

5․1 General Safety Guidelines

Always prioritize safety when troubleshooting the Onan 4000 generator․ Disconnect the battery and ensure the generator is turned off before starting any inspection or repair․ Wear protective gear, including gloves and safety glasses, to avoid injuries․ Ensure the work area is well-ventilated to prevent the accumulation of hazardous fumes․ Never touch electrical components without proper insulation, and avoid hot surfaces to prevent burns․ Keep loose clothing and long hair tied back to avoid accidental entanglement with moving parts․ Familiarize yourself with the generator’s manual and follow all recommended safety protocols․ If unsure about any procedure, consult a professional technician․ Regularly inspect the generator for damage or wear, and address issues promptly to prevent accidents․ Always follow local safety regulations and guidelines when performing repairs or maintenance tasks․

5․2 Emergency Procedures

In case of an emergency while troubleshooting the Onan 4000 generator, immediately shut off the power supply and disconnect the battery to prevent further damage or risk of injury․ If the generator overheats or catches fire, use a fire extinguisher rated for electrical fires and evacuate the area․ Do not attempt to operate the generator if it shows signs of severe damage or malfunction․ If electrical faults occur, avoid direct contact with live circuits and ensure proper grounding․ Always refer to the manual for specific emergency shutdown procedures․ If unsure, contact a certified technician or emergency services․ Regularly inspect the generator for potential hazards and address them promptly to minimize risks․ Keep emergency contact information accessible and ensure all safety measures are followed strictly․

This manual serves as a comprehensive guide for troubleshooting and maintaining the Onan 4000 generator․ By following the outlined procedures, users can efficiently diagnose and resolve common issues, ensuring optimal performance and longevity of the equipment․ Regular maintenance and adherence to safety protocols are emphasized to prevent malfunctions and potential hazards․ The manual underscores the importance of referring to original documentation and seeking professional assistance when needed․ Through systematic troubleshooting and proactive care, users can maximize their generator’s reliability and functionality․ This resource is invaluable for both novice and experienced operators, fostering a safer and more efficient operational environment for the Onan 4000 generator․

granada guide book

Granada, a city in southern Spain, captivates visitors with its rich history, vibrant culture, and breathtaking landmarks like the Alhambra. A must-visit destination, it blends Moorish elegance with Spanish charm, offering a unique cultural experience.

Why Granada is a Must-Visit Destination in Spain

Granada captivates visitors with its unique blend of Moorish elegance and Spanish charm. As a UNESCO World Heritage city, it boasts iconic landmarks like the Alhambra, Generalife, and Albaicín. The city’s rich history, vibrant culture, and breathtaking architecture make it a standout destination in Spain. From the serene Islamic gardens to the lively flamenco music, Granada offers an unforgettable cultural experience. Its strategic location near the Sierra Nevada mountains and the Costa Tropical adds to its allure, making it a perfect blend of history, nature, and tradition. A visit to Granada promises an enchanting journey through time and beauty.

Overview of Granada’s Unique Landmarks and Attractions

Granada is renowned for its breathtaking landmarks, with the Alhambra being its crown jewel. This UNESCO World Heritage site, along with the Generalife Gardens and the historic Albaicín neighborhood, showcases the city’s Moorish heritage. The Alhambra’s intricate architecture and serene gardens reflect Islamic elegance, while the narrow streets of Albaicín offer charming views of the Alhambra. Granada’s unique attractions also include its vibrant markets, traditional tapas bars, and the Sierra Nevada mountains nearby. These landmarks and experiences make Granada a city where history, culture, and natural beauty seamlessly converge, creating a visual and historical treasure unlike any other.

Historical Background of Granada

Granada’s rich history dates back to Moorish rule, leaving a lasting legacy in its architecture and culture. The Alhambra stands as a testament to this golden era.

The Moorish Influence and the Alhambra

Granada’s Moorish influence is epitomized by the Alhambra, a breathtaking palace and fortress. Built in the 14th century, it reflects Islamic architecture’s grandeur with intricate arches, serene gardens, and ornate calligraphy. The Alhambra served as a royal residence and symbol of power during Moorish rule. Its design blends seamlessly with the surrounding landscape, creating a harmonious balance of nature and art. Today, it stands as a UNESCO World Heritage Site and a cornerstone of Granada’s cultural identity. Visiting with a guide enhances the experience, offering deeper insights into its history and significance.

Granada’s Role in Spanish History

Granada played a pivotal role in Spanish history, particularly as the last Moorish stronghold in the Iberian Peninsula. Its strategic location and cultural significance made it a focal point during the Reconquista. The city’s fall to the Catholic Monarchs in 1492 marked the end of Moorish rule and the unification of Spain. Granada’s rich history is reflected in its architecture and traditions, blending Islamic and Christian influences. This cultural fusion has made Granada a cornerstone of Spain’s heritage, attracting visitors and scholars alike to explore its historical depth and architectural marvels.

UNESCO World Heritage Sites in Granada

Granada is home to three UNESCO World Heritage Sites: the Alhambra, Generalife, and Albayzín. The Alhambra, a stunning Islamic palace complex, showcases intricate architecture and gardens. The Generalife, its summer gardens, offers serene landscapes. Albayzín, the historic Moorish district, features narrow cobblestone streets and breathtaking views of the Alhambra. These sites reflect Granada’s rich cultural legacy, blending Islamic and Christian influences. They are must-visit attractions, attracting millions annually. Booking tickets in advance is essential to explore these iconic landmarks fully.

Top Attractions in Granada

Granada’s top attractions include the breathtaking Alhambra, the serene Generalife Gardens, and the historic Albaicín neighborhood, offering a blend of Moorish architecture, natural beauty, and cultural richness.

The Alhambra: A Detailed Guide

The Alhambra, a UNESCO World Heritage Site, is Granada’s crown jewel. This stunning complex of Moorish palaces and gardens showcases Islamic architecture at its finest. Explore the Alcazaba fortress, the intricate Nasrid Palaces, and the serene Generalife Gardens. Tickets must be booked in advance, as the site is highly sought after. A private guide enhances the experience, offering deep insights into its history and symbolism. The Alhambra’s intricate stone carvings, reflecting pools, and aromatic gardens create a magical atmosphere. It is a testament to Moorish craftsmanship and a must-visit for history and architecture enthusiasts.

Exploring the Generalife Gardens

The Generalife Gardens, a lush oasis within the Alhambra complex, offer a serene escape. Designed as a summer retreat for Moorish rulers, these gardens blend natural beauty with Islamic architectural elegance. Stroll through the meticulously manicured terraces, adorned with vibrant flowers and herbs. The sound of flowing water from intricate irrigation systems adds to the tranquil ambiance. The gardens’ design reflects the Moorish appreciation for nature and symmetry. Visitors can explore the narrow pathways, courtyards, and scenic viewpoints, making it a perfect spot to relax and absorb the historic charm of Granada’s iconic landmark.

The Albaicín Neighborhood: A Historic District

The Albaicín, a UNESCO World Heritage Site, is a historic neighborhood perched on a hill opposite the Alhambra. Its narrow, cobblestone streets and whitewashed houses evoke a timeless charm. Once a Moorish quarter, it retains much of its Islamic architectural legacy. The Mirador de San Cristóbal offers stunning views of the Alhambra and the city. As you wander, discover hidden plazas, quaint shops, and authentic flamenco music. The Albaicín is a living museum of Granada’s rich cultural tapestry, blending Moorish and Spanish influences in a captivating setting that invites exploration and reflection. Its unique ambiance makes it a must-visit destination for any traveler.

Cultural Experiences in Granada

Granada offers a vibrant mix of flamenco music, traditional tapas, and lively markets, showcasing its rich cultural diversity and passionate spirit. Immerse yourself in its artistic and culinary heritage.

Flamenco Music and Dance

Flamenco, a soulful expression of Andalusian culture, thrives in Granada. Experience passionate performances in intimate venues, such as caves in the Sacromonte district or traditional tablao bars. The city’s deep-rooted gypsy heritage makes it a hotspot for authentic flamenco. Attend a mesmerizing show to witness the emotional dance, powerful vocals, and intricate guitar melodies. Many tours and guidebooks recommend booking tickets in advance, as these performances are a highlight of Granada’s cultural scene. Let the rhythm and energy of flamenco captivate your senses during your visit.

Traditional Tapas and Local Cuisine

Granada is a paradise for food lovers, offering a rich culinary experience rooted in Andalusian tradition. Indulge in delicious tapas, a staple of local culture, often served free with drinks. Savor classic dishes like tortilla española, gazpacho, and jamón ibérico. Explore the narrow streets to discover authentic tapas bars, where each bite tells a story of regional flavors. Don’t miss local specialties like habas con jamón or espinacas con garbanzos. Pair your meal with a glass of local wine or a refreshing tinto de verano. Granada’s cuisine is a perfect blend of tradition and innovation, making every dining experience unforgettable.

Granada’s Vibrant Markets and Shopping

Granada’s bustling markets and charming shops offer a unique shopping experience. The historic Alcaicería, once a silk market, now features vibrant souvenirs and local crafts. Explore the lively Mercado de San Agustín for fresh produce and regional delicacies. Discover traditional Andalusian products like handmade ceramics, intricate textiles, and aromatic spices. Don’t miss the opportunity to shop for unique jewelry and leather goods. Evening shopping in areas like Calle Navas combines retail therapy with tapas bars, creating a lively atmosphere. Granada’s markets blend tradition and modernity, making them a shopper’s delight.

Day Trips and Excursions

Explore beyond Granada with day trips to the Sierra Nevada Mountains for hiking, the Alpujarra region for traditional villages, and the Costa Tropical for beaches and seafood.

Visiting the Sierra Nevada Mountains

The Sierra Nevada Mountains offer a stunning escape from Granada, with breathtaking landscapes and outdoor activities. Hike through lush forests, enjoy panoramic views, and explore traditional villages. In winter, the Sierra Nevada Ski Resort provides excellent skiing opportunities, while summer invites trekking and horseback riding. Visit the picturesque villages of La Zubia and Monachil to experience local culture and cuisine. The mountains are also home to rare flora and fauna, making them a nature lover’s paradise. Whether you seek adventure or tranquility, the Sierra Nevada Mountains promise an unforgettable experience.

Exploring the Alpujarra Region

Nestled in the foothills of the Sierra Nevada, the Alpujarra region captivates visitors with its charming villages, breathtaking landscapes, and rich cultural heritage. Whitewashed villages like Pampaneira, Bubión, and Capileira perch on steep hillsides, offering stunning views and a glimpse into traditional Andalusian life. Hike the ancient trails, explore terraced farmlands, and discover the region’s unique history. The Alpujarra is also known for its literary connections, as it inspired writers like Gerald Brenan. Enjoy local cuisine, including hearty stews and locally-grown produce, for an authentic experience in this picturesque corner of Granada.

Discovering the Costa Tropical

Costa Tropical, Granada’s coastal gem, offers a serene escape with its pristine beaches, crystal-clear waters, and charming fishing villages. Explore Almuñécar and Salobreña, where Mediterranean charm meets tropical vibes. Enjoy water sports, hiking trails, and breathtaking views of the Sierra Nevada. Savor fresh seafood and local wines, immersing yourself in the region’s laid-back atmosphere. A hidden gem compared to busier Spanish coasts, Costa Tropical promises tranquility and natural beauty, perfect for those seeking relaxation and authentic coastal experiences in southern Spain.

Hidden Gems of Granada

Discover Granada’s lesser-known museums, secret gardens, and local festivals. Explore hidden courtyards and unique cultural experiences that reveal the city’s authentic charm beyond its famous landmarks.

Lesser-Known Museums and Galleries

Granada’s hidden cultural gems include lesser-known museums and galleries that offer unique insights into its artistic and historical heritage. The Archaeological Museum showcases ancient artifacts, while the Fine Arts Museum houses an impressive collection of Spanish art. For a more niche experience, explore indie galleries in the Realejo district, where local artists display contemporary works. These spots provide a refreshing contrast to the city’s more famous attractions, allowing visitors to delve deeper into Granada’s creative soul. Don’t miss the opportunity to discover emerging talents and lesser-known masterpieces in these understated cultural spaces.

Secret Gardens and Courtyards

Granada’s secret gardens and courtyards are hidden gems that reveal the city’s intimate beauty. Tucked away in the Albaicín district, these tranquil spaces offer a serene escape from the bustling streets. The Generalife Gardens, while famous, boast lesser-known sections with lush greenery and fragrant flowers. Private courtyards, adorned with traditional Andalusian tiles and fountains, provide a glimpse into the region’s Moorish heritage. Exploring these spots during spring, when flowers bloom, is a must for a truly enchanting experience. Guided tours often uncover these secret oases, allowing visitors to appreciate Granada’s artistic and natural splendor.

Local Festivals and Events

Granada comes alive with vibrant festivals that showcase its rich cultural heritage. The Flamenco Festival highlights the passionate art of Andalusian music and dance, while the Fiesta del Corpus Christi offers a spectacle of traditional processions and colorful decorations. Summer evenings are magical with outdoor concerts and cultural events at the Alhambra, illuminated under the stars. These gatherings reflect the city’s deep-rooted traditions and its lively spirit, making them unforgettable experiences for visitors seeking authentic local charm and community connection.

Practical Information for Visitors

Plan your itinerary with guidebooks, book tickets in advance for popular sites, and explore transportation options to navigate Granada’s historic streets efficiently.

Best Time to Visit Granada

The best time to visit Granada is from April to June and September to October, when mild temperatures and blooming flowers create ideal sightseeing conditions. Spring offers vibrant gardens, while autumn brings harvest charm. Summer can be hot, but evenings remain pleasant. Winters are cooler but still enjoyable for exploring indoor attractions. Plan ahead by booking tickets for popular sites like the Alhambra in advance, especially during peak seasons. Consider visiting during shoulder seasons for smaller crowds and lower prices, ensuring a more relaxed and memorable experience in this historic city.

Where to Stay in Granada

Granada offers diverse accommodations to suit every traveler’s needs. The historic Albaicín district provides charming stays with breathtaking views of the Alhambra, while Sacromonte is ideal for peaceful retreats. For convenience, the city center offers hotels and hostels near main attractions. Luxury options abound in modern areas like Realejo, with upscale amenities. Budget-friendly guesthouses and B&Bs are plentiful, offering authentic local charm. Booking in advance is highly recommended, especially during peak seasons. Consider stays with balcony views to fully appreciate Granada’s picturesque landscapes and vibrant atmosphere, ensuring a memorable experience in this enchanting city.

Getting Around the City

Granada’s compact size makes it easy to explore on foot or by bike, with many attractions within walking distance. The city boasts an efficient public bus network, including routes like C1 and C2, connecting the center to outer areas. Taxis are readily available and affordable for shorter trips. Bike rentals are another popular option, allowing visitors to navigate cobblestone streets and scenic paths. The Alhambra is accessible via public transport or a short drive; With its well-connected streets and scenic views, Granada is a city where every mode of transport enhances the journey and the overall experience.

Family-Friendly Activities

Granada offers engaging experiences for families, including interactive museums, kid-friendly tours of the Alhambra, and outdoor adventures in the Sierra Nevada, ensuring fun for all ages.

Kid-Friendly Tours of the Alhambra

The Alhambra offers specially designed tours for children, making history and architecture engaging through interactive experiences. Knowledgeable guides craft storytelling and hands-on activities to captivate young minds. These tours are tailored to keep kids entertained while exploring the palaces and gardens. Private guides are highly recommended for a personalized experience, allowing families to move at their own pace. Advanced booking is essential due to high demand. These tours ensure that even the youngest visitors can appreciate the beauty and history of this iconic landmark, creating unforgettable memories for the whole family.

Interactive Museums for Children

Granada’s interactive museums offer engaging experiences for children, blending education with fun. The Science Park Museum features hands-on exhibits that spark curiosity in science and technology, while the Granada Museum of Fine Arts provides family-friendly workshops. These spaces are designed to inspire creativity and learning through interactive displays and activities. Perfect for families, these museums ensure kids have an enjoyable and enriching experience, making them a great addition to any Granada itinerary.

Outdoor Activities in Granada

Granada offers a variety of outdoor activities for all ages. Explore the Sierra Nevada mountains for hiking and trekking, or visit the Generalife Gardens to enjoy nature and architecture. Stroll through the Albaicín neighborhood, with its narrow streets and scenic views. Families can also visit local parks and outdoor spaces, perfect for relaxation and play. These activities provide a refreshing way to experience Granada’s natural beauty and cultural charm.

Book Recommendations for Granada

Discover Granada through Tales of the Alhambra by Washington Irving and South from Granada by Gerald Brenan. Explore guidebooks, historical novels, and stunning photography books capturing the city’s essence.

Guidebooks for Planning Your Trip

For a seamless journey, consider Granada City Travel Guide 2024, offering insights into historic wonders and coastal gems. Granada in 3 Days provides detailed itineraries, dining tips, and money-saving strategies. These guidebooks include practical advice on navigating the city, booking tickets, and exploring hidden gems. They feature comprehensive maps, transportation tips, and highlights of must-visit attractions like the Alhambra. Whether you’re a first-time visitor or a seasoned traveler, these guides ensure a well-planned and memorable trip. Available in stores and online, they are essential companions for discovering Granada’s charm.

Historical Novels Set in Granada

Immerse yourself in Granada’s rich past through novels like Tales of the Alhambra by Washington Irving, which weaves legends and history around the iconic palace. South from Granada by Gerald Brenan offers a vivid portrayal of life in the Alpujarras during the early 20th century. These books provide a deeper understanding of the city’s cultural and historical tapestry, blending fiction with real-life events. Perfect for travelers seeking to connect with Granada’s soul, these novels highlight the city’s enduring allure and its significance in Spanish history. They are ideal companions for exploring the Alhambra and beyond.

Photography Books of Granada

Capture the essence of Granada through stunning photography books that showcase its iconic landmarks and hidden gems. From the intricate architecture of the Alhambra to the vibrant streets of the Albaicín, these books offer a visual journey through the city. Many feature breathtaking shots of the Generalife Gardens and the Sierra Nevada backdrop. Some highlight Granada’s cultural richness, including flamenco performances and bustling markets. These books are perfect for photographers and travelers alike, providing inspiration and a lasting memento of Granada’s timeless beauty. They beautifully encapsulate the city’s unique blend of history, nature, and artistry.

Granada, a city where Moorish legacy meets Spanish charm, captivates with its iconic Alhambra and Generalife. Plan your visit with this guidebook to explore its rich history and vibrant culture.

Final Tips for Making the Most of Your Visit

Plan ahead by booking Alhambra tickets in advance to avoid long waits. Consider a private guide for a deeper historical insight. Visit during spring (April–June) or autumn (September–October) for ideal weather. Explore beyond landmarks—wander through Albaicín and Sacromonte for authentic charm. Don’t miss local tapas and festivals for a taste of Granada’s vibrant culture. Use public transport or walk to navigate the city’s narrow streets. Lastly, capture stunning views from miradores like San Nicolás for unforgettable memories of this captivating city.

PDF

the essays of warren buffett pdf

The Essays of Warren Buffett offer a comprehensive collection of Warren E. Buffett’s writings‚ compiled by Lawrence A. Cunningham. These essays provide insights into corporate governance‚ investment strategies‚ and financial reporting‚ serving as a valuable resource for investors and managers. The PDF version of the book is widely available‚ making Buffett’s timeless wisdom accessible to a global audience.

1.1 Overview of the Book

The Essays of Warren Buffett: Lessons for Corporate America is a curated collection of Warren Buffett’s writings‚ edited by Lawrence A. Cunningham. The book compiles Buffett’s letters to Berkshire Hathaway shareholders‚ offering insights into corporate governance‚ financial reporting‚ and investment strategies. It emphasizes transparency‚ ethical business practices‚ and long-term value creation‚ making it a vital resource for investors‚ managers‚ and students of business. The PDF version is widely accessible‚ ensuring broad dissemination of Buffett’s wisdom.

1.2 Importance of the Essays in Modern Business

The Essays of Warren Buffett hold significant relevance in modern business‚ offering timeless lessons on corporate governance‚ financial transparency‚ and ethical practices. Buffett’s insights guide investors and managers in navigating complex markets‚ emphasizing long-term value creation. The essays’ practical wisdom‚ accessible in PDF format‚ continues to shape business strategies and inspire leaders‚ making them indispensable for understanding sustainable and responsible corporate practices in today’s global economy.

Historical Background and Evolution of the Essays

The Essays of Warren Buffett were first compiled in 1999‚ with subsequent editions updating Buffett’s timeless wisdom. The PDF version ensures accessibility‚ preserving his evolving insights for modern readers.

2.1 The First Edition and Its Impact

The first edition of The Essays of Warren Buffett‚ compiled by Lawrence A. Cunningham‚ was launched in 1996. It became an instant bestseller‚ organizing Buffett’s shareholder letters into a coherent guide on corporate governance‚ investment‚ and finance. The PDF version of this edition remains widely sought after‚ offering timeless lessons and solidifying Buffett’s reputation as a sage of modern business and investing.

2.2 Subsequent Editions and Updates

Subsequent editions of The Essays of Warren Buffett have expanded on the original‚ with the third edition released in 2009 and a fifth edition in 2019. These updates incorporate new insights‚ maintaining relevance in modern finance. The PDF versions of these editions are widely accessible‚ ensuring Buffett’s principles remain a cornerstone for investors and managers seeking timeless wisdom in an evolving business landscape.

Key Themes and Lessons from the Essays

The essays highlight key themes such as corporate governance‚ financial transparency‚ and Buffett’s investment philosophy‚ offering timeless lessons for investors and managers.

3.1 Corporate Governance and Responsibility

Warren Buffett emphasizes strong corporate governance and responsibility‚ advocating for ethical leadership‚ fair disclosure‚ and accountability. His essays stress the importance of aligning management interests with shareholders’ benefits‚ fostering trust and long-term value creation. Buffett’s principles promote transparency and integrity‚ setting a benchmark for responsible business practices.

3.2 Financial Reporting and Transparency

Buffett underscores the importance of clear and accurate financial reporting‚ advocating for transparency to build trust with shareholders. He critiques overly complex disclosures and promotes straightforward communication of financial data‚ ensuring stakeholders understand the true performance of a company. Buffett’s approach to financial reporting emphasizes honesty and clarity‚ reflecting his commitment to ethical business practices.

3.3 Investment Philosophy and Strategy

Buffett’s investment philosophy‚ detailed in the PDF version of his essays‚ emphasizes long-term value investing‚ disciplined decision-making‚ and a focus on quality companies with strong fundamentals. He advocates for a patient approach‚ avoiding speculative trends and prioritizing sustainable growth. His strategy highlights the importance of understanding businesses deeply and aligning investments with enduring principles‚ offering timeless guidance for investors.

The Role of Lawrence A. Cunningham

Lawrence A. Cunningham‚ a professor and corporate governance expert‚ compiled and introduced Buffett’s essays‚ organizing them into a coherent guide that enhances accessibility and understanding of Buffett’s principles.

4.1 Cunningham’s Contribution to the Book

Lawrence A. Cunningham‚ a renowned professor and corporate governance expert‚ played a pivotal role in organizing and introducing Buffett’s essays. His meticulous selection and arrangement transformed Buffett’s letters into a structured‚ accessible guide‚ enhancing readability and comprehension. Cunningham’s insights and commentary provide context‚ making Buffett’s principles more relatable for investors and managers. His work bridges academic rigor with practical wisdom‚ ensuring the essays remain relevant and impactful for modern audiences.

4.2 His Perspective on Buffett’s Ideas

Lawrence A. Cunningham’s perspective on Buffett’s ideas highlights their timeless relevance and practicality. He interprets Buffett’s essays as a roadmap for ethical and successful business practices‚ emphasizing trust‚ transparency‚ and long-term value creation. Cunningham’s admiration for Buffett’s wisdom is evident‚ as he bridges Buffett’s philosophy with modern corporate challenges‚ making it accessible and actionable for both investors and managers.

The Structure and Organization of the Essays

The essays are meticulously organized into key sections‚ covering corporate governance‚ management‚ and investor relations‚ providing a clear and comprehensive guide to Buffett’s principles in the PDF edition.

5.1 The Prologue and Owner-Related Business Principles

The prologue sets the tone by emphasizing Buffett’s belief in aligning company decisions with the interests of owners. It outlines principles such as transparency‚ integrity‚ and long-term value creation‚ which form the foundation of Berkshire Hathaway’s operations. These principles are presented in an accessible manner‚ making the PDF edition a valuable resource for understanding Buffett’s ownership mindset and ethical approach to business.

5.2 Sections on Corporate Governance and Management

The sections on corporate governance and management highlight Buffett’s emphasis on effective board oversight and responsible leadership. He advocates for integrity‚ accountability‚ and aligning management incentives with shareholder interests. These essays‚ available in the PDF version‚ provide practical wisdom on fostering a culture of trust and transparency‚ essential for sustainable corporate success and stakeholder value creation.

The Significance of Berkshire Hathaway Letters

The Berkshire Hathaway letters‚ featured in The Essays of Warren Buffett PDF‚ provide transparent insights into Buffett’s investment strategies and corporate governance‚ educating investors worldwide.

6.1 Insights into Buffett’s Decision-Making Process

The Berkshire Hathaway letters in The Essays of Warren Buffett PDF reveal Buffett’s meticulous approach to investment decisions. His emphasis on long-term value‚ detailed financial analysis‚ and ethical considerations offers a clear framework for understanding his strategic choices. The letters provide a rare glimpse into how Buffett evaluates opportunities‚ manages risks‚ and aligns decisions with Berkshire’s core values‚ making them invaluable for investors seeking to adopt similar methodologies.

6.2 Lessons for Shareholders and Investors

The Berkshire Hathaway letters in The Essays of Warren Buffett PDF provide invaluable lessons for shareholders and investors. Buffett emphasizes transparency‚ trust‚ and long-term value‚ encouraging investors to adopt a patient‚ disciplined approach. His insights on financial reporting and ethical decision-making offer practical guidance‚ helping readers align their strategies with proven principles that foster sustainable success in both investing and business management.

The Essays as a Resource for Investors and Managers

The Essays of Warren Buffett PDF serves as a valuable resource‚ offering practical insights into corporate governance‚ investment strategies‚ and financial reporting‚ aiding investors and managers in applying Buffett’s principles effectively.

7.1 Practical Applications of Buffett’s Strategies

The Essays of Warren Buffett PDF provides actionable insights‚ enabling investors and managers to apply Buffett’s value investing principles‚ such as long-term wealth creation and margin of safety. His strategies emphasize disciplined decision-making‚ ethical practices‚ and transparency‚ offering real-world applications for business growth and sustainable success. These practical lessons are invaluable for adapting Buffett’s timeless wisdom to modern financial challenges and corporate environments.

7.2 Case Studies and Real-World Examples

The Essays of Warren Buffett PDF includes numerous case studies‚ such as Berkshire Hathaway’s investments and strategic decisions‚ offering practical examples of Buffett’s principles in action. These real-world illustrations provide readers with concrete lessons on value creation‚ risk management‚ and ethical leadership‚ demonstrating how Buffett’s strategies have shaped successful business outcomes across various industries and market conditions.

Ethical Considerations in Business

Buffett emphasizes honesty‚ integrity‚ and fairness as foundational to business success‚ advocating for ethical leadership and responsible decision-making in all corporate actions and interactions.

8.1 Buffett’s Views on Honesty and Integrity

Warren Buffett consistently emphasizes the importance of honesty and integrity in business‚ advocating for transparent financial reporting and ethical decision-making. He believes trust‚ built through unwavering integrity‚ is a cornerstone of long-term success. Buffett’s approach to corporate governance and management reflects his commitment to these values‚ ensuring accountability and fairness in all dealings. His philosophy underscores that ethical behavior fosters sustainable growth and credibility.

8.2 The Role of Ethics in Corporate Success

Warren Buffett underscores that ethics are integral to corporate success‚ fostering trust and long-term sustainability. His approach prioritizes honesty‚ fairness‚ and accountability‚ ensuring that ethical practices are embedded in decision-making. Buffett’s philosophy demonstrates that ethical behavior not only builds strong relationships with stakeholders but also enhances a company’s reputation and resilience‚ ultimately driving enduring success in business.

The Impact of the Essays on Corporate America

The Essays of Warren Buffett have profoundly influenced Corporate America by shaping business practices‚ policies‚ and ethical standards. Buffett’s insights have inspired transparency‚ fairness‚ and long-term value creation‚ setting a benchmark for corporate excellence and integrity across industries.

9.1 Influence on Business Practices and Policies

The Essays of Warren Buffett have significantly shaped business practices and policies across Corporate America. Buffett’s emphasis on transparency‚ ethical decision-making‚ and long-term value creation has inspired companies to adopt more accountable governance models. His principles have influenced financial reporting standards‚ encouraging honesty and clarity. This shift has fostered trust among stakeholders and promoted sustainable growth‚ aligning business operations with enduring ethical frameworks.

9.2 Reception and Reviews from the Business Community

The Essays of Warren Buffett have received widespread acclaim from the business community. Renowned for their clarity and wisdom‚ Buffett’s writings are praised as essential reading for investors and managers. Reviewers highlight the practical insights and timeless principles‚ while the PDF version’s accessibility has further broadened its reach. The book is celebrated as a foundational resource for understanding modern corporate governance and investment strategies.

Educational Value of the Essays

The Essays of Warren Buffett are widely used in business education‚ offering clear insights into finance‚ governance‚ and investing. The PDF version enhances accessibility for students and professionals‚ providing a practical learning tool that bridges theory with real-world applications.

10.1 Use in Business and Finance Education

The Essays of Warren Buffett are integral to business and finance education‚ offering practical lessons on corporate governance and investment strategies. The PDF version is widely used in academic curricula‚ providing students with accessible‚ real-world case studies that illustrate Buffett’s principles. This resource bridges theoretical knowledge with practical applications‚ making it invaluable for both students and professionals seeking to understand modern business practices.

10.2 Key Takeaways for Students and Professionals

The Essays of Warren Buffett provide timeless insights into value investing‚ corporate governance‚ and ethical business practices. Students gain foundational knowledge‚ while professionals find actionable strategies. The PDF format ensures easy access‚ making Buffett’s wisdom a must-read for anyone aiming to enhance their understanding of finance and leadership‚ offering both theoretical depth and practical guidance for real-world applications.

The Essays in the Digital Age

The Essays of Warren Buffett are widely available in PDF format‚ ensuring easy access for modern readers. Digital versions enhance readability and convenience‚ making Buffett’s wisdom accessible to a global audience.

11.1 Availability of the PDF Version

The Essays of Warren Buffett: Lessons for Corporate America is accessible in PDF format‚ offering a convenient way to explore Buffett’s insights. This digital version ensures that readers worldwide can easily download and reference the book‚ making its timeless lessons on investing and corporate governance readily available at any time. Its widespread availability has enhanced its reach and impact globally.

11.2 Online Resources and Summaries

Online platforms offer extensive resources and summaries of The Essays of Warren Buffett‚ providing readers with easy access to key takeaways and analysis. Websites like the Internet Archive and Scribd host PDF versions and detailed summaries‚ enabling quick reference and deeper understanding of Buffett’s investment philosophy and corporate governance principles. These resources are invaluable for both casual readers and serious scholars.

Comparisons with Other Works by Buffett

The Essays of Warren Buffett stands out as a uniquely organized and comprehensive collection of Buffett’s writings‚ offering insights into his investment philosophy and corporate governance principles.

12.1 Similarities and Differences with Other Books

The Essays of Warren Buffett shares similarities with other Buffett books in its focus on value investing and corporate governance. However‚ it differs by providing a structured‚ thematic approach‚ making it a unique resource. Unlike other works‚ this compilation emphasizes transparency and ethical business practices‚ offering a distinct perspective on Buffett’s philosophy. The PDF version enhances accessibility‚ ensuring wide dissemination of these principles.

12.2 Buffett’s Consistent Message Across Publications

Warren Buffett’s writings consistently emphasize value investing‚ long-term thinking‚ and ethical business practices. Across his works‚ including the Essays‚ Buffett underscores the importance of corporate governance‚ transparency‚ and shareholder alignment. His philosophy remains coherent‚ advocating for disciplined investment strategies and integrity. The PDF version of the Essays reinforces these timeless principles‚ offering a clear and accessible guide to his enduring wisdom for investors and managers alike.

The Essays and Modern Investment Strategies

The Essays of Warren Buffett remain highly relevant‚ offering timeless principles for modern investing. Buffett’s value investing philosophy‚ long-term focus‚ and adaptability continue to guide investors in today’s dynamic markets.

13.1 Relevance in Today’s Financial Markets

The Essays of Warren Buffett remain a vital resource for modern investors‚ offering timeless principles on value investing‚ long-term focus‚ and disciplined decision-making. Buffett’s insights‚ now easily accessible in PDF format‚ continue to guide investors through today’s volatile markets‚ emphasizing the importance of adaptability and ethical practices in achieving sustainable success. His wisdom is as relevant now as ever‚ shaping strategies for both individual and institutional investors.

13.2 Adaptation of Buffett’s Principles to New Challenges

Warren Buffett’s principles‚ as detailed in his essays‚ remain highly relevant in today’s dynamic financial markets. His emphasis on long-term investing‚ margin of safety‚ and ethical business practices continues to guide investors through modern challenges. The PDF version of his essays provides accessible insights‚ helping adapt these timeless strategies to contemporary issues like technological advancements and global economic shifts.

The Role of the Essays in Business Ethics

The essays underscore Warren Buffett’s commitment to ethical business practices‚ emphasizing honesty‚ integrity‚ and transparency. These principles guide corporations toward trust and long-term success‚ aligning with Buffett’s values.

14.1 Promoting Transparency and Fairness

Warren Buffett’s essays advocate for transparency in corporate dealings‚ emphasizing the importance of clear and honest communication. He believes in providing detailed disclosures to shareholders‚ fostering trust and accountability. Buffett’s approach aligns with ethical standards‚ ensuring fairness in business operations and decision-making. This commitment to openness strengthens the relationship between companies and their stakeholders‚ promoting a culture of integrity and mutual respect.

14.2 Case Studies of Ethical Decision-Making

Buffett’s essays include real-world examples of ethical dilemmas‚ offering insights into how companies can navigate complex situations while maintaining integrity. He highlights cases where honesty and fairness prevailed‚ such as during the Salomon Brothers scandal‚ showcasing his commitment to ethical leadership. These case studies serve as practical lessons‚ demonstrating how ethical decision-making fosters long-term success and stakeholder trust in corporate governance.

The Essays as a Historical Document

The Essays of Warren Buffett: Lessons for Corporate America chronicle decades of economic trends and corporate evolution‚ providing historical context to Buffett’s timeless insights and principles.

15.1 Reflection of Economic Trends Over Decades

The Essays of Warren Buffett PDF captures the evolution of economic landscapes‚ offering a chronological perspective on market shifts‚ corporate governance‚ and investment strategies. Buffett’s writings span decades‚ reflecting changes in financial markets‚ regulatory environments‚ and business practices‚ providing a historical roadmap for understanding modern economic challenges and opportunities.

15.2 Historical Context of Buffett’s Writings

The Essays of Warren Buffett PDF provides a historical context spanning decades‚ reflecting Buffett’s observations on economic cycles‚ corporate practices‚ and investment trends. His writings‚ compiled by Lawrence Cunningham‚ offer insights into how Buffett navigated various financial crises and market shifts‚ establishing his reputation as a sage investor and corporate leader.

The Essays of Warren Buffett PDF leaves a lasting legacy‚ offering timeless wisdom on investing‚ governance‚ and ethics. Readers are encouraged to embrace these insights for sustainable success.

16.1 The Enduring Legacy of the Essays

The Essays of Warren Buffett PDF has cemented its place as a foundational resource for investors and managers globally. Compiled by Lawrence A. Cunningham‚ it encapsulates Buffett’s timeless principles of value investing‚ corporate governance‚ and ethical business practices. The essays’ relevance in today’s financial landscape underscores Buffett’s enduring impact on modern business and investment strategies‚ making it an indispensable guide for future generations of leaders and financiers alike.

16.2 Final Recommendations for Readers

Readers are encouraged to approach The Essays of Warren Buffett as a timeless guide for investing and leadership. The PDF version offers convenient access to Buffett’s wisdom‚ making it a must-read for both seasoned professionals and aspiring investors. Embrace the principles of value investing‚ ethical decision-making‚ and long-term thinking to apply these lessons in real-world scenarios and achieve sustainable success in business and finance.